
How to Make A Custom Painting in Minecraft?
Published on: February 16, 2025 | Last Updated: January 7, 2025
Written By: Isabella Cruz
A custom painting is like a special picture you create in Minecraft. It’s a bit like finger painting, but on your screen with blocks!
How to make a custom painting in Minecraft is super important if you wanna show off your art skills. I’ve made some wild designs that really made my game world pop, and I promise, it’s so much fun!
In this guide, you’ll learn essential tools, step-by-step instructions, color palettes, different types of paintings, and common problems when creating custom paintings in Minecraft. Let’s unleash your creativity!

- ✓
- ✓
- ✓

- ✓
- ✓
- ✓
Contents
- 1 How to Make a Custom Painting in Minecraft?
- 2 A custom painting is unique artwork created to meet specific requests.
- 3 Essential Tools and Resources Before You Start
- 4 Step-by-step Guide to Creating Custom Paintings
- 5 Recommended Color Palette for Minecraft Paintings
- 6 Different Types Of Custom Paintings in Minecraft
- 7 Exploring Different Formats for Custom Paintings
- 8 Using Mods to Enhance Custom Paintings
- 9 Factors Affecting the Quality Of Your Custom Paintings
- 10 Common Issues When Creating Custom Paintings in Minecraft
- 11 Finishing Touches for Your Custom Painting
- 12 How to Use Your Custom Paintings in Minecraft
- 13 Frequently Asked Questions About Making Custom Paintings in Minecraft
- 14 Conclusion
- 15 Additional Resources
How to Make a Custom Painting in Minecraft?
To create a custom painting, first, find an image online. Use a converter to change it to the required Minecraft format, then upload it to your server. Finally, place the painting using the .png file. If you’re wondering about applying additional finishes to your artwork, you might want to explore polyurethane coating techniques. Voilà, your custom art is ready!
A custom painting is unique artwork created to meet specific requests.
Unlike mass-produced art, custom paintings offer individuality, originating directly from an artist’s hand and vision. If you’re curious about the techniques artists use to prepare and finish their work, you might want to explore painting on aluminium surfaces.
To add a personal touch to games, many turn to Minecraft’s custom painting feature. I remember experimenting with it on my last gaming night; the thrill of bringing my designs to life added a fun twist! If you’re looking to elevate your painting skills beyond the digital realm, painting materials and techniques can offer similar creative satisfaction.
I used it myself for work when I needed a visual that resonated with my clients. Custom paintings in Minecraft let you express creativity effortlessly; the process of making a custom painting opens a world of possibilities for unique designs. Plus, it’s a blast to see your ideas reflected in-game! If you’re curious about potential risks with painted materials, check out burning painted wood safely.
Essential Tools and Resources Before You Start
What do you need to create a custom painting in Minecraft?
- Graphics Software: A program like Adobe Photoshop or GIMP. You’ll need this to design your custom artwork before uploading it.
- File Format Converter: Use a converter like IrfanView. It’s essential for changing images to the PNG format.
- Minecraft Resource Pack: Get a pack like the Default Resource Pack. You’ll modify this to replace existing paintings with your custom work.
- Template Reference: A chart of existing Minecraft paintings. This helps you understand the dimensions and styles that work best.
We have now covered essential tools and resources needed for your project. Next, we will explore a step-by-step guide for creating custom paintings.

Also See: Can You Bake Salt Dough After Painting? Yes, You Can!

Step-by-step Guide to Creating Custom Paintings
Follow these steps to create custom paintings in Minecraft.
-
Choose Your Design
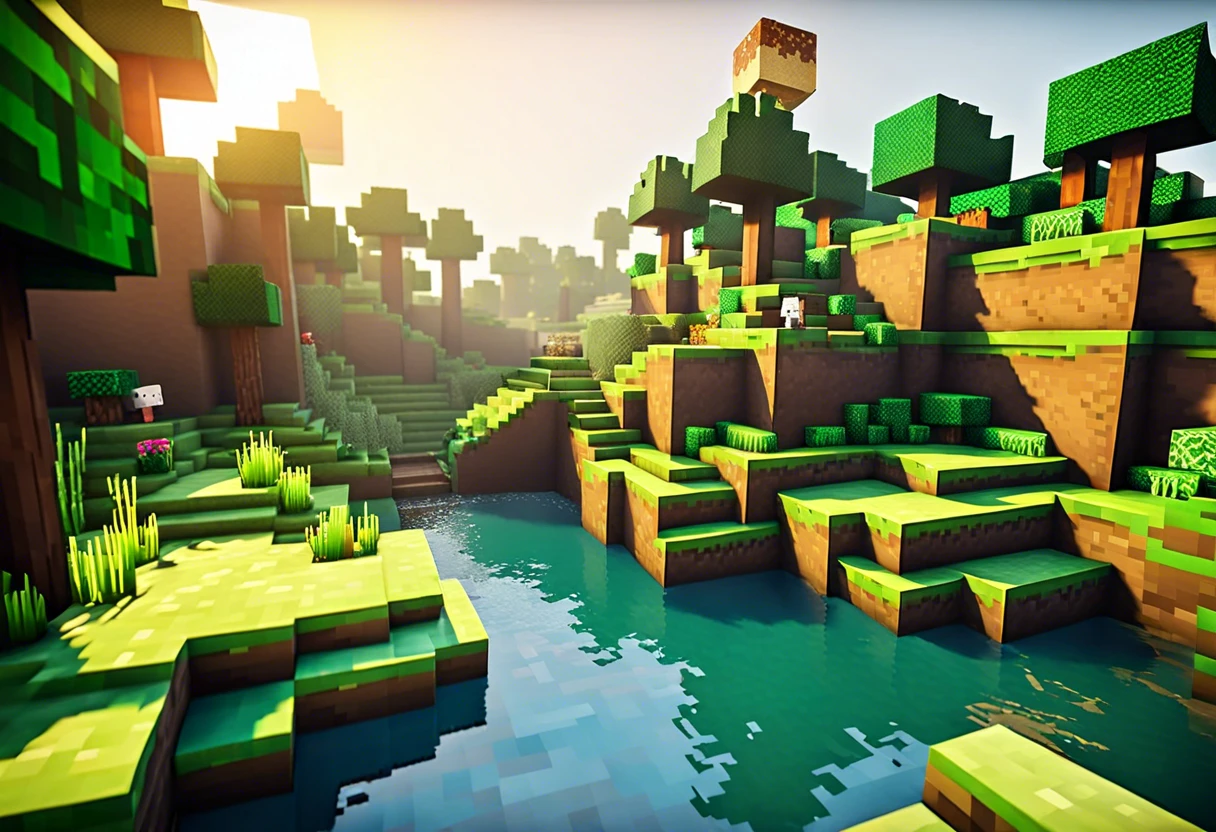
Select a design that excites you, whether it’s a landscape or an abstract sketch. The ideal dimensions for Minecraft paintings are 256×256 pixels to ensure the best quality.
Feel free to find inspiration from online platforms or create something original using digital art tools like Photoshop. Make sure your choice stands out in your Minecraft world!
-
Convert Your Image to Minecraft Format
Use a graphic editing program to convert your image into a Minecraft painting format. Save it as a PNG file, ensuring it meets Minecraft’s specific pixel dimensions.
You can also try online converters that change images to the required format. Keeping the file size under 1 MB (1,024 KB) helps everything run smoothly in the game.
-
Upload Your Custom Painting
Transfer your PNG file to the Minecraft resource pack folder. Navigate to
%appdata%/.minecraft/resourcepacksto upload the file.Make sure you use the correct directory path so your custom painting appears in the game. Once done, you can see your image in-game by breaking and placing a painting after loading your resource pack!
We have now covered a step-by-step guide for creating custom paintings. Up next is a recommended color palette for Minecraft art.
Recommended Color Palette for Minecraft Paintings
I recommend a “Forest Adventure” theme that captures the vibrant yet calming hues of nature, perfect for enhancing your custom artworks.
| Color Box | Hex Code | Color Name |
|---|---|---|
| #4CAF50 | Forest Green | |
| #8BC34A | Lime Green | |
| #F9EBB2 | Pale Yellow | |
| #795548 | Brown | |
| #3F51B5 | Indigo |
That covers the suggested color scheme for Minecraft paintings. Let’s now take a look at various styles of custom paintings.
Different Types Of Custom Paintings in Minecraft
Let’s move on to the types. We’ll cover pixel art, banners, portraits, and murals.
-
Pixel Art
Pixel art is a classic choice for custom paintings. You create small blocks (16×16 Pixels) on the grid to form a unique image.
-
Banners
Banners let you create customized designs using patterns. You can use wool, dye, and a crafting table for stunning 1×1 tiles.
-
Portraits
Portraits are ideal for creating images of characters or players. Use the 3×2 canvas for a clear representation that blends your art style.
-
Murals
Murals provide space to work large with many blocks. They can cover walls, with sizes up to 40 blocks wide for impressive artworks.
As someone who’s been in the field for a while, I really love pixel art. It gives a nostalgic vibe and captures the essence of video game culture that I adore.
We have now covered various kinds of custom paintings in Minecraft. The next section will explore different formats for these paintings.
Exploring Different Formats for Custom Paintings
Ever thought about how to present your art? There are various formats to consider when creating custom paintings in Minecraft.
| Format Type | Ideal Size (Pixels) | Usage | Tips for Success |
|---|---|---|---|
| Square Format | 256×256 | Best for detailed landscapes or abstract designs | Zoom in to see detail; avoid too many colors for clarity |
| Portrait Format | 128×256 | Great for character portraits | Focus on facial features; keep background simple |
| Wide Format | 256×128 | Perfect for panoramic scenes | Use gradient colors for depth; plan your layout |
| Custom Aspect Ratios | Varies | Allows unique designs or brand logos | Keep crucial details within the central area |
Using Mods to Enhance Custom Paintings
Want to take your custom paintings to the next level? Mods can seriously enrich the experience!
-
Custom Paintings Mod
This mod allows for larger images, beyond traditional dimensions, letting you showcase big, beautiful art pieces!
-
Optifine
Enhance graphics quality and detail, resulting in sharper, more vibrant paintings.
-
Resource Packs
Use packs that enhance the appearance of paintings, adjusting the lighting and texture for a unique touch.
Factors Affecting the Quality Of Your Custom Paintings
What factors influence creating your unique artwork in Minecraft?
-
Design Complexity: The more intricate your design, the more time and resources it requires.
-
Creative Tools: Using special mods can expand your palette and improve your custom paintings.
-
Texture Packs: Different texture packs change how your painting appears; choose wisely for the best results.
-
Block Size: Custom paintings come in various sizes, and larger ones attract more attention.
Common Issues When Creating Custom Paintings in Minecraft
When my friend tried to make a custom painting in Minecraft, he couldn’t get the image size right. His 128×128 pixel artwork turned into a blurry mess!
To fix this, ensure the image resolution is 64×64 pixels or lower. Use PNG format for crisp quality. Check the dimensions carefully before importing!
Finishing Touches for Your Custom Painting
After crafting your masterpiece in-game, apply a sealant like Mod Podge. Let it dry for at least 2 hours (120 Minutes) to ensure durability.

Inspect transitions for color matching. Use a Minecraft color picker to evaluate every pixel, ensuring no hue mismatch remains in 1, 4, or 16-pixel squares.
From one expert to another, create texture by layering pigments. Use at least 3 distinct shades every 8×8 blocks for richer visual depth in your custom painting.
How to Use Your Custom Paintings in Minecraft
Once your custom painting is ready, you’ll want to display it beautifully. Here’s how to effectively use those creations.
-
Placement Strategy
Finding the right spot for your painting is key. Consider walls that are at least 2 blocks high for better visibility!
-
Combining with Other Decor
Mixing your paintings with furniture or lighting enhances the overall look. Think about using glowstone or torches nearby to highlight your art.
-
Creating Galleries
Why not build a gallery? A simple room can host multiple custom paintings, giving you a space to showcase your creative journey!
Frequently Asked Questions About Making Custom Paintings in Minecraft
What Are the Dimensions for Custom Paintings in Minecraft?
Custom paintings in Minecraft typically have dimensions of 1×1, 2×1, 1×2, or even 4×4 blocks. This flexibility allows you to create diverse designs ranging from simple icons to complex artwork covering large areas.
Can I Use Any Image As a Custom Painting in Minecraft?
No, you can’t use any image as a custom painting in Minecraft. The image must be in a specific format like PNG and optimized to a size of 128×128 pixels or smaller for the game to recognize it. If you’re struggling with image quality or want to perfect your custom painting technique, you can remove paint imperfections effectively.
What Tools Do I Need to Create Custom Paintings in Minecraft?
You need an image editing software to create custom paintings in Minecraft. Free tools like GIMP or Photoshop work well for resizing and editing your images to meet Minecraft’s requirements.
Are There Any Restrictions on the Content Of Custom Paintings?
Yes, there are content restrictions for custom paintings in Minecraft. Images should not include any explicit content, hate symbols, or copyrighted material. This maintains a safe and fun community experience.
How Do I Troubleshoot Issues With My Custom Painting Not Showing Up?
If your custom painting isn’t showing up, double-check the image format and size. Ensure it’s a PNG file and does not exceed 128×128 pixels. Most issues arise because of incorrect image settings, so fixing these often resolves the problems. When persistent paint display problems occur, you might want to explore troubleshooting paint rendering issues.
Can I Combine Multiple Images Into One Custom Painting?
Yes, you can combine multiple images into one custom painting as long as the final image meets the size requirements. A composite artwork can reflect your unique style while staying within the game’s limitations. If you want to enhance your image editing skills, check out these advanced lasso tool techniques.
Do Custom Paintings Affect Game Performance in Minecraft?
No, custom paintings do not significantly affect game performance in Minecraft. While they do add details, the impact on FPS (Frames Per Second) is negligible, especially if the images are well-optimized.
How Can I Share My Custom Paintings With Other Players?
You can share your custom paintings by exporting the PNG files and sending them to friend through various platforms. Alternatively, you can post them online, allowing others to download and use them in their own games. If you’re looking to enhance your digital artwork, painting techniques can transform your creative process.
Conclusion
You made it to the end. We covered what a custom painting is, essential tools and resources, step-by-step guidance, color palettes, types of custom paintings, quality factors, common issues, finishing touches, and some creative DIY project ideas.
Hopefully, I was able to impart some of my experience on how to make a custom painting in Minecraft. It’s all about gathering your materials, following the steps we’ve discussed, and letting your creativity flow to create something unique.
For further insights and related content, visit our homepage at Paint Answers, where you’ll find a wealth of expert articles and helpful advice.
Additional Resources
- Smith, R. (2003). The Artist’s Handbook of Materials and Techniques (5th ed.). New York, NY: Knopf.
- How to Make a Custom Painting in Minecraft | Beebom
- How to make custom paintings in Minecraft
- Minecraft Painting Creator
Isabella is a Filipino-American art writer and critic specializing in contemporary painting, blending her Filipino heritage with global art trends. She holds a BFA from California State University, Long Beach, and a Minor in Art History from the University of the Philippines. Isa has experience as a Gallery Assistant, Art Appraisal Specialist, and Social Media Creative for Art & Design.
Aluminium, Material


