
How to Seal A Painted Plate?
Published on: March 22, 2026 | Last Updated: January 29, 2026
Written By: Alisha Winters
A painted plate is a dish that you decorate with colors and designs. It’s like a canvas, but for food—a fun way to show off your art!
Knowing how to seal a painted plate is super important. I’ve had my share of painted plates chip and fade—what a bummer! Sealing helps keep your artwork safe and looking fresh for years.
In this guide, you’ll learn what a painted plate is, tips to prepare for sealing, detailed steps to seal a painted plate, suitable colors, types of sealants, factors influencing sealing, common sealing issues, finishing touches, and fun DIY project ideas. Let’s dive in and explore how to seal a painted plate!
Contents
- 1 How to Seal a Painted Plate?
- 2 What is a Painted Plate?
- 3 Before You Start Sealing Your Painted Plate
- 4 Steps to Seal a Painted Plate
- 5 Advantages of Sealing Your Painted Plates
- 6 Testing the Sealant’s Durability
- 7 Quick Tips for Future Projects
- 8 Types Of Sealants for Painted Plates
- 9 Best Practices for Sealing Painted Plates
- 10 Comparing Sealant Options
- 11 Factors Affecting the Sealing Process
- 12 Common Issues When Sealing a Painted Plate
- 13 Finishing Touches for Your Sealed Painted Plate
- 14 Frequently Asked Questions About Sealing Painted Plates
- 15 Conclusion
- 16 Useful Resources
How to Seal a Painted Plate?
To seal a painted plate, use a clear acrylic spray or a food-safe varnish. Hold the spray 12 inches (30 Cm) away and apply thin coats. Let it dry completely between layers. For durability, seal it with multiple coats. If you’re looking to explore alternative painting techniques for ceramic painting methods, consider different approaches to enhance your project.
What is a Painted Plate?
A painted plate is a decorative ceramic dish with hand-painted designs. It typically has a bisque ceramic surface, ready to accept colors, usually made from non-toxic, high-quality acrylic paints. If you’re exploring alternative painting materials and techniques.
When sealing a painted plate, it’s crucial to protect your artwork. From my experience, using a food-safe sealant ensures your hand-painted designs last over time.
I remember creating my first painted plate; it was a rewarding experience! Learning to seal a painted plate gave me confidence, knowing my designs would shine and stay fresh for years on dining tables or as wall art. If you’re looking to expand your painting skills, painting ceramic pots offers another creative outlet.
Before You Start Sealing Your Painted Plate
What do you need to seal your painted plate?
- High-Quality Clear Acrylic Sealer: Use a product like Minwax Polycrylic Clear Gloss. It’s essential for protecting your design from wear and tear.
- Soft Paintbrush: Choose a brush like Princeton Velvetouch for a smooth application. This prevents disturbing the paint underneath.
- Spray Adhesive (Optional): Consider 3M Super 77 for extra grip before sealing. It keeps the paint intact during the process.
- Rubbing Alcohol: You’ll need it to clean the surface. This prepares the plate and ensures the sealer adheres well.
We have now covered the preparation needed for sealing a painted plate. Next, we will discuss the sealing process itself.
Also See: Can You Paint Glass With Acrylic Paint? Quick Tips!
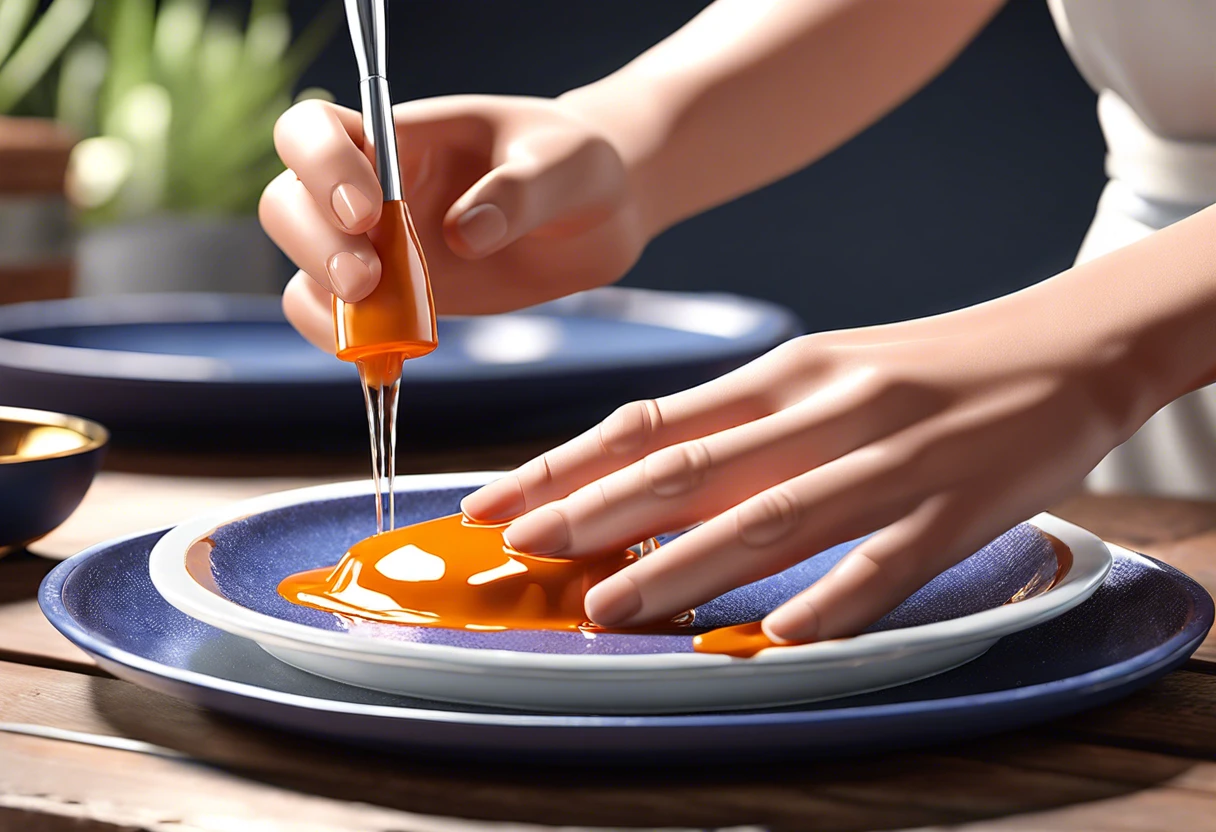
Steps to Seal a Painted Plate
Follow these steps to seal painted plates for durability and longevity.
-
Prepare the Painted Surface
Ensure the paint is completely dry. Typically, wait at least 24 hours after painting to allow moisture to evaporate, ensuring the sealant adheres well.
If you’ve painted intricate designs, check for rough spots. A smooth surface promotes a better seal.
-
Choose the Right Sealant
Select a sealant based on your intended use. Options include polyurethane spray (Dries in About 15 Minutes) or food-safe epoxy, especially if you’ll use the plate for serving.
If you’re decorating for the kitchen, a food-safe sealant is essential. I once used regular sealant on a food plate, and it peeled—don’t make that mistake!
-
Application Of Sealant
Apply your chosen sealant in light, even coats. Generally, two to three coats work best for durability.
Hold the spray can about 30 cm (12 Inches) from the surface to avoid drips. Over-application can be messy, which I’ve learned from experience!
-
Drying and Curing Time
Allow each coat to dry according to product instructions—typically about 1-2 hours. Then, let the entire plate cure for at least 72 hours before use to ensure it’s fully hardened.
If humidity is high, monitor the curing time, as it may take longer to set. In drier conditions, the process might speed up.
We’ve wrapped up the steps for sealing a painted plate here. Let us turn our attention to the benefits of sealing.
Advantages of Sealing Your Painted Plates
Sealing your painted plates comes with several perks. Let’s explore why sealing is worth the time and effort.
- Protection from Chips: A good sealant safeguards your artwork against chips and scratches that can ruin the design.
- Vibrant Colors: Sealing keeps your colors looking fresh and bright, preventing fading over time.
- Easy Cleaning: Sealed plates are easier to wipe clean. You won’t have to scrub as hard to get rid of stains.
- Food Safety: Using food-safe sealants ensures that your plates are safe for serving food. This is essential for active lifestyles!
You should now have a good understanding of the benefits of sealing your painted plates. In the next part, we’ll discuss testing the sealant’s durability.
Testing the Sealant’s Durability
Want to check if your sealant works? Here’s how to put it to the test!
- Water Test: Gently splash some water on the sealed surface. If it beads up, you’re good to go!
- Scratch Test: Use your fingernail to lightly scratch a corner of the plate. A durable seal should resist scratches and show no damage.
- Food Test: Place some food on the plate for a few hours. Check to see if any oils or colors seep into the sealant.
We covered evaluating the sealant’s durability, application methods, and performance testing here. We will now cover helpful tips for future projects.
Quick Tips for Future Projects
Thinking about your next painted plate project? Here are some useful tips!
- Test in Small Areas: Always test your sealant on a small, hidden area first to ensure compatibility.
- Temperature Matters: Keep your workspace at room temperature for best results, ideally between 15°C to 25°C (59°F to 77°F).
- Less is More: When in doubt, use less sealant. It’s easier to add more coats than to fix drips or runs!
Types Of Sealants for Painted Plates
Let’s discuss the different types of sealants used on painted plates: spray sealants, paint-on sealants, epoxy finishes, and dishwasher-safe sealants.
-
Spray Sealants
Spray sealants offer easy application and provide even coverage. They’re great for protecting your plates from scratches and UV light, typically curing within 24 hours.
-
Paint-on Sealants
Paint-on sealants come in various finishes, like matte and glossy. They’re often water-based and ensure a strong bond with the painted surface, with a recommended curing time of up to 8 hours.
-
Epoxy Finishes
Epoxy finishes create a durable, glossy layer on your plates. They resist heat and water but require precise mixing; a 1:1 ratio is essential for the best results.
-
Dishwasher-safe Sealants
These sealants ensure your plates can withstand a cycle in the dishwasher without losing their charm. Look for brands that specifically advertise ‘dishwasher-safe’ for peace of mind.
Here’s a tip I’ve picked up: I prefer paint-on sealants for their versatility and easier touch-up options. You can achieve the exact finish you want while protecting your artwork.
Best Practices for Sealing Painted Plates
Let’s dive into some best practices that ensure a flawless seal on your painted plates.
-
Multiple Thin Coats
Always apply multiple thin coats instead of one thick one. Typically, 2-3 coats protect better and reduce drips.
-
Catch the Light
Sealing in natural light can help highlight imperfections. This way, you can see spots that need attention before sealing.
-
Layer Application Timing
Wait until the previous layer is fully dry—usually 1-2 hours—before applying the next. This prevents bubbling and keeps the finish smooth.
-
Final Curing Time
After your last coat, let the plate cure for at least 72 hours. This time allows the sealant to reach its full strength.
Comparing Sealant Options
Considering different sealant types for your painted plate? Here’s a comparison table.
| Sealant Type | Application Method | Drying Time (Hours) | Durability | Food Safe? |
|---|---|---|---|---|
| Clear Acrylic Spray | Spray | 1-2 | High | Yes |
| Paint-On Varnish | Brush | 2-4 | Moderate | Yes |
| Epoxy Resin | Mix & Pour | 8-12 | Very High | Yes |
| Dishwasher-Safe Sealant | Brush or Spray | 1-3 | High | Yes |
Factors Affecting the Sealing Process
What factors will change how you seal your beautiful painted plate?
-
Type of Paint: Water-based or oil-based paint affects sealing durability.
-
Drying Time: Proper drying between layers prevents lifting; wait at least 24 hours.
-
Sealing Method: Choosing spray sealant or brush-on affects ease and design impact.
-
Temperature and Humidity: Extreme conditions can compromise seal effectiveness; aim for room temperature.
Common Issues When Sealing a Painted Plate
My friend once used the wrong sealant on her painted plate. The finish was sticky and messy. Not cool, right?
To fix this, use a food-safe sealant like Mod Podge or a clear acrylic spray. Apply three light coats, letting each dry for 15–20 minutes in between. This keeps your design safe and sleek!

Finishing Touches for Your Sealed Painted Plate
After you’ve sealed the plate, let it cure for at least 72 hours (3 Days) in a cool, dry place. Avoid direct sunlight, which can damage the finish.
Inspect the edges and corners for any peeling or lifting paint. Use a soft cloth to wipe any smudges and tighten the seal with products like Mod Podge.
If it’s not your first time with painted plates, consider applying a second coat within 1–2 hours for added durability. This ensures the protection lasts for years.
Frequently Asked Questions About Sealing Painted Plates
What Type Of Sealant is Best for a Painted Plate?
For sealing a painted plate, an acrylic-based sealant is your best choice. Acrylic sealants offer great durability, flexibility, and a clear finish, making them ideal for painted surfaces on plates.
Can I Put My Sealed Painted Plate in the Dishwasher?
No, you shouldn’t put your sealed painted plate in the dishwasher. High temperatures and harsh detergents can damage both the paint and the sealant over time.
How Long Does It Take for the Sealant to Dry?
The sealant for a painted plate generally takes 24 hours to dry completely. Depending on humidity and temperature, drying can vary—just make sure it’s in a well-ventilated area.
What Should I Do if the Sealant Peels Off?
If the sealant peels off your painted plate, you need to remove any remaining sealant gently and reapply. A light sanding followed by a fresh coat can restore that protective layer.
Can I Use Regular Paint on Plates, and Will It Need Sealing?
Yes, you can use regular paint on plates, but it’ll definitely need sealing. Most paints don’t work well with food safe requirements, and a sealant protects the paint from wear and tear.
Can I Decorate My Painted Plate With Markers?
Yes, you can use permanent markers to decorate your painted plate. However, be cautious; once you apply a sealant, some markers might bleed or smudge.
How Do I Prevent My Sealant From Yellowing?
To prevent your sealant from yellowing, choose a UV-resistant sealant. UV protectants break down sunlight’s harmful rays, preventing color fade and sealant deterioration.
What is the Difference Between Gloss and Matte Sealants?
The difference lies in the finish. Gloss sealants give a shiny touch while matte sealants offer a non-reflective surface. Your choice affects aesthetics and ultimately the durability of your painted plate. If you’re looking to add some sparkle, you might want to enhance your paint with glitter.
Also See: Can You Paint Your Dog’s Nails? Keep It Safe and Fun!
Conclusion
We covered the basics of sealing a painted plate, including essential steps, types of sealants, recommended color palettes, factors that affect sealing, common issues, and DIY project ideas.
To seal a painted plate, choose the right sealant and follow the outlined steps, ensuring your design shines and lasts. If you need further assistance with sealing painted plates or related projects, feel free to reach out.
For additional insights and resources, visit Paint Answers.
Useful Resources
- Smith, R. (2003). The Artist’s Handbook of Materials and Techniques (5th ed.). New York, NY: Knopf.
Experienced interior designer with 15+ years in transforming spaces, blending artistry with expertise in color and design. Rhode Island School of Design graduate, specializing in restorations and modern makeovers.
Ceramic, Material


