
Can You Sand Paint?
Published on: February 5, 2026 | Last Updated: October 1, 2025
Written By: paint_answered
Sanding is when you touch rough surfaces with a tool to make them smooth. It’s like petting a cat to make its fur shiny and soft!
When you wonder, can you sand paint, it’s crucial to know the why behind it. In my experience, sanding helps create a smooth finish and can turn a sloppy job into something beautiful.
In this guide, you’ll explore essential paint sanding techniques, steps to sand paint effectively, types of paint that can be sanded, factors affecting the sanding process, and expert tips for the pros. You’ll also discover common issues and DIY project ideas involving sanded paint, plus a few FAQs to wrap it all up.
Contents
- 1 Can You Sand Paint?
- 2 What is Sanding?
- 3 Before You Start Sanding Paint
- 4 Why Sanding Paint is Essential for Refinishing
- 5 Timeframe for Sanding Between Coats
- 6 Understanding Sandpaper Grids
- 7 Steps to Sand Paint Effectively
- 8 Understanding the Best Techniques for Sanding Paint
- 9 Different Sanding Methods for Various Paint Types
- 10 Types Of Paint That Can Be Sanded
- 11 Factors Affecting the Sanding Process
- 12 Common Issues When Sanding Paint
- 13 Finishing Touches After Sanding
- 14 Expert Tips for the Pros
- 15 DIY Project Ideas Involving Sanded Paint
- 16 Frequently Asked Questions About Sanding Paint
- 17 Conclusion
- 18 Useful Resources
Can You Sand Paint?
Yes, you can sand paint, especially if it’s uneven or too thick. Use fine-grit sandpaper 💰 Save on Assorted Grit Sandpaper → , around 220-grit (0.1 Mm), for the best results. Be gentle to avoid removing too much paint. Wet sanding can also reduce dust and smooth the surface. If you’re working with metal surfaces, you might want to explore specific painting techniques for metal.
What is Sanding?
Sanding is the process of smoothing surfaces using abrasives attached to a backing material. The abrasives range from 40 (Coarse) to 3000 (Very Fine) grit and help create a finer finish or prepare surfaces for coating.
You might wonder about sanding paint during a project. I once sanded a paint layer to achieve a smoother texture for a DIY furniture piece.
.My friends have shared how well it worked for their projects, especially regarding sanding paint. One friend wet-sanded his single-stage paint job and praised the improved shine. He used 1500 grit for a perfect finish, showing me that patience—and the right grit—can lead to beautiful results.
Before You Start Sanding Paint
What do you need to get started?
- Safety Goggles 🔥 Deal: Anti-Fog Safety Goggles → : Wear protection like 3M Safety Goggles to prevent dust from getting into your eyes.
- Respirator Mask: Use a mask like the 3M 6200 to protect your lungs from harmful particles.
- Sanding Block: Use a sanding block such as the Rubbermaid 52307 for smooth control and even pressure.
- Sandpaper: Get 320-grit (0.08 Mm) sandpaper, ideal for smoothing paint surfaces without damage.
- Drop Cloth: Use a drop cloth like the 3M Heavy-Duty option to protect your area and prevent mess.
So far we covered how to prepare for sanding paint. Let’s look at why sanding paint is crucial for refinishing.
Also See: Can You Use Dawn to Wash Walls Before Painting? Yes!
Why Sanding Paint is Essential for Refinishing
Sanding paint isn’t just about smooth finishes; it can boost the durability and appearance of your painted surface.
Benefits of Sanding Paint
- Smooth Surface: Sanding removes imperfections, giving your project a polished look.
- Better Adhesion: It creates a textured surface that helps new paint stick better.
- Old Paint Removal: Sanding can effectively strip layers of old, flaking paint, prep for a fresh start.
- Enhanced Finish: A sanded surface looks professional, like something you’d see in a store.
That covers the importance of sanding paint for refinishing. Let’s now take a look at the timeline for sanding between coats.
Timeframe for Sanding Between Coats
Knowing when to sand between coats can significantly affect your results. Timing is everything!
| Paint Type | Drying Time Before Sanding | Recommended Grit for Sanding |
|---|---|---|
| Acrylic Paint | 1-3 hours | 220-320 grit |
| Enamel Paint | 24 hours | 400-600 grit |
| Latex Paint | 24 hours | 220 grit |
| Oil-based Paint | 48 hours | 320 grit |
We covered the duration for sanding between coats. We will now cover the different sandpaper grid types.
Understanding Sandpaper Grids
Not all sandpaper is created equal! Here’s a breakdown to help you choose the right grit.
- Coarse Grit (40-80): Best for heavy material removal.
- Medium Grit (100-150): Ideal for blending surfaces.
- Fine Grit (180-220): Use for finishing touches on smooth surfaces.
- Very Fine Grit (240-600): Perfect for polishing and preparing surfaces for final coats.
That covers the basics of sandpaper grids. Let’s now take a look at the steps for effective paint sanding.

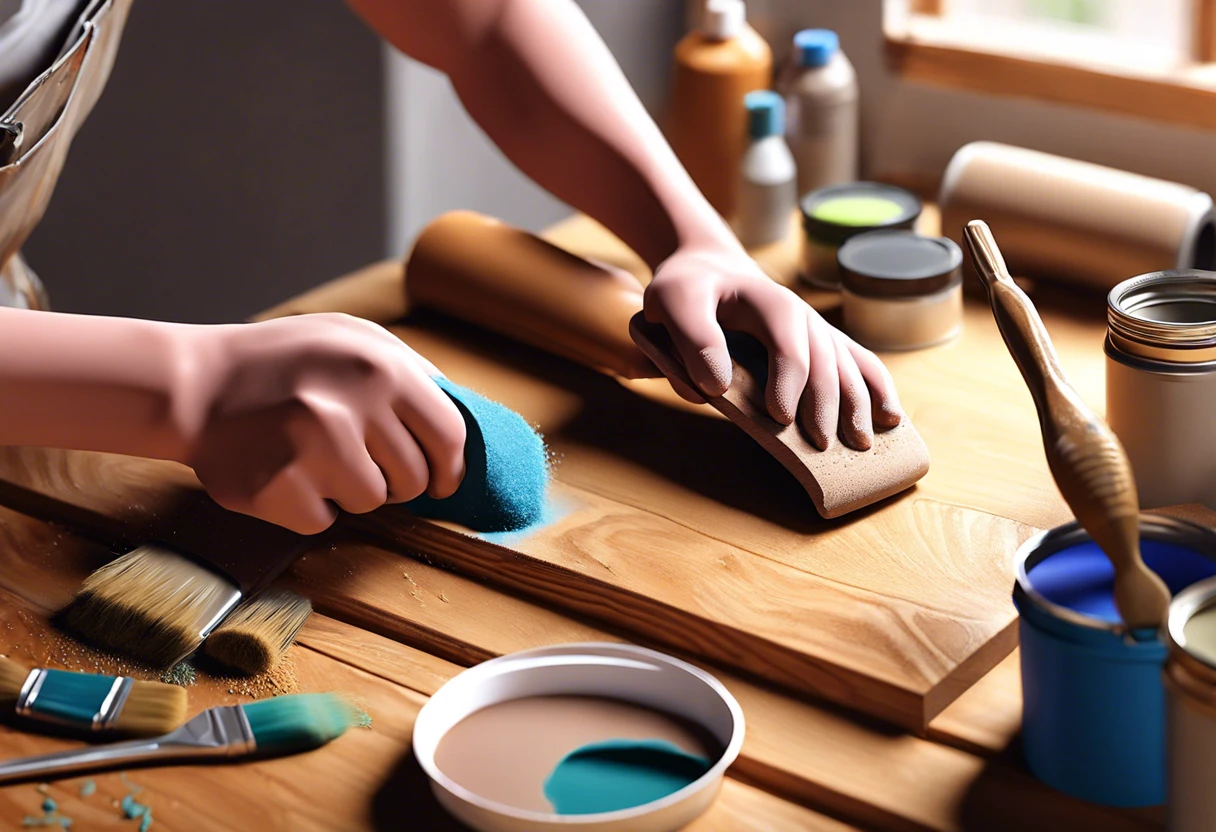
Steps to Sand Paint Effectively
Here are the steps to sand painted surfaces like a pro.
-
Choose the Right Sandpaper Grit
Select sandpaper with the right grit for your project. For textured paint or multiple layers, start with 120-grit (P120) sandpaper for rough sanding.
Switch to 220-grit (P220) for a smoother finish. This two-phase approach ensures you won’t damage the underlying surface.
-
Prep the Surface for Sanding
Dust off the surface thoroughly. Use a damp cloth for stubborn particles; much junk can settle before you start sanding.
Lay down a drop cloth ⚡ Best Pick: Heavy-Duty Canvas Drop → to catch debris. Preparation helps keep your work area clean and organized.
-
Sand the Painted Surface Carefully
Begin sanding with gentle strokes in a circular or linear motion. Sanding with the grain of the wood often yields better results without damaging the surface.
Apply consistent, steady pressure to lay the perfect foundation. It’s key to know when to switch to finer grit for that ideal smoothness.
-
Keep the Surface Wet (if Wet Sanding)
If you’re wet sanding, keep a spray bottle handy to mist the area regularly. Adding moisture reduces dust and prevents scratches, which is crucial for finishes.
Use waterproof sandpaper, usually in the 800-grit (P800) range, and you’ll notice how it glides more easily. Water also helps you identify areas that need more work!
-
Clean Up After Sanding
After finishing, clean the surface of dust and debris before applying any new paint. Vacuum the area and use a damp cloth again if you wet sanded.
Take pride in your workspace; a clean area inspires creativity. Don’t overlook this step; debris can ruin your new paint job.
Understanding the Best Techniques for Sanding Paint
Sanding paint requires specific techniques to maximize results while avoiding damage.
Common Sanding Techniques
- Circular Motion: Best for leveling uneven spots and small areas. It minimizes scratches.
- Linear Motion: Ideal for long, flat surfaces. Sand with the grain to enhance smoothness.
- Wet Sanding: Use this method to reduce dust and ease material removal. It’s particularly effective for finishing touches.
Tips for Effective Sanding Techniques
- Consistency: Maintain a steady pressure for even results; too much pressure can gouge the surface.
- Patience: Don’t rush! Take your time to ensure the best finish. Fast sanding can lead to mistakes.
- Switch Grits Gradually: Use a progression of grits (e.g., from 120 to 220) for a flawless surface without deep scratches.
Different Sanding Methods for Various Paint Types
Choosing the right sanding method is crucial for the type of paint you’re working with.
| Paint Type | Sanding Method | Recommended Grit |
|---|---|---|
| Acrylic | Wet Sanding | 400 grit |
| Enamel | Dry Sanding | 600 grit |
| Latex | Wet or Dry Sanding | 220 grit |
| Oil-based | Dry Sanding | 320 grit |
Types Of Paint That Can Be Sanded
Let’s explore the different types of paint: Acrylic, Enamel, Latex, and Oil-based.
-
Acrylic Paint
Acrylic paint dries quickly and can be sanded within 1 to 3 hours. Use fine grit sandpaper (Around 400-grit) to avoid damaging the surface.
-
Enamel Paint
Enamel paints provide a hard finish that can be sanded after 24 hours. A 600-grit sandpaper yields the best smoothness without harming the coat.
-
Latex Paint
Latex paints dry relatively fast and can be sanded after 24 hours. For a flawless finish, 220-grit sandpaper works well.
-
Oil-based Paint
Oil-based paints take longer to dry but provide a durable finish. Sanding with 320-grit after 48 hours creates an ultra-smooth surface.
I’ve learned from experience that sanding acrylic paint is transformative. The fine grit enhances vibrant details in my projects.
Factors Affecting the Sanding Process
What factors determine if you can effectively sand a painted surface?
-
Type of Paint: Different paints react differently; some sand easily while others do not.
-
Age of the Paint: Fresh paint can gum up sandpaper, while cured paint sands more easily.
-
Sanding Grit: Fine grit smooths surfaces, while coarse grit removes more material quickly.
-
Surface Preparation: Clean surfaces adhere better and yield smoother results when sanded.
Common Issues When Sanding Paint
When my buddy tried sanding his car’s paint, he created swirl marks. Frustrating, right? Those can linger forever if you don’t fix them.
To tackle this, use 2000-grit wet sandpaper with water. It helps flatten the surface. Then, polish with a microfiber cloth 💰 Save on Microfiber Cleaning Cloth → . Trust me, you’ll see great results!
Finishing Touches After Sanding
After you’ve completed sanding, wipe the surface with a 3M Tack Cloth to remove dust. Then, apply a high-performance clear coat for added protection and a sleek finish.
Expert Tips for the Pros
From one expert to another, consider polishing with a RUPES polish at 3000 RPM for a pristine finish. Switch grits gradually to achieve your desired gloss level.
Also See: Can You Return Paint Samples to Lowe’s? Learn More!
DIY Project Ideas Involving Sanded Paint
If you love unique art, consider making a sanded paint canvas or a decorative sandblast vase. These projects let you unleash your creativity while transforming ordinary items into extraordinary art! When working with paint in challenging conditions, you’ll want to know how cold affects exterior painting techniques.
I’d start with a blank canvas (Around $15) to create the sanded paint canvas. For the vase, grab a cheap clear one for about $5; with some sandpaper and paint, expect to spend roughly $25 total. Set aside a few hours—you’ll definitely love the way they turn out! If you’re looking to expand your painting skills to other surfaces, check out how to transform plastic surfaces with paint.
If you’re wondering can you sand paint effectively, try using a wet sanding method for a smooth finish. Alternatively, mix textured sand into your paint for a quirky, three-dimensional look. I’ve done both, and they bring such a fun twist to standard artwork!
Frequently Asked Questions About Sanding Paint
Can All Types Of Paint Be Sanded?
Yes, all types of paint can be sanded, but the results vary. Different paints, like acrylic or oil-based, respond differently to sanding. For instance, oil-based paints might require a coarser grit while acrylic paints benefit from fine grit.
What Grit Of Sandpaper Should I Use?
The grit of sandpaper you should use varies by the project. Generally, start with 80-120 grit for heavy sanding and transition to 220-320 grit for finishing touches. Using the right grit ensures a smooth surface without deep scratches. If you’re wondering about paint storage and potential degradation over time, check out how paint condition affects your project.
How Do I Avoid Damaging the Underlying Surface?
To avoid damaging the underlying surface while sanding, use light pressure. Continuously check for signs of wear. For example, when using a power sander, keep it moving and don’t focus on one area for too long.
Is It Necessary to Prime After Sanding?
Yes, it’s necessary to prime after sanding if you’ve exposed bare wood or a different surface. Primer helps create an even base, increases paint adhesion, and can affect the color and finish, providing a uniform look. If you’re working with specialized materials like polycarbonate panels, you might want to explore specific painting techniques for painting clear plastic surfaces.
What Safety Precautions Should I Take?
Always wear a mask and goggles when sanding paint. This minimizes inhaling dust particles and protects your eyes. Studies show that prolonged exposure to dust can cause respiratory issues, so play it safe! If you’re concerned about potential paint damage during your paint removal process, take necessary precautions.
How Often Should I Sand Between Coats?
You should sand between coats of paint every time for the best finish. Usually, it’s suggested to sand after every coat or after the paint dries according to the manufacturer’s advice. This adds better adhesion and a smoother finish. If you’re working on a specific project like painting a bookcase, you’ll want to follow precise techniques for a professional result to achieve flawless painting techniques.
Can I Wet Sand My Paint?
Yes, you can wet sand your paint. Wet sanding reduces dust and helps in achieving a smooth finish. Typically, finer grits, like 2000 or more, work well when wet sanding, ensuring a high-gloss look. If you’re considering painting over an existing surface like a chalkboard, you might want to explore techniques for painting over chalkboard.
What Tools Can Help With Sanding Paint?
Several tools can help with sanding paint, including sandpaper, electric sanders, and sanding blocks. Electric sanders are quicker for large areas, while hand sanding provides precision for detailed work. Choose tools based on your project size.
Conclusion
We’ve reached the end, and I hope you found this information helpful. Throughout this guide, we discussed sanding techniques, pre-sanding preparations, effective steps for sanding, suitable paint types, influencing factors, common sanding issues, finishing touches, inspection tips, expert advice, and creative DIY project ideas.
So, can you sand paint? Absolutely! Whether you’re working with single stage paint or others, choosing the right grit and understanding your paint type can significantly enhance the final finish.
For more insights and resources, be sure to explore our homepage: Paint Answers.
Useful Resources
- Gurney, J. (2009). Color and Light: A Guide for the Realist Painter. Kansas City, MO: Andrews McMeel Publishing.
- How To Choose The Right Sandpaper | Benjamin Moore
- NYC’s Guide: Sanding Semi-Gloss Paint Layers – A Must?
- Do you need to sand between coats of semi-gloss paint? – Quora


