Can A Refrigerator Be Painted?
A refrigerator is a big box that keeps your food cold and fresh. It’s like a giant icebox where all your yummy snacks stay safe!
So, can a refrigerator be painted? It’s super important to know if your fridge can sport a new color, especially if you want to jazz up your kitchen like I did with mine.
In this article, you’ll explore whether can a refrigerator be painted, how to prep your fridge, the right paint types to use, common issues you might face, and some creative DIY ideas too!
Contents
- 1 Can a Refrigerator Be Painted?
- 2 What is a Refrigerator?
- 3 Before You Start Painting Your Refrigerator
- 4 Steps to Successfully Paint Your Refrigerator
- 5 Benefits of Painting Your Refrigerator
- 6 Painting Techniques for Unique Effects
- 7 Maintenance Tips for Painted Refrigerators
- 8 Types Of Paint Suitable for Refrigerators
- 9 Factors Affecting the Outcome Of Painting a Refrigerator
- 10 Alternative Refresh Options for Your Refrigerator
- 11 Cost Comparison: Painting Versus Other Refresh Options
- 12 Common Issues Encountered When Painting a Refrigerator
- 13 Finishing Touches for a Polished Look
- 14 Frequently Asked Questions About Painting Refrigerators
- 15 Conclusion
- 16 Useful Resources
Can a Refrigerator Be Painted?
Yes, you can paint a refrigerator. Use specially designed appliance paint for best results. Make sure to clean the surface and allow full drying time. If you’re considering painting other surfaces like brick, painting exterior brick walls requires similar preparation techniques. Don’t forget to choose a color that complements your kitchen!
What is a Refrigerator?
A refrigerator is a household appliance designed to keep food and drinks cold. It operates using a compressor and refrigerant, maintaining temperatures around 3°C to 5°C (37°F to 41°F). In 2022, the average refrigerator consumed about 400 to 800 kWh per year, depending on the model and size.
Can you paint a refrigerator? I tried painting a spare fridge once, and it was a challenge! The prep work took a long time, but the results surprised me.
I relied on my fridge to keep my fresh veggies crisp and ready for salads. It got me wondering, can you paint a stainless steel fridge? Would a fresh coat help it fit better with my kitchen decor? The options for refinishing (Restoring) stainless steel always intrigue me.
Before You Start Painting Your Refrigerator
What do you need to get started?
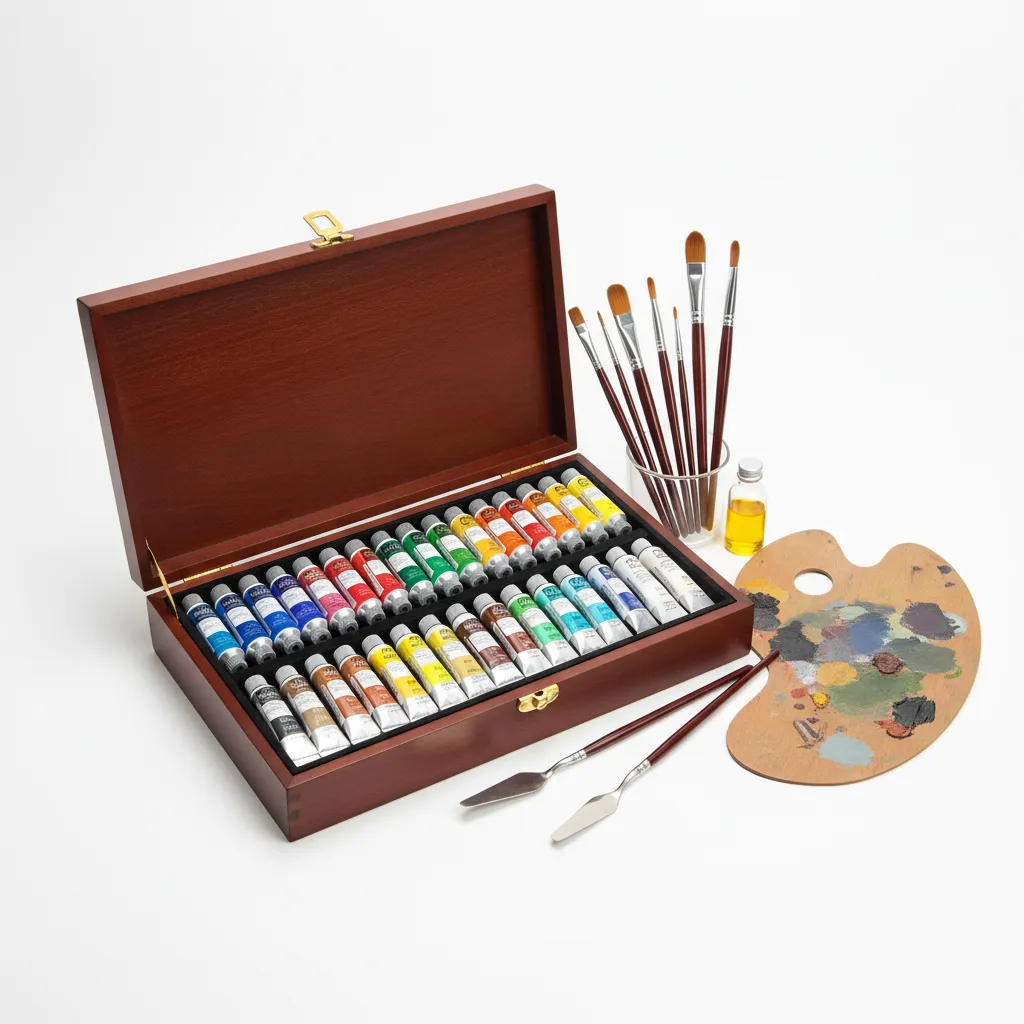
- Cleanser: Use a heavy-duty cleanser like Dawn or Simple Green. It removes grease and grime, ensuring paint adheres well.
- Sandpaper ⭐ Top Rated: Assorted Grit Sandpaper → : Get 220-grit sandpaper. This is essential for scuffing the surface, helping the paint stick better.
- Primer: Use a high-adhesion primer, such as Zinsser BIN. It creates a strong base for the paint, especially on metal surfaces.
- Paint: Choose appliance-specific paint, like Rust-Oleum’s Appliance Epoxy. This provides a durable, factory-like finish.
- Drop Cloths: Invest in heavy-duty drop cloths, at least 6 ft x 9 ft (1.83 M X 2.74 M). They protect your flooring from paint spills and drips.
We’ve wrapped up essential tips and considerations here. Let us turn our attention to steps for successfully painting your refrigerator.
Also See: Can Gutters Be Painted? Tips for Transforming Them!

Steps to Successfully Paint Your Refrigerator
Here are the steps to paint your refrigerator successfully.
-
Prepare the Refrigerator Surface
First, unplug your refrigerator and empty it. Clean the exterior thoroughly using warm water and mild detergent to ensure the paint adheres well.
Sand any rough spots with 220-grit sandpaper to create a smooth surface. Scuffing up knickknacks helps prevent peeling paint later on.
-
Apply Primer
Use a high-quality spray primer designed for metal surfaces. Spraying allows for even coverage; aim for light, quick coats to avoid runs.
Let the primer dry per the manufacturer’s instructions, usually about 30 minutes to an hour. Don’t rush this step; the primer helps the paint adhere better.
-
Choose the Right Paint
Select paint specifically for appliances or metal surfaces. I recommend using oil-based paint as it withstands scratches better than latex.
Look for paints rated for direct heat and moisture to ensure longevity. Make sure it’s compatible with your refrigerator type; not all surfaces react the same!
-
Paint the Refrigerator
Start with a thin, even coat of paint, applying it with long strokes or short bursts from a spray can. Keep a distance of about 12 inches (30 Cm) from the surface for better control.
After the first coat dries, lightly sand it with fine-grade sandpaper to remove imperfections before applying a second coat. Aim for 2-3 coats for a smooth finish. Ensure good ventilation; proper airflow makes a big difference. If you’re considering a complete car exterior painting techniques can help you achieve optimal results.
Free ToolOpen Calculator →Exterior Paint Cost EstimatorPlanning a repaint? Don't let contractors overcharge you. Calculate your exact siding and trim paint needs instantly. -
Allow Time to Dry
Check your paint can for the drying time, usually about 24 hours. Avoid touching or opening the fridge during this time to prevent fingerprints and accidents.
Be patient; busy households often need to allow layers to dry properly for durable results. Rushing could lead to chipping!
-
Final Touches and Cleaning
Once fully dry, inspect your paint job for uniformity. Touch up any uneven areas to create a clean, chic look.
Finish by cleaning all cooking and magnetic surfaces; this prevents missed spots and keeps your fridge shining. I like to give it a final rinse with a damp cloth for added sparkle!
We have now covered the steps to effectively paint your refrigerator. Next, we will discuss the advantages of this process.
Benefits of Painting Your Refrigerator
Painting your refrigerator can yield surprising benefits that go beyond aesthetics.
-
Enhanced Longevity
A fresh coat of paint acts as a protective layer. It shields the underlying material from rust and wear. This can extend the life of your refrigerator by years.
-
Improved Kitchen Aesthetics
Changing the color or style can elevate your kitchen’s overall look. A well-painted fridge can become the focal point of your culinary space.
-
Cost-Efficient Upgrade
Purchasing a new appliance can be expensive. Painting your refrigerator is a budget-friendly way to refresh your kitchen for around $30 (USD).
-
Personal Expression
Painting allows you to express your style. You can choose colors that resonate with you, creating a space that feels uniquely yours.
We’ve wrapped up the advantages of painting your refrigerator. Let us turn our attention to techniques for unique painting effects.
Painting Techniques for Unique Effects
Want to add some flair? Here are a couple of techniques to consider.
-
Two-Tone Designs
Consider a two-tone effect by painting the top half a different color than the bottom. This adds dimension and can visually alter the fridge’s proportions.
-
Stencils and Patterns
Use stencils to create fun patterns or even personalized designs. You can make it truly yours with minimal effort—just spray or dab paint over the stencil.
-
Ombre Effects
For a modern look, try an ombre technique. Gradually blend colors from dark at the bottom to light at the top. It gives your fridge a high-end appearance.
We’ve wrapped up various painting techniques for unique effects here. Let us turn our attention to maintenance tips for painted refrigerators.

Maintenance Tips for Painted Refrigerators
Keep your painted fridge looking fresh with these simple maintenance tips.
-
Regular Cleaning
Use gentle soap and a soft cloth to clean the surface. Avoid harsh chemicals that can damage the paint.
-
Avoid Scratching
Be cautious with magnets and other items. They can scratch the paint if not handled carefully.
-
Periodic Touch-Ups
Inspect the paint job every few years. It might need a touch-up to keep it looking pristine.
Types Of Paint Suitable for Refrigerators
Let’s explore the types of paint you can use: enamel, epoxy, chalk, and spray paint.
-
Enamel Paint
Enamel paint is durable and often used for appliances. It withstands high temperatures and comes in various colors, making it ideal for a refrigerator makeover.
-
Epoxy Paint
Epoxy paint offers a strong finish and excellent adhesion. It’s resistant to chipping and fading, making it perfect for high-use appliances like refrigerators.
-
Chalk Paint
Chalk paint has a matte finish and is easy to apply. While it creates a vintage look, it may need regular touch-ups to maintain its appeal.
-
Spray Paint
Spray paint is quick and easy to use; however, ensure proper ventilation. It works well for appliances, but choose a type designed for metal surfaces.
I’ve learned that epoxy paint is my top choice for fridges. Its durability and resistance make it a smart investment for long-lasting results.
Factors Affecting the Outcome Of Painting a Refrigerator
What factors impact your ability to paint your fridge successfully?
-
Surface Material: The material type, such as stainless steel or plastic, affects paint adhesion.
-
Preparation Process: Proper cleaning and priming are essential for a smooth finish.
-
Paint Type: Using appliance-grade paint ensures better durability and resistance to chipping.
-
Environmental Conditions: Temperature and humidity affect drying time and overall paint quality.
Alternative Refresh Options for Your Refrigerator
If you’re not set on painting, consider these fun refresh options to give your fridge a new life.
-
Vinyl Wraps
Vinyl wraps can completely transform your fridge. They come in various designs—from wood grain to colorful patterns. Plus, they’re removable and easy to clean!
Free ToolOpen Calculator →Car Wrap Material CalculatorDon't run short on vinyl halfway through! Calculate the exact footage you need and stop wasting money on excess material. -
Magnet Art
Use decorative magnets to add personality. You can swap them out easily. Whether it’s family photos or fun quotes, it’s an instant update.
-
Removable Wallpaper
Try removable wallpaper designed for appliances. It adds flair without the commitment of paint, and it’s easy to switch up whenever you feel like a change.
Cost Comparison: Painting Versus Other Refresh Options
Here’s a quick rundown of costs to help you decide the best method for refreshing your fridge.
| Option | Estimated Cost (USD) | Longevity |
|---|---|---|
| Painting | $30 – $50 | 5 – 10 years |
| Vinyl Wraps | $50 – $100 | 3 – 5 years |
| Magnets | $10 – $30 | Varies |
| Removable Wallpaper | $30 – $80 | 3 – 5 years |
Common Issues Encountered When Painting a Refrigerator
My friend once tried to paint her refrigerator. She ended up with paint drips and spots—not cool!
To fix this, she sanded the surface with 220-grit sandpaper and applied a primer for metal. Two light coats of appliance enamel resolved her problem beautifully!
Finishing Touches for a Polished Look
After painting your appliance, let it cure for 72 hours (3 Days) before use. This ensures durability and prevents premature wear on the finish.
Inspect the painted surface for drips or uneven texture, ensuring it’s smooth. Use a fine-grit sanding block (About 220 Grit) to fix any imperfections without overdoing it.
An insider tip—apply a clear polyurethane sealant. Products like Rust-Oleum offer a clear protective coat for added longevity, especially in high-touch areas.
Frequently Asked Questions About Painting Refrigerators
Can I Use Regular Paint for My Refrigerator?
Yes, you can use regular paint for your refrigerator, but it’s not recommended. Regular paint might not withstand humidity or temperature changes like specialized appliance paint, which is designed to last and resist chipping. Appliance paint, typically available in spray or liquid form, ensures better longevity.
How Do I Prep My Refrigerator for Painting?
To prep your refrigerator for painting, clean it thoroughly and sand the surface. Cleaning removes grease and grime, while sanding improves adhesion. Use a degreaser to eliminate residue and choose 120-220 grit sandpaper to create a slightly rough surface for better paint adherence. If you’re curious about alternative painting techniques, you might want to explore creative painting methods for surfaces.
Can I Remove Paint if I Don’t Like the Color?
Yes, you can remove paint if you don’t like the color. Use a paint remover specifically designed for appliances or a gentle solvent like rubbing alcohol. Apply it carefully according to the manufacturer’s instructions to avoid damaging the refrigerator’s surface. If you’re considering repainting your boat and want professional tips, check out how to paint a boat effectively.
How Long Does Painted Refrigerator Paint Last?
Painted refrigerator paint typically lasts between 5 to 10 years when properly applied. With quality surface prep and application, you ensure durability. Most manufacturers claim that their specialized appliance paints can hold up even against regular wear and tear. If you’re curious about specific paint matching techniques for your appliance project, you might want to explore professional paint color matching.

What Safety Precautions Should I Take While Painting?
While painting, it’s essential to take safety precautions. Use gloves and a mask to avoid inhaling fumes, and work in a well-ventilated area. Following these steps protects your health and ensures a safe working environment during your DIY project.
Can You Paint a Stainless Steel Refrigerator?
Yes, you can paint a stainless steel refrigerator. Use a specialized appliance paint formulated for metal surfaces to achieve the best results. This approach helps maintain the sleek look and ensures that the paint adheres effectively without peeling or chipping. If you’re looking to explore creative decoration techniques, painting artificial flowers can offer another unique way to personalize your space.
How to Paint Stainless Steel to Black?
To paint stainless steel to black, follow the proper prep steps: sand the surface, clean it, and apply a primer designed for metals before painting. This ensures the black paint sticks well, providing a smooth and lasting finish. If you’re wondering about the best thinning techniques for your paint, acetone can help thin paint effectively.
How to Remove Paint on Stainless Steel?
You can remove paint on stainless steel using a paint stripper or a specially formulated solvent. Make sure to test a small area first to avoid surface damage. Work gently to strip away the paint without scratching or harming the stainless steel underneath. If you’re considering alternative painting methods, spray painting techniques offer versatility.
Also See: Can Redgard Be Painted Over? Tips for Best Results
Conclusion
We’ve reached the end, and I trust you found this guide useful. We explored essential topics like understanding refrigerators, preparing your appliance, successful painting steps, color choices, paint types, factors affecting results, common painting challenges, finishing touches, and creative DIY ideas.
So, can you paint a refrigerator? Absolutely! If you’re looking to refresh your kitchen’s appearance, various paint options for stainless steel and recommended prep techniques can help you achieve a flawless finish. I hope these tips facilitate your fridge transformation.
For further expert guidance, visit Paint Answers.
Useful Resources
- Loomis, A. (2011). Figure Drawing for All It’s Worth. New York, NY: Titan Books.
- How To Paint A Fridge (without the paint scratching off) – at home with Ashley
- How To Paint A Fridge + Best Tips For A Long-Lasting Finish
- How do I paint a white rusty fridge? | Bunnings Workshop community