
Can Gel Stain Go Over Paint?
Published on: February 13, 2025 | Last Updated: January 7, 2025
Written By: Alisha Winters
What is gel stain? It’s a product that adds color to wood, kinda like paint, but it lets the wood’s beauty shine through. So, you get a cool look while still seeing the grain!
Now, can gel stain application techniques go over paint? This question’s super important if you’re planning a project like I did last summer on my old chair; I learned a lot about getting it right for the best results!
In this guide, we’ll cover essential prep steps, a step-by-step process for applying gel stain on painted surfaces, color palettes, types of gel stains compatible with paint, factors that affect outcomes, common issues, finishing touches for a pro look, and some creative DIY project ideas using gel stain over paint.
Contents
- 1 Can Gel Stain Go Over Paint?
- 2 What is Gel Stain?
- 3 Essential Preparations Before You Begin Applying Gel Stain
- 4 Step-by-step Guide for Using Gel Stain on Painted Surfaces
- 5 Advantages of Using Gel Stain Over Paint
- 6 Tips for Choosing the Right Gel Stain
- 7 Maintenance After Applying Gel Stain Over Paint
- 8 Different Types Of Gel Stains and Their Compatibility With Paint
- 9 Factors Affecting the Outcome Of Gel Stain Over Paint
- 10 Understanding the Surface Below: How Paint Affects Gel Stain Application
- 11 The Role of Wood Type Beneath the Paint
- 12 Common Issues When Using Gel Stain Over Painted Surfaces
- 13 Finishing Touches for a Professional Look
- 14 Creative DIY Project Ideas Using Gel Stain Over Paint
- 15 Frequently Asked Questions (FAQ)
- 16 Conclusion
- 17 Additional Resources
Can Gel Stain Go Over Paint?
Yes, you can apply gel stain over paint. Make sure the paint’s dry and clean. This method gives a unique, rich color and texture. Just remember, test it first for the best results!
What is Gel Stain?
Gel stain is a thick, pigmented stain for wood surfaces. Unlike traditional stains, it has a higher viscosity, allowing for better control and a smoother finish, with most products containing about 20% pigment density. When you’re looking to transform wooden surfaces like stair railings, choosing the right color can make a significant design impact selecting the perfect railing shade.
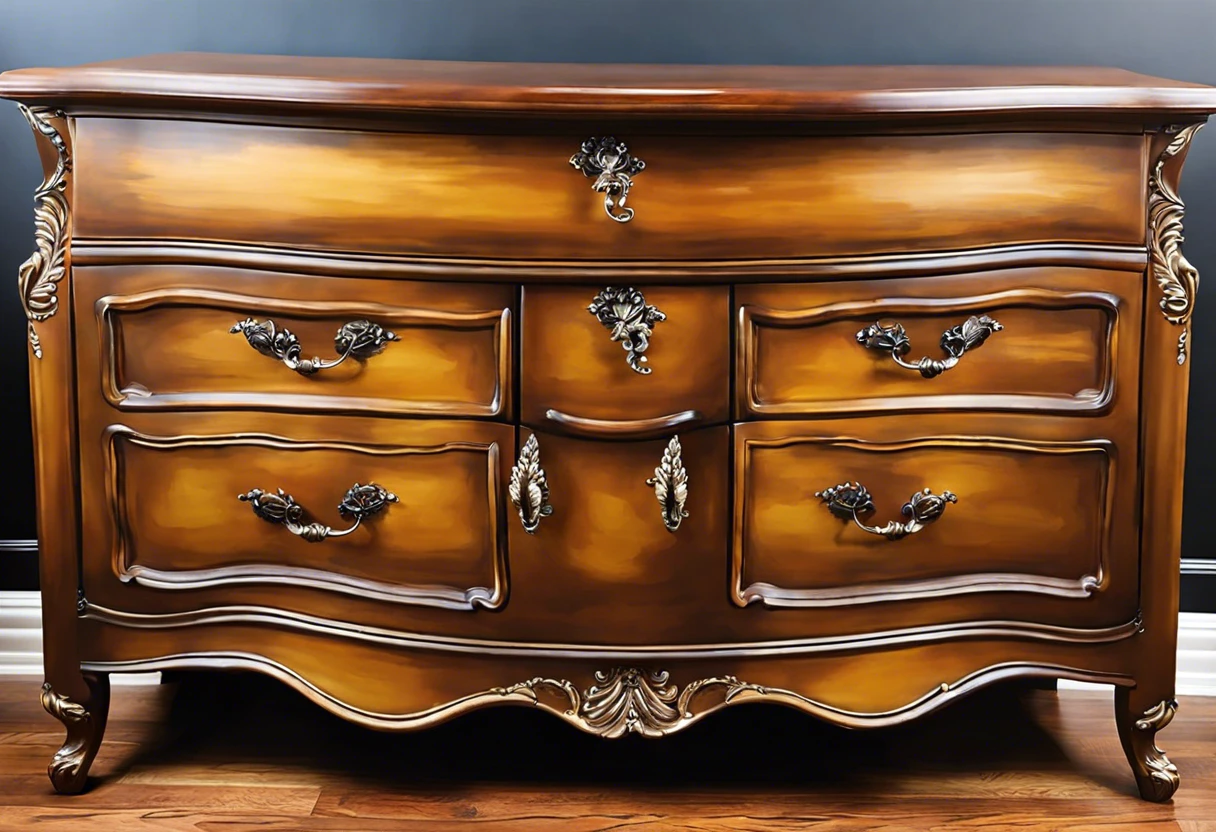
You might wonder, can gel stain go over paint? I’ve tried it on a dresser with a poor paint job, and I was amazed at the coverage. It completely transformed the piece!
I had a friend use it on an old table that had seen better days. They found it tricky to know if they could use gel stain over paint. This experience highlighted how important it is to understand the specifics of products like gel stains when working on DIY painting materials. Knowing if stains can blend in with wood treatments can change the entire look. If you’re curious about transforming decorative items like painting holiday lighting techniques can provide additional creative inspiration for your home projects.
Essential Preparations Before You Begin Applying Gel Stain
What do you need to prepare for?
- Surface Cleaner: Use a cleaner like Krud Kutter or TSP (Tri Sodium Phosphate) to remove dirt and grease before staining.
- Gel Stain: Choose gel stains such as General Finishes Gel Stain or Minwax Gel Stain for the best results. They adhere well to painted surfaces.
- Lint-Free Rags: Use high-quality, lint-free rags like Scott Shop Towels to prevent debris from affecting your stain.
- Sandpaper ⚡ Best Pick: Assorted Grit Sandpaper → : Keep a variety from 220 to 320 grit for a smooth surface. This helps the gel stain bond better to the paint.
- Sealer: Use a top-quality sealer like Varathane or Clear Polyurethane to protect your finish from wear after staining.
You should now have a good understanding of key preparations needed for gel stain application. In the next part, we’ll discuss how to apply gel stain on painted surfaces.
Also See: What is Body Paint? A Creative Expression Of Art
Step-by-step Guide for Using Gel Stain on Painted Surfaces
Follow these steps to successfully use gel stain over painted surfaces.
-
Assess the Paint Condition
Check for peeling or chipping paint. If there are issues, sand the area for a smooth surface for your gel stain.
High-quality paint typically supports gel stains; fresh latex (Water-based) or oil-based paint works best. Waiting a day or two after painting can help with bonding.
-
Clean the Surface Thoroughly
Use a mixture of warm water (About 37°C, 98°F) and mild detergent to scrub the surface. Wipe away grease, dirt, or residue for proper staining.
Rinse well and dry completely—water can ruin your gel stain application. Using a lint-free cloth helps avoid fiber contamination.
-
Test the Gel Stain
Choose a small, hidden area to test the gel stain. Apply a thin coat to see how it adheres to the paint without running or discoloring.
Wait 24 hours to see the true color and consistency. This ensures you’re satisfied with the final look before full application.
-
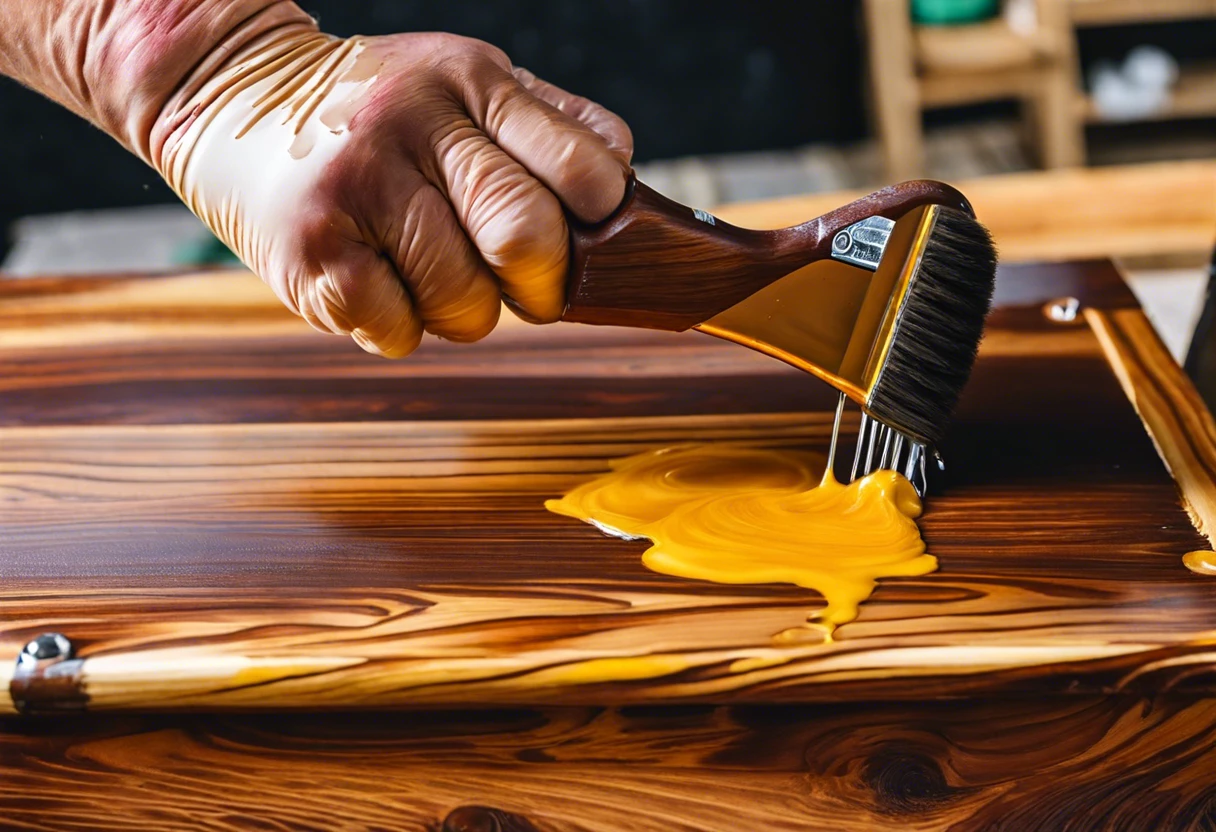
Apply the Gel Stain
Use a foam brush or lint-free cloth to apply the gel stain evenly. Start from one corner and work with the grain; light, smooth strokes create even coverage.
A thin coat is crucial—aim for 3 ounces per square meter (1 Ounce Per Square Foot) based on what you’re staining. Apply a few coats for depth, ensuring each dries thoroughly in between.
-
Allow the Stain to Set
Let the stain cure according to the manufacturer’s instructions—typically 8 to 24 hours. Curing time can vary based on humidity and temperature.
Check the texture after 12 hours; if it feels tacky or soft, it’s not ready yet. Avoid touching it during this time for the best finish!
-
Seal the Stained Surface
Once fully cured, apply a protective sealant—lacquer or polyurethane works well. This provides a barrier and extends your new stain’s lifespan.
A common ratio is two parts sealant to one part gel stain when mixing for an extra protective layer. Sealing enhances both durability and luster.
So far, we covered a guide on applying gel stain to painted surfaces. Let’s look at the benefits of using gel stain next.
Advantages of Using Gel Stain Over Paint
Why choose gel stain over paint for your projects? Here are some solid reasons!
- Enhanced Wood Grain: Gel stain respects the wood’s beauty. It highlights the grain, unlike paint, which hides it.
- Versatile Colors: You can find a wide range of colors that cater to various design aesthetics, giving you plenty of choices.
- Thicker Consistency: Its gel-like quality makes it easy to control—ideal for getting vibrant colors without drips.
- Shorter Dry Time: Typically, gel stain dries faster than regular paint, allowing for quicker project completion.
- Better Layering Potential: You can build depth in color by layering gel stain, creating a unique finish.
We’ve wrapped up the benefits of gel stain compared to paint here. Let us turn our attention to tips for selecting the best gel stain.
Tips for Choosing the Right Gel Stain
Selecting the right gel stain can make all the difference. Here are a few pointers to keep in mind.
| Criteria | What to Look For |
|---|---|
| Color Match | Pick a shade that complements or contrasts nicely with your existing paint. |
| Base Type | Water-based for quick cleanup; solvent-based for durability. |
| Transparency Level | Consider opaque vs. translucent to achieve your desired coverage. |
| Application Method | Choose a gel stain that suits your preference for brush, cloth, or spray application. |
You should now have a good understanding of selecting the appropriate gel stain. In the next part, we’ll discuss maintaining gel stain.


Maintenance After Applying Gel Stain Over Paint
Once you’ve completed your project, maintaining it is key. Here’s how:
- Regular Dusting: Use a soft, dry cloth to prevent dirt buildup.
- Avoid Harsh Cleaners: Stick to mild soaps and water to protect the finish.
- Check for Wear: Inspect the surface every few months for any wear and plan for reapplication if needed.
Different Types Of Gel Stains and Their Compatibility With Paint
Let’s explore the different types of gel stains. We’ll cover the best options, their compatibility, and whether they can be applied over paint.
-
Opaque Gel Stains
Opaque gel stains provide solid color coverage. They hide the surface completely, making them suitable for painted surfaces, but they won’t showcase the wood grain beneath.
-
Translucent Gel Stains
These stains allow some wood grain to show through while adding color. They’re ideal for previously painted wood, highlighting depth while maintaining paint visibility.
-
Water-based Gel Stains
Water-based stains dry quickly and have less odor. You can easily apply them over paint, and they clean up with soap and water — a definite plus in the studio!
-
Solvent-based Gel Stains
Solvent-based options are durable and perfect for outdoor use. They adhere well over paint but require more drying time — about 6 to 8 hours before applying a topcoat.
This reminds me of a valuable lesson I learned with water-based gel stains. I applied one over a brightly painted surface and was thrilled with its ease of use and vibrant results. It felt magical watching the transformation! If you’re curious about enhancing your hardware’s appearance, you might want to explore painting cabinet hardware techniques.
Factors Affecting the Outcome Of Gel Stain Over Paint
What factors influence applying gel stain over paint?
-
Type of Paint: Different paints, like latex or oil-based, react differently with gel stain.
-
Paint Condition: Dull, well-prepped surfaces hold gel stain better than glossy surfaces.
-
Stain Composition: Some gel stains are made for specific surfaces—check compatibility!
-
Application Technique: Applying thin layers works better than thick layers.
Understanding the Surface Below: How Paint Affects Gel Stain Application
Paint type and condition play a crucial role in gel stain results. Let’s dive into how these factors influence the outcome.
| Factor | Impact on Gel Stain | Notes |
|---|---|---|
| Type of Paint | Affects adhesion and color depth. | Latex paints often allow better absorption than oil-based ones. |
| Paint Finish | Glossy surfaces may repel stain. | Matte or eggshell finishes work best for better bonding. |
| Age of Paint | Older paints may be less compatible. | Wait at least two weeks for new paint to cure. |
| Condition of Paint | Integrity impacts stain application. | Repair peeling or cracked areas for an even finish. |
The Role of Wood Type Beneath the Paint
The type of wood under your painted surface can change how well gel stain takes. Let’s explore this further.
- Softwoods: Like pine soak up stain more and can deepen in color.
- Hardwoods: Oak and maple might need more prep; the stain may blend differently.
- Previous Stains: Any old finishes can affect how gel stain reacts during application.
Common Issues When Using Gel Stain Over Painted Surfaces
My friend tried using gel stain over his painted cabinets. He noticed uneven color and streaks after application. Frustrating, right?
To fix this, he lightly sanded the surface with 220-grit (0.1 Mm) sandpaper, cleaned it, and applied a test coat of gel stain. Problem solved! Proper preparation is key.
Finishing Touches for a Professional Look
After confirming that the gel stain can sit over the paint, let it cure for at least 72 hours (3 Days). This ensures durability and creates a strong bond with the surface.
Inspect the surface for 60-degree angle drips, as they can mar your finish. Use quality gel stain products like Minwax Gel Stain, which, when applied and inspected closely, yield excellent results. If you’re looking to refresh your bathroom’s aesthetic, consider choosing the perfect vanity color.
Here’s a pro tip from my past projects: Always sand with 220-grit sandpaper between coats. It levels the finish and enhances color depth, making the stain pop.
Creative DIY Project Ideas Using Gel Stain Over Paint
Ever thought about revamping an old piece of furniture? Try transforming a dull wooden chair into a statement piece with gel stain, it’s super fun!
For this project, I’d grab some gel stain, sandpaper, and rags, which typically costs around $20-30. You can complete this in a weekend, giving you plenty of time to enjoy your new treasure!
But if you’re curious about alternatives, consider layering solid stain over paint for a more textured finish. Or try using a homemade coffee stain for a unique look—trust me, it’ll give your piece a cozy vibe! If you want to explore creative painting techniques like adding adorable details, painting a cute chick design can elevate your project’s aesthetic.
Also See: Can You Paint a Stainless Steel Sink? Here’s How!
Frequently Asked Questions (FAQ)
Now let us look at some common concerns. I typically get asked these questions.
What Types Of Paint Can I Use Gel Stain Over?
You can use gel stain over water-based and oil-based paints. Each type of paint has unique properties; water-based paints generally allow better absorption for gel stains
Will Gel Stain Make My Painted Surface Darker?
Yes, gel stain will likely darken your painted surface. Gel stain contains pigments that enhance color depth, which affects light in 3D space.
How Long Does Gel Stain Take to Dry Over Painted Surfaces?
Gel stain typically dries to the touch in 1 to 2 hours but fully cures in 24 hours. The drying time can vary based on factors like humidity and air circulation.
Can I Layer Gel Stain on Already Stained Paint?
Yes, you can layer gel stain on already stained paint. Just check the compatibility of the existing stain to ensure proper adhesion.
Is There a Need to Sand Painted Surfaces Before Applying Gel Stain?
Yes, sanding painted surfaces is often necessary before applying gel stain. Lightly sanding (220-grit) helps the stain adhere better, ensuring a smooth finish.
Can Solid Stain Go Over Gel Stain?
Yes, solid stain can be applied over gel stain. Ensure the gel stain is fully cured and clean the surface for best results.
What is the Optimum Temperature for Applying Gel Stain?
The optimum temperature for applying gel stain is between 10°C and 30°C (50°F to 86°F). This helps in achieving even application and proper drying.
Can Gel Stain Be Removed From Painted Surfaces?
Yes, gel stain can be removed from painted surfaces. Using a paint stripper or rubbing alcohol can often help break down the gel stain.
Conclusion
That brings us to the end of our exploration. We covered what gel stain is, essential preparations, a step-by-step guide for use, recommended color palettes, compatibility of different gel stains with paint, factors that affect the outcome, common issues, finishing touches for a professional look, and DIY project ideas.
To answer the big question, yes, gel stain can go over paint, but you need to prepare correctly and pick the right type to ensure a successful outcome. With careful selection and application, you can achieve that desired finish on your painted surfaces.
For further insights and tips, visit Paint Answers.
Additional Resources
- Betti, C., & Sale, T. (2012). Drawing: A Contemporary Approach (6th ed.). Belmont, CA: Cengage Learning.
- What pre-existing surfaces can I apply General Finishes Gel Stain (AKA One Coat Wonder) to? | General Finishes
- How to Use Oil Base Gel Stain Over Existing Finishes
- Is it possible to apply gel stain on painted furniture? – Quora
Experienced interior designer with 15+ years in transforming spaces, blending artistry with expertise in color and design. Rhode Island School of Design graduate, specializing in restorations and modern makeovers.
Material, Stain


