
How Can You Paint Leather?
Published on: February 27, 2026 | Last Updated: October 1, 2025
Written By: paint_answered
Leather is a soft, smooth material made from animal skin. Think of it as a fancy skin that helps us make cool stuff like jackets and shoes.
So, how can you paint leather? It’s super important to know the right way to do it. I’ve learned that prepping the leather properly makes a huge difference in how your painting turns out.
In this guide, you’ll discover what leather is, what you need before starting, a step-by-step process, color recommendations, types of paint, factors that affect the outcome, common problems, finishing touches, and fun DIY ideas. Get ready to dive into how can you paint leather!
Contents
- 1 How Can You Paint Leather?
- 2 What is Leather?
- 3 What You Need to Know Before You Start Painting Leather
- 4 How to Prepare Leather for Painting
- 5 Special Techniques for Painting Leather
- 6 Understanding Leather Types for Painting
- 7 Step-by-step Guide to Painting Leather
- 8 Different Types Of Leather Paint Available
- 9 Factors Affecting the Outcome Of Your Leather Painting Project
- 10 Common Issues Encountered When Painting Leather
- 11 Maintenance Tips for Painted Leather
- 12 Creative Techniques to Elevate Your Painted Leather Art
- 13 Creative DIY Project Ideas for Painted Leather
- 14 Frequently Asked Questions About Painting Leather
- 15 Conclusion
- 16 Useful Resources
How Can You Paint Leather?
You can paint leather by using a suitable leather paint. Clean the surface first and let it dry. Apply paint in thin coats with a brush or sponge. Seal it with a topcoat for durability.
What is Leather?
Leather is a durable material made from animal skin, primarily from cows. It undergoes a tanning process that enhances its longevity, with roughly 83 million metric tons (Approximately 183 Billion Pounds) produced annually worldwide.
Painting leather isn’t like painting canvas. I’ve experimented with leather projects, finding them both challenging and fulfilling—but more on that later.
A friend of mine relied on it for creativity when revamping her leather jackets. She taught me that while the fun lies in vibrant colors, it’s essential to know how to remove paint from leather. Preserving the leather’s quality requires specific techniques for painting delicate fabric surfaces carefully.


What You Need to Know Before You Start Painting Leather
What do you need to get started?
- Leather Preparation Cleaner: Use a product like Angelus Leather Prep. It removes oils and residues, ensuring a clean surface for better paint adhesion.
- Leather Paint: Choose Angelus Acrylic Leather Paint, available in various colors. This specially formulated paint bonds well with leather for lasting results.
- Paint Brushes: Use fine detail brushes like the Select Artistry 10-Piece Brush Set. They give you precise control for intricate designs.
- Sealer: Use a protective gloss finish such as the Angelus Spirit Acrylic Finisher to seal your artwork and protect it from scratches and fading.
We have now covered essential tips for painting leather. The next section will focus on preparing leather for painting.
Also See: Can You Mix Grout With Paint? Find Out the Answer!
How to Prepare Leather for Painting
Preparing leather correctly is key to achieving the best results. Let’s break down the steps involved.
Cleaning the Leather Surface
Start with a gentle cleaner. Look for products like Saddle Soap or a mixture of water and mild soap. This removes dirt and oils that may prevent paint from sticking.
Deglazing the Leather
Apply a deglazer, which is essential for removing any finishing products. A popular choice is Angelus Leather Deglazer. This step ensures your paint bonds well, extending its durability.
That covers the steps to prepare leather for painting. Let’s now take a look at special techniques for painting leather.
Special Techniques for Painting Leather
Try these cool techniques to elevate your leather painting:
- Stippling Technique: Use a sponge to dab paint, creating a textured finish. This method works great for intricate designs or backgrounds.
- Watercolor Effect: Mix water with acrylic paint for a soft, flowing look. It’s perfect for blending colors smoothly on leather.
- Masking: Use painter’s tape ⚡ Best Pick: Blue Painter’s Tape → to create clean lines or geometric patterns on your leather before painting. Just pull it off once the paint dries!
So far we covered unique methods for painting leather. Let’s look at the different types of leather used for painting next.
Understanding Leather Types for Painting
Not all leather is created equal. Knowing your leather type can guide your painting process.
| Leather Type | Characteristics | Best Paint Type |
|---|---|---|
| Full Grain Leather | Durable, retains natural grain, ages beautifully. | Acrylic |
| Top Grain Leather | More flexible, easier to paint on, less durable than full grain. | Acrylic or Dye |
| Bonded Leather | Made from leftover leather scraps, less expensive but less durable. | Dye |
| Synthetic Leather | Vegan option, often plastic-based, can mimic leather. | Fabric Paint |
That covers the different types of leather suitable for painting. Let’s now take a look at the painting process itself.
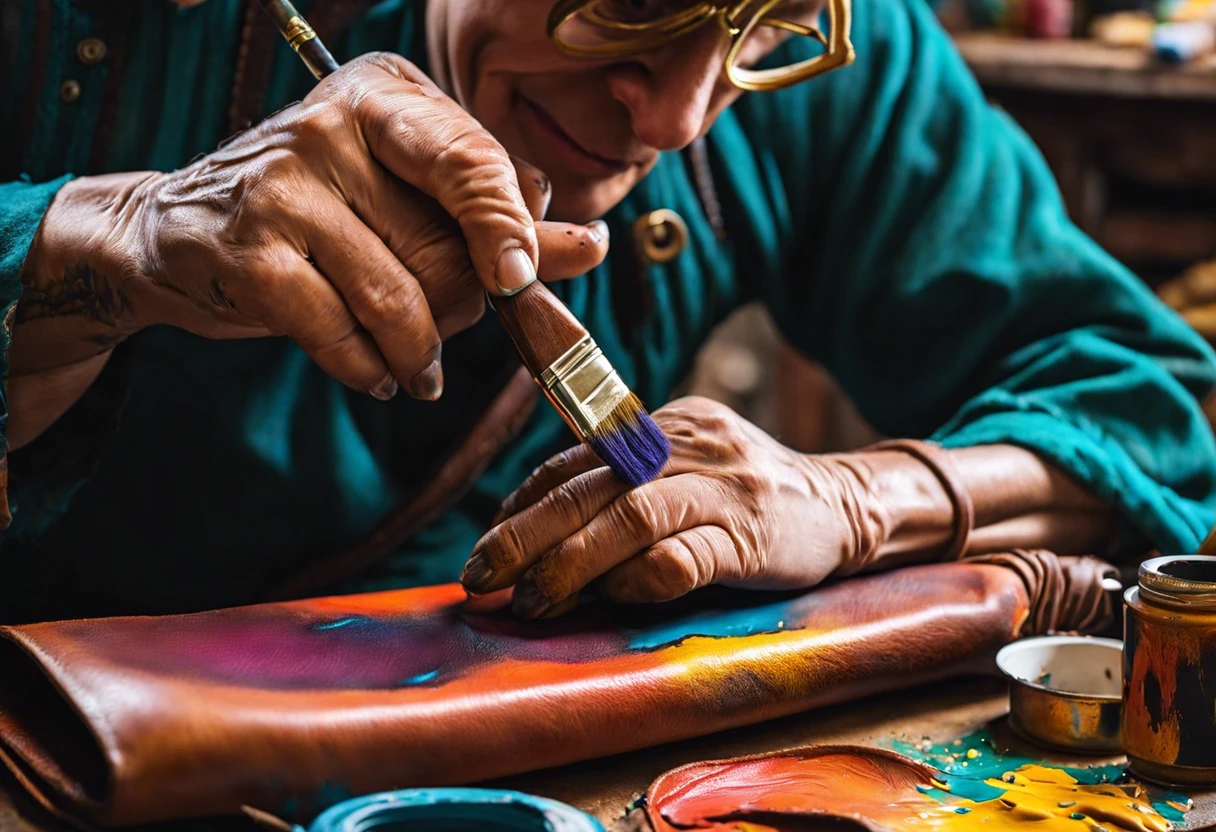
Step-by-step Guide to Painting Leather
Here are the steps to transform your leather into a fresh work of art.
-
Preparing the Leather Surface
Clean the leather with a mixture of water and gentle soap, removing dirt and oils. Let it dry completely for 30-45 minutes to prevent debris from mixing with your paint, ensuring smoother application.
If you want to go the extra mile, lightly sand the area with fine-grit sandpaper ⭐ Top Rated: Assorted Grit Sandpaper → to maximize adhesion. Just be gentle—you don’t want to damage the leather’s texture.
-
Selecting the Right Paint
Choose quality acrylic paint designed for leather, as it offers flexibility and won’t crack when the leather bends. Water-based options are ideal; look for paint labeled ‘multi-surface’ or ‘professional acrylic’ for best results. If you’re concerned about potential paint damage during application, protecting your surface matters.
Consider both the color and finish, like matte or glossy. Remember, cheaper paints can fade or peel within months, so invest about $10-20 per bottle for consistent results.
-
Applying the Paint
Use a paintbrush or sponge to apply thin layers of paint, allowing it to dry for about 1 hour between coats. Thicker layers tend to crack soon after application, so patience is key.
You may need 2 to 4 coats, depending on your desired opacity. Experiment a bit; lighter colors typically need more layers to cover dark leather backgrounds well.
-
Sealing the Paint
After everything dries, seal the paint with a leather finisher for protection. A spray-on acrylic sealer works well; options range from $5 to $15 per can, providing a longer-lasting, smoother finish. If you’re considering advanced paint protection techniques, ceramic coating single-stage paint offers an additional layer of durability and shine.
Allow the sealer to set for at least 24 hours before using your leather goods. This extra step protects your work—I’ve made the mistake of skipping it, and my paint chipped off too soon!
Different Types Of Leather Paint Available
Let’s explore the types of leather paint: acrylic, alcohol-based, dye-based, and fabric paint.
-
Acrylic Leather Paint
Acrylic leather paint is a versatile option. It’s water-based, dries quickly, and won’t crack easily, typically available in 4 oz (118 Ml) or larger bottles.
-
Alcohol-based Leather Paint
Alcohol-based paint delivers vibrant colors and is ideal for detailed designs. It’s fast-drying but may require multiple thin coats for even coverage.
-
Dye-based Leather Paint
Dye-based paint penetrates the leather, giving it a natural look. Use this option sparingly; a single 2 oz (59 Ml) bottle can cover up to 50 sq in (322 Cm²).
-
Fabric Paint on Leather
Fabric paint works on thin leather since it keeps the material flexible. It’s best for unique textures, like using a sponge brush to create patterns, but won’t last long outdoors.
From my experience, acrylic leather paint is my go-to choice. Its durability and wide color range suit both DIY projects and restoring favorite items.
Factors Affecting the Outcome Of Your Leather Painting Project
What factors can impact your leather painting experience?
-
Type of Leather: Different leathers absorb paint differently, affecting color and texture.
-
Temperature and Humidity: High humidity can cause paint to dry unevenly, leading to peeling.
-
Surface Preparation: Proper cleaning and priming affect how well paint adheres to leather.
-
Quality of Paint: Using the wrong type can result in poor outcomes or even damage to leather.
Common Issues Encountered When Painting Leather
My friend once painted his favorite leather jacket but experienced cracking after just one layer. It was too thick!
To fix this, he should use thin coats—aim for 2-3 layers spaced 30 minutes apart. Always use paint specifically for leather, and seal it with a topcoat for durability.
Maintenance Tips for Painted Leather
To keep your painted leather looking fresh, follow these maintenance tips regularly.
- Cleaning: Use a damp cloth and gentle soap. Make sure to clean the painted surface gently, without scrubbing too hard, as that can chip the paint. Aim to clean every 1-2 weeks.
- Conditioning: Apply a leather conditioner every 3 months. This helps maintain softness and prevents cracking. Look for products like Lexol or Bick 4.
- Storage: Store your painted leather items away from direct sunlight. Use dust bags or cover them with cloth to protect them from dust and moisture.
Creative Techniques to Elevate Your Painted Leather Art
Want to make your painted leather pop? Try some of these unique techniques!
- Splatter Technique: Add excitement with a splatter technique using a toothbrush. Dip in paint and flick it onto the leather for a fun, random pattern.
- Stenciling: Create intricate designs with stencils. This helps produce clean, sharp images. Just tape the stencil down and dab paint gently over it.
- Layering Colors: Try layering colors for depth. Start with a lighter base and gradually add darker shades. This technique can create beautiful ombre effects.
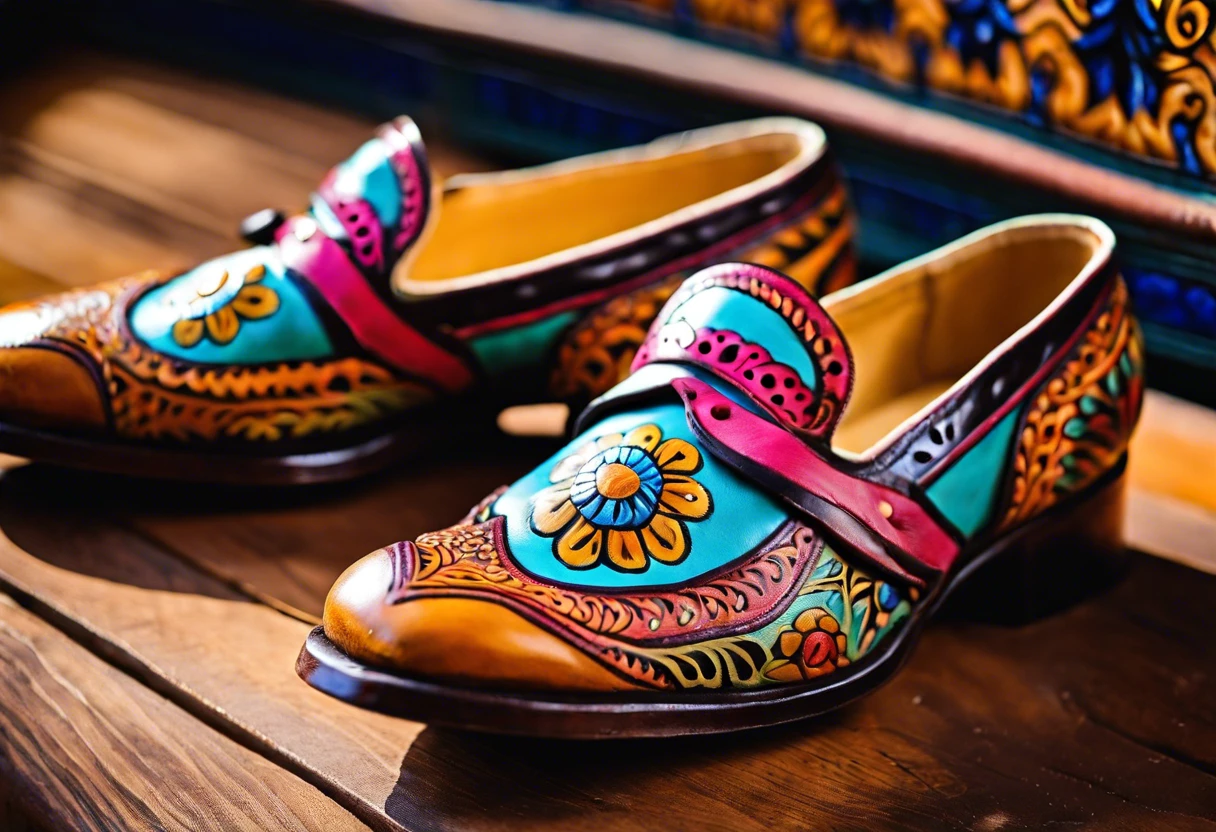
Creative DIY Project Ideas for Painted Leather
Want to jazz up your tote bag? Try painting whimsical designs like florals or abstract patterns on natural leather—it’s easier than you think!
For this project, you’ll need leather paint, brushes, and a few hours. Materials cost around $15 to $30, and you’ll be transforming your bag in no time!
If you want to explore different options, use stencils for a unique look, or experiment with leather dye for vibrant colors. My personal favorite? A watercolor effect with a spray bottle for a super artistic flair! Artists like Bob Ross mastered creative painting techniques that inspire unique approaches to color and texture.
Frequently Asked Questions About Painting Leather
What Type Of Paint is Best to Use on Leather?
The best paint to use on leather is acrylic leather paint. Acrylic leather paint is specially formulated to adhere well to leather, providing durability and flexibility. It adheres better than regular acrylic paint, making it a suitable choice for various projects.
Can You Paint Over Already Finished Leather?
Yes, you can paint over already finished leather. However, you must prepare the surface by cleaning and using a deglazer to remove any finishes. This step ensures that the new paint adheres properly and lasts longer. If you’re wondering about surface preparation techniques for different materials, repairing painted surfaces requires similar meticulous steps.
How Do You Make Sure Paint Adheres to Leather?
To ensure paint adheres to leather, start by cleaning the surface thoroughly and applying a deglazer. This process removes oils and finishes that could prevent good adhesion. Preparing the leather properly enhances paint durability and prevents peeling. If you’re curious about the broader techniques of applying paint to surfaces, check out some professional body painting techniques.
Is It Possible to Remove Paint From Leather?
Yes, it’s possible to remove paint from leather. You can use a leather-safe paint stripper or rubbing alcohol for this task. Gently dab the area with a cotton swab to minimize damage to the leather. If you’re looking to refresh your home’s aesthetic, you might also want to explore railing color options.
Can Painted Leather Be Cleaned?
Yes, painted leather can be cleaned, but do so carefully. Use a damp cloth and a gentle soap to avoid damaging the paint. Regular cleaning keeps your artwork looking fresh, ensuring longevity.
What’s the Lifespan Of Painted Leather?
The lifespan of painted leather can vary, typically lasting from 1 to 5 years with proper care. Factors influencing longevity include exposure to sunlight, wear, and the type of paint used. Proper maintenance extends the life of painted leather artworks. If you’re looking to transform surfaces with paint, you might find helpful techniques for painting challenging materials effectively.
Also See: Can You Tile Over Painted Drywall? What to Consider
Conclusion
We covered the basics of leather, what you need to know before painting, a step-by-step guide, recommended color palettes, types of leather paint, factors influencing your project, common issues, and finishing touches.
Happy painting your leather items by following these steps: prep the surface, choose the right paint, and apply with care. Now you know how to paint leather—it’s all about preparation and technique.
For additional insights and expert advice, visit our homepage at Paint Answers.
Useful Resources
- Loomis, A. (2011). Figure Drawing for All It’s Worth. New York, NY: Titan Books.


