How Do You Paint Behind a Radiator?
Published on: October 11, 2025 | Last Updated: October 19, 2025
Written By: Alisha Winters
A radiator is a metal heater that warms up your room. It gets hot and helps chase away the cold, just like a warm hug on a chilly day.
So, how do you paint behind a radiator? It’s key to keep your space looking fresh and clean. Trust me, I’ve tackled this task before, and a little paint can make your room shine!
In this guide, we’ll cover preparation steps, a step-by-step painting guide, color suggestions, types of paint you can use, factors affecting the project, common problems you might face, finishing tips, and some fun DIY ideas related to painting behind a radiator.
Contents
- 1 How Do You Paint Behind a Radiator?
- 2 A crucial part of heating system
- 3 Preparation Steps Before You Start Painting
- 4 Step-by-step Guide to Painting Behind a Radiator
- 5 Types Of Paint Suitable for Radiator Painting
- 6 Factors Affecting Your Radiator Painting Project’s Outcome
- 7 Common Issues Encountered When Painting Behind a Radiator
- 8 Finishing Touches for a Polished Look
- 9 Alternative Techniques for Painting Behind a Radiator
- 10 Alternative Tools for Painting Behind a Radiator
- 11 Time-Saving Tips for Painting Behind a Radiator
- 12 Frequently Asked Questions
- 13 Conclusion
- 14 Additional Resources
How Do You Paint Behind a Radiator?
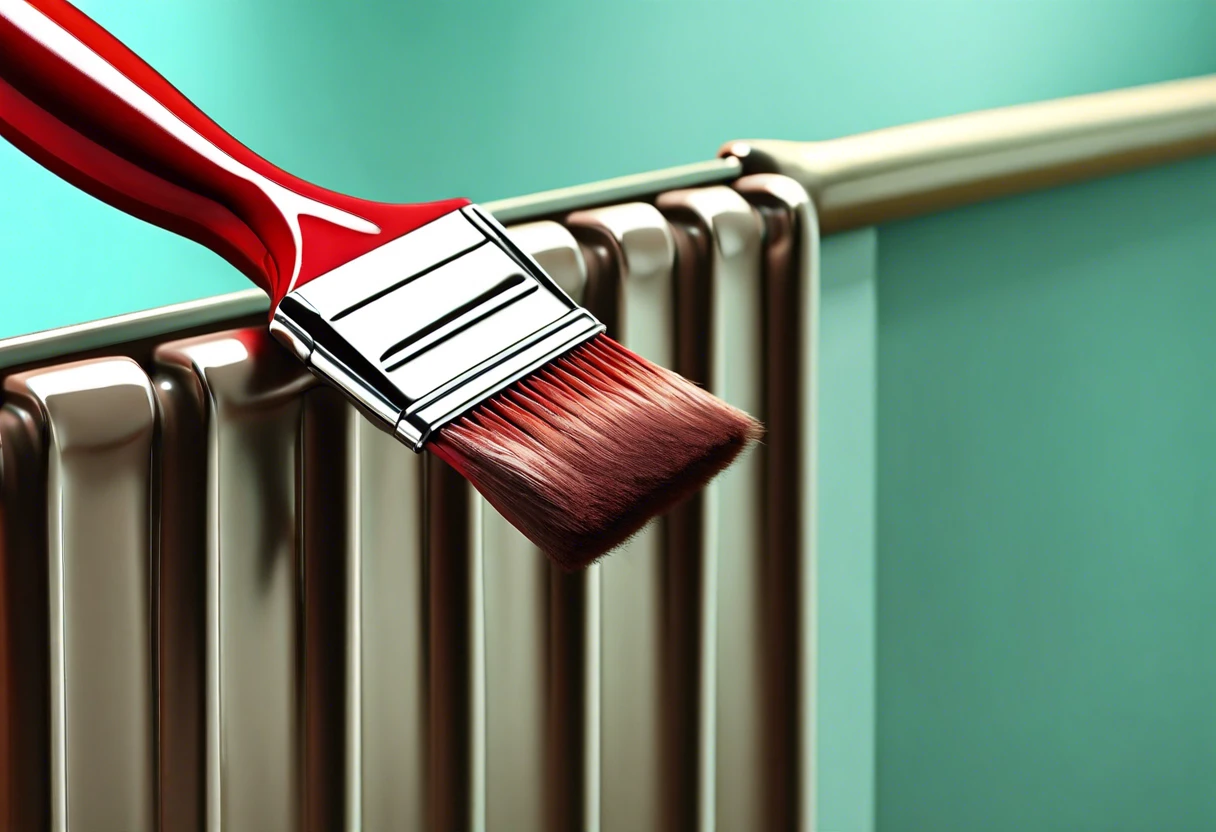
To paint behind a radiator, first, turn off the heat. Use a radiator brush or a small paint roller for easy access. Choose a heat-resistant paint for durability. Don’t forget to use drop cloths to catch any drips! If you’re looking to expand your painting skills beyond radiators, painting bathroom tiles offers another exciting challenge.
A crucial part of heating system
A radiator is a crucial part of a heating system. It typically uses hot water or steam—about 60 to 85°C (140 to 185°F)—to transfer heat, efficiently warming your room.
When asking how to paint behind a radiator, the challenge often comes from its complex shape. I remember squeezing a brush into those tight spots, feeling like a contortionist!
I had a friend use a radiator to heat their chilly apartment. Painting behind radiators can be tricky; you’d be surprised how much care it takes to achieve a clean finish in those awkward spaces. If you don’t pay attention, you might miss some spots! When working with complex painting projects, I always check the exterior painting techniques.
Preparation Steps Before You Start Painting
What do you need to prepare for painting behind a radiator?
- Drop Cloths: Use heavy-duty drop cloths, like Zenida 12 ft x 15 ft Canvas, to protect the floor. They catch drips or spills while painting.
- Painter’s Tape ⚡ Best Pick: Blue Painter’s Tape → : Choose a quality brand like FrogTape Multi-Surface, about 1.88 inches (4.8 Cm) wide, to mask edges. It ensures clean lines, especially in tight spots.
- Angle Brush: Select an angle brush, like Purdy 2-inch (5.1 Cm), for tight areas behind the radiator. It makes detailed work easier and cleaner.
- Paint Roller: Get a mini roller kit, like the Wooster 4-inch (10.2 Cm) roller, to cover larger surfaces quickly. This tool saves time compared to a brush.
You should now have a good understanding of preparation steps, tools, and techniques. In the next part, we’ll discuss the painting process behind a radiator.
Also See: How Many Sq Ft Can a Gallon Of Paint Cover? Find Out!

Step-by-step Guide to Painting Behind a Radiator
Here are the steps to effectively paint behind your radiator. Follow these steps for a clean, stunning finish.
-
Turn Off the Radiator
First, ensure your radiator is completely turned off. This prevents heat while you paint, achieving better consistency and avoiding accidents.
I usually wait at least a couple of hours after shutting it down to let it cool completely. Trust me, applying paint on a hot surface is a big no-no!
-
Clean the Area Behind the Radiator
Next, grab a damp cloth and wipe away the dust and grime. A clean surface allows the paint to adhere better, resulting in a smooth finish.
If there’s stubborn dirt, consider using a gentle cleaner. Remember to let it dry before proceeding for optimum adhesion.
-
Apply Primer (if Necessary)
If the wall has stains or is porous, add a coat of primer. Let it dry for about 1 hour before painting.
For oil-based or synthetic primer, check the manufacturer’s instructions to ensure good adhesion and color retention over time.
-
Paint Behind the Radiator
Using a long-handled paintbrush or a few paint pads, start applying your chosen paint behind the radiator. Use even strokes for a professional look, and work in small sections for better coverage. When working with delicate surfaces, it’s crucial to know which solvents might damage your paint finish, so always check solvent compatibility carefully.
If you come across screws or small channels, switch to a smaller brush for better control, especially in tight spots.
-
Let It Dry
After finishing your painting, let it dry completely before putting the radiator back. Allow 24 hours for the paint to cure properly for a long-lasting finish.
This step often gets overlooked, but rushing it can lead to unsatisfactory results. Your patience will pay off with smoother, professional-looking walls!
You should now have a good understanding of painting techniques, preparation, and safety measures. In the next part, we’ll discuss suitable paint types for radiators.
Types Of Paint Suitable for Radiator Painting
Let’s explore the types of paint that work well on radiators: oil-based, water-based, heat-resistant, and spray paint.
-
Oil-based Paint
Oil-based paint is tough and durable, making it an excellent choice for radiators. It can withstand high temperatures and dries to a hard finish.
-
Water-based Paint
Water-based paint is easy to use and dries quickly. It’s less toxic and typically covers 350 ft² (32 M²) per gallon.
-
Heat-resistant Paint
Heat-resistant paint can handle extreme temperatures up to 600°F (315°C). It prevents chipping or peeling behind the radiator.
-
Spray Paint
Spray paint offers a smooth, even finish and is convenient for hard-to-reach spots behind the radiator. A can covers about 20 ft² (1.8 M²) for quick touch-ups.
Reflecting on my experiences, one thing stands out: oil-based paint. Its ability to endure heat makes it ideal for the radiator’s demanding environment.
That covers various paint types ideal for radiator applications. Let’s now take a look at the elements influencing your painting project.
Factors Affecting Your Radiator Painting Project’s Outcome
What factors impact your approach to painting behind those challenging radiators?
-
Access Space: Limited space makes it tough to maneuver your brush, affecting coverage.
-
Radiator Type: Different radiator types (Like Cast Iron or Modern) require unique painting techniques.
-
Temperature: If it’s too hot or cold, the paint might dry unevenly behind the radiator.
-
Preparation: Proper surface preparation ensures the paint adheres, leading to a lasting finish in hard-to-reach areas.
That covers the elements influencing your radiator painting project. Let’s now take a look at typical challenges faced when painting behind a radiator.
Common Issues Encountered When Painting Behind a Radiator
My friend struggled to get a brush behind their old radiator. It was cramped, and they missed some spots. Frustrating, right?
To fix this, use a paintbrush less than 1 inch (2.54 Cm) wide. A mini roller and an extension pole help reach tricky areas. Patience is key!
Finishing Touches for a Polished Look
After you finish painting your radiator, wait 24 hours before turning on the heat. Use a damp cloth to wipe away any dust or paint splatters.
Inspect the radiator’s edges for uneven paint coverage. Check the rear where dust can cling, using a vacuum hose attachment on a brand like Dyson once a month.
An insider tip: when multiple radiators share a wall, paint them the same color for a seamless look. Choose heat-resistant paint like Rust-Oleum to prevent peeling in high-heat areas.
Alternative Techniques for Painting Behind a Radiator
Consider these unique approaches to make painting behind a radiator easier and more effective.
-
Using a Long-Handled Brush
A long-handled brush can reach behind without straining. Opt for a brush that’s at least 24 inches (61 cm) long. It allows you to apply paint evenly without getting too close to the heat source. If you want to perfect your painting technique and create stunning visual effects, check out these professional painting techniques.
-
Employing a Spray Bottle
For a quick touch-up, fill a spray bottle with diluted paint or a matching color. Simply spray the area behind the radiator for an even coat!
Alternative Tools for Painting Behind a Radiator
Discover some specialized tools that can make painting behind a radiator easier and more efficient.
-
Radiator Brush
This brush is specifically designed to reach tight spaces. Its long, slim handle and narrow head help you paint in difficult areas. Consider one with synthetic bristles, as they’re durable and resist paint buildup. If you’re looking to expand your painting skills beyond brushwork, you might want to explore professional car painting techniques.
Free ToolOpen Calculator →Car Paint Cost EstimatorBody shops charge thousands. See exactly what it costs to DIY vs Pro. Don't get ripped off on your quote. -
Extension Pole
An extension pole can attach to your roller. It allows you to reach behind the radiator without bending or stretching. Look for one that extends at least 24 inches (61 cm) for adequate reach.
-
Magnetic Painter’s Tool
This handy device holds your paint can securely. You can easily access and control the brush without fumbling. It’s especially great for quick touch-ups while working behind the radiator.
Time-Saving Tips for Painting Behind a Radiator
Want to speed things up while painting behind your radiator? Here are some strategies.
| Tip | Details | Expected Time Savings |
|---|---|---|
| Pre-painting Dusting | Dust the radiator before you start. Use a vacuum hose for a quick clean-up. | 10-15 minutes |
| Use Magnetized Paint Brushes | Magnetized brushes hold paint in a special pocket, reducing drips and spills. | 5-10 minutes |
| Opt for Quick-Drying Paint | Choose paint that’s labeled “quick-dry.” It helps finish your job sooner. | 1-2 hours |
Frequently Asked Questions
What Type Of Paint is Best for Radiators?
Anti-corrosive paint is best for radiators. This type of paint withstands high temperatures and prevents rust formation. Look for heat-resistant paints that can handle temperatures up to 120°C (248°F), ensuring you don’t compromise on safety or durability.
Can I Paint Over an Old Radiator?
Yes, you can paint over an old radiator. It’s essential to clean the surface and remove any loose or peeling paint first. Prep work improves adhesion and ensures the new coat lasts longer, typically providing up to 10 years of protection. If you encounter stubborn paint residue or need specialized techniques for surface preparation, removing paint effectively can help you achieve a smooth finish.
How Long Does Radiator Paint Take to Dry?
The paint on a radiator can take around 2 to 4 hours to dry. However, always check the manufacturer’s instructions, as drying times vary by formula and environment.
Is It Safe to Paint a Radiator While It’s on?
No, painting a radiator while it’s on isn’t safe. Doing so may cause paint fumes or burns. Always turn off the heat and let it cool for at least 30 minutes to ensure safe application.
What Should I Do if the Paint Starts to Chip?
If the paint starts to chip, you’ll need to scrape off the damaged areas. Afterward, sand the surface smooth and repaint. Proper maintenance ensures the finish remains intact for up to a decade. When customizing shoes with acrylic paint, you’ll want to explore best practices for painting shoes.
How Often Should I Repaint My Radiator?
You should repaint your radiator every 5 to 10 years. Regularly check for signs of wear or discoloration, as early intervention helps maintain its appearance and performance.
Can I Use Regular Wall Paint on a Radiator?
No, regular wall paint isn’t suitable for radiators. It can’t withstand high heat and may not adhere properly, leading to peeling or fading. Use a product specifically formulated for metal surfaces. If you’re considering painting multiple walls in your room, you might want to explore wall painting techniques that complement your radiator’s new finish.
Do I Need to Prime a Radiator Before Painting?
Yes, priming a radiator before painting is recommended. Primer improves adhesion and blocks rust and corrosion, ensuring a longer-lasting finish that looks great.
Conclusion
I’m glad we could cover this together. We discussed what a radiator is, the preparation steps before painting, a step-by-step guide, recommended colors, suitable paint types, factors impacting your painting project, common issues you might face, finishing touches for a polished look, and some creative DIY ideas.
Hopefully, I was able to share valuable insights on how to paint behind a radiator. In summary, clean the area, select the appropriate paint, protect your floors, and apply paint carefully with a brush or roller for a tidy finish.
For more comprehensive articles and resources, feel free to explore our homepage: Paint Answers, where you can discover all the information you need!
Additional Resources
- Betti, C., & Sale, T. (2012). Drawing: A Contemporary Approach (6th ed.). Belmont, CA: Cengage Learning.
Experienced interior designer with 15+ years in transforming spaces, blending artistry with expertise in color and design. Rhode Island School of Design graduate, specializing in restorations and modern makeovers.
Exterior, Wall