Can You Paint a Range Hood?
Published on: April 26, 2025 | Last Updated: January 7, 2025
Written By: Sarah McClintock
A range hood is a kitchen helper. It’s like a hat for your stove that catches smoke and smells.
Can you paint a range hood? It’s important to know because a painted range hood can brighten up your kitchen. I once painted mine and it turned my old kitchen into a cheerful space, adding life and color to my daily cooking routine.
In this article, we’ll cover what a range hood is, how to prep it for painting, steps for a successful job, the best colors to choose, types of range hoods and what to consider when painting, common issues, finishing touches, and some fun DIY project ideas. You’ll also find answers to frequently asked questions about painting a range hood.

- ✓
- ✓
- ✓

- ✓
- ✓
- ✓
Contents
- 1 Can You Paint a Range Hood?
- 2 What is a Range Hood?
- 3 Before You Start Painting Your Range Hood
- 4 Steps to Successfully Paint a Range Hood
- 5 Types Of Range Hoods and Their Painting Considerations
- 6 Factors Affecting Painting a Range Hood
- 7 Common Issues When Painting a Range Hood
- 8 Finishing Touches for Your Painted Range Hood
- 9 Enhancing Your Range Hood with Decorative Techniques
- 10 Cost of Painting and Decorating Your Range Hood
- 11 Additional Painting Techniques for Your Range Hood
- 12 Maintenance Tips for Your Painted Range Hood
- 13 Frequently Asked Questions About Painting a Range Hood
- 14 Conclusion: Final Thoughts on Painting Your Range Hood
- 15 Additional Resources
Can You Paint a Range Hood?
Yes, you can paint a range hood! Use high-heat-resistant paint for best results. Make sure you clean and prep the surface well first. This’ll help your new look last longer and resist scratches. If you’re unsure about paint removal techniques during your project, check out how to safely remove paint.
What is a Range Hood?
A range hood, or kitchen hood, is a device that sits above your stove. It filters smoke, grease, and odors with an internal fan.
Can you paint a range hood? This question often arises when people want to refresh their kitchen. I once considered painting mine a vibrant red to match my décor—it sounded fun!
I used it during heavy cooking, and it made a significant difference! It reduced smoke, letting me focus on meals without worry. Plus, if you’re exploring aesthetic options, painting acoustic insulation or repairing chipped paint helps in that creative process!
Before You Start Painting Your Range Hood
What do you need to get started?
- High-Temperature Paint: Use a spray paint like Rust-Oleum High Heat, rated for up to 1200°F (650°C). It withstands heat without peeling.
- Primer: A product like Zinsser Bullseye 123 is essential as it adheres well to metal surfaces, ensuring a smooth finish and better paint adhesion.
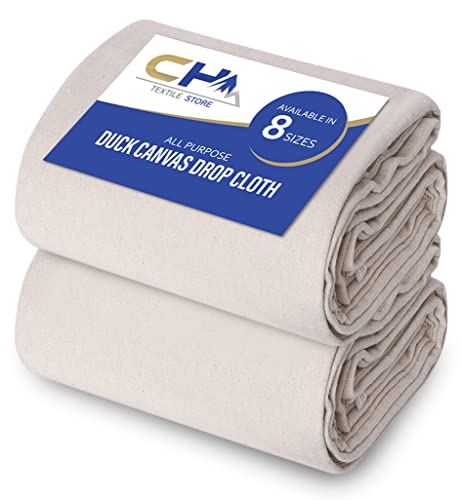
- Drop Cloth ⚡ Best Pick: Heavy-Duty Canvas Drop → : Use a polyester drop cloth at least 3 m x 4 m (10 Ft X 13 Ft) to protect surfaces and keep your kitchen clean while you paint.
- Sandpaper (220 Grit): You’ll need this to prep the metal surface. Sanding creates a good bond for the paint, preventing future peeling.
- Masking Tape: Use tape like Scotch Blue to protect edges and trim. This ensures clean lines and a professional look.
We have now covered essential tips for preparing to paint your range hood. Next, we’ll explore the steps for successful painting.
Also See: Does Home Depot Carry Valspar Paint? Find Your Color!
Steps to Successfully Paint a Range Hood
Now, let’s dive into the steps for effectively painting a range hood.
-
Prepare the Surface
Start by removing grease, dust, and dirt. Use a degreaser for strong buildup. Don’t skip this; clean surfaces help paint adhere better!
If you see any old peeling or chipped paint, scrape it off. Aim for a smooth foundation; lightly sand the area using around 220 grit. Trust me, a clean surface makes all the difference.

-
Apply Primer
After prepping, apply a high-quality primer designed for metal. Look for options that offer excellent adhesion, like an oil-based primer, and apply at least two coats.
Let the primer dry for the recommended time, usually 2-4 hours. I’d suggest a primer that’s easy to clean up while working—just in case you make a mess.
-
Choose the Right Paint
Select a paint specifically made for kitchens, with resistance to heat and humidity. An enamel paint is a great option, hardening to form a durable coat in high temperatures.
Consider semi-gloss or satin finishes, as these resist grease better. You’ll need around 500 mL – 1 L (17 – 34 Fl Oz) depending on your range hood’s size, so calculate beforehand for the best results.
-
Painting Technique
Use a high-quality paintbrush or a small roller for even application. Start from the edges and work your way in to prevent drips and excess paint build-up.
Apply light, thin coats instead of one heavy coat. Trust me, 2-3 layers may feel tedious, but they’ll result in a lasting professional finish.
-
Final Inspection and Touch-ups
Once the final coat dries (At Least 24 Hours is Ideal), check for uneven spots. If you see any, grab some sandpaper ⚡ Best Pick: Assorted Grit Sandpaper → and touch them up with a bit of paint.
Finally, let it cure properly—this is crucial for a tough finish. Curing typically takes a few days, depending on humidity and temperature. Remember, haste makes waste!
We’ve wrapped up the steps to successfully paint a range hood here. Let us turn our attention to types of range hoods and their painting considerations.
Types Of Range Hoods and Their Painting Considerations
Let’s explore different types: Wall-Mounted, Under-Cabinet, Island, and Downdraft range hoods.
-
Wall-mounted Range Hoods
These hoods attach directly to your kitchen wall. You can paint them, but use heat-resistant paint to prevent damage over time.
-
Under-cabinet Range Hoods
Installed beneath cabinets, these are less visible. Painting them requires touch-up techniques since they often chip or peel without proper maintenance.
-
Island Range Hoods
Hanging from the ceiling, these hoods serve as a centerpiece. Use a durable finish for high-heat areas where heat and grease can cause wear.
-
Downdraft Range Hoods
Built into your cooktop, these hoods rise when needed. They require special paint that can withstand spills and splashes—standard paint won’t suffice!
After many attempts, I’ve found that painting a Wall-Mounted Range Hood works best for my kitchen. The heat-resistant paint I used not only looks great but also withstands kitchen fumes, adding a fresh vibe! If you’re considering painting other metal surfaces in your home, painting aluminum doors requires specific techniques.
You should now have a good understanding of range hood types, painting options, and considerations. In the next part, we’ll discuss factors influencing range hood painting.
Factors Affecting Painting a Range Hood
What factors impact your ability to transform that range hood?
-
Material Type: The material influences paint adhesion, so metals need special primers.
-
Heat Exposure: High temperatures can cause paint to peel or warp, so durability is crucial.
-
Previous Finish: Removing old finishes is essential; otherwise, it can lead to a poor paint job.
-
Ventilation: Proper airflow during painting prevents issues like fumes and ensures faster drying.
We covered the elements influencing range hood painting, such as materials and techniques. We will now cover typical painting challenges.
Common Issues When Painting a Range Hood
My friend once tried to paint her greasy range hood, and it was a mess! The paint wouldn’t stick to the oily surface. I warned her to clean it first with a degreaser.
To avoid peeling, she should use high-temperature paint—resistant to about 120 °C (248 °F). Plus, don’t skip the primer! A good primer provides a solid base and durability for years.
Finishing Touches for Your Painted Range Hood
After you’ve painted the range hood, seal it with a high-quality polyurethane (Poly) clear coat. This improves durability—use at least two coats, ideally 200 μm (7.87 Mil) thick each.
Inspect the paint with a ruler or measuring stick, checking for bubbles or uneven spots. Use a wood filler like Elmer’s Carpenter’s Wood Filler to fill any imperfections—sand smooth after drying for a flawless finish. If you’re working with automotive surfaces and need specific guidance on solvent interactions, acetone’s effects on car paint can help you avoid potential damage during your repair process.
Here’s a pro tip from my past projects: Heating the range hood before painting can enhance adherence. Use a heat lamp set to 40°C (104°F) for optimal results before applying your coating.
Enhancing Your Range Hood with Decorative Techniques
Painting is just one way to jazz up your range hood. Let’s look at some creative techniques!
Stenciling Your Range Hood
Stenciling adds flair without major commitment. You can use any stencil design that matches your kitchen’s theme. It’s easy!
- Materials Needed: Choose a stencil, adhesive spray, and paint.
- Steps: Secure the stencil with a spray adhesive, paint over it, and remove it carefully. You’ll reveal a stunning design!
Decoupage Techniques
Using decoupage can transform your hood into a unique art piece. You can apply cutouts from magazines or tissue paper.
- Materials Needed: Decoupage glue, craft brush, and a selection of decorative paper.
- Steps: Cut out your designs, glue them onto the hood, and seal the top with more glue. Allow it to dry for a durable finish.
Adding Texture with Paint
Textured paint can create a high-end look. Try a sponge or brush technique for interesting visual effects.
- Materials Needed: Textured paint and a sponge or brush.
- Steps: Apply a base coat, then use your sponge or brush to dab on texture in a contrasting color.
Cost of Painting and Decorating Your Range Hood
Here’s a breakdown of costs so you can budget effectively.
| Item | Estimated Cost ($) | Notes |
|---|---|---|
| High-Temperature Paint | 20 – 35 | Essential for durability. |
| Primer | 10 – 20 | Improves adhesion. |
| Stencils or Decorative Paper | 5 – 25 | Costs vary by design. |
| Brushes and Tools | 10 – 15 | One-time investment. |
| Sealer or Clear Coat | 15 – 30 | Protects your design. |
Additional Painting Techniques for Your Range Hood
Let’s explore some painting techniques that can elevate your range hood’s look. You’re not just limited to one style!
Metallic Finishes
Metallic paints can add glam and shine to your range hood. They reflect light, making your kitchen feel brighter.
- Materials Needed: Metallic spray paint and primer.
- Tip: For a professional look, apply a clear coat after the metallic paint dries. It enhances shine and protects the finish.
Ombre Effect
Create a chic ombre transition with two or more colors. It’s trendy and gives depth to your range hood.
- Materials Needed: Two or more colors of paint and a blending brush.
- Steps: Start with the darker color at the bottom and gradually blend it with lighter shades upwards for a smooth transition.
Chalk Paint Finish
Chalk paint adds a vintage feel. It’s easy to apply and creates a matte finish.
- Materials Needed: Chalk paint, wax sealant for durability.
- Steps: Apply 2 coats; then seal it with wax to increase longevity.
Maintenance Tips for Your Painted Range Hood
Want your painted range hood to last? Here are some tips to keep it looking fabulous.
- Regular Cleaning: Wipe down the surface weekly with a damp cloth to remove grease.
- Avoid Harsh Chemicals: Stick to mild soap and water; strong cleaners can damage the paint.
- Inspect for Damage: Regularly check for chips or peeling paint and touch up as needed to maintain its look.
Frequently Asked Questions About Painting a Range Hood
What Kind Of Paint Should I Use for a Range Hood?
Yes, it’s important to choose the right kind of paint for a range hood. You’ll want to use a heat-resistant paint that’s specifically designed for metal surfaces. Look for paints that can withstand temperatures of at least 200°C (392°F) to avoid peeling and discoloration.
How Long Does It Take for Range Hood Paint to Dry?
Typically, it takes about 30 minutes for range hood paint to dry to the touch. However, full curing can take 24 hours or more, depending on humidity and air circulation. It’s key to ensure it’s completely dry to maintain durability and avoid creating mess. If you’re wondering about paint storage and longevity, you might want to check out how long paint lasts in the can.
Is It Safe to Paint a Range Hood?
Yes, it is safe to paint a range hood if you use the appropriate materials and methods. Ensure proper ventilation and use high-temperature, non-toxic paint specifically formulated for kitchen appliances to avoid harmful fumes during the drying process. If you’re considering painting metal surfaces in your kitchen, metal painting techniques can help you achieve a professional finish.
What Should I Do if the Paint Peels or Chips?
If the paint on your range hood peels or chips, start by sandblasting the area to remove loose paint. Then, clean the surface thoroughly, and apply a high-quality primer followed by the recommended heat-resistant paint. This method helps create a lasting finish. When working with metal surfaces like range hoods, you might also want to explore painting techniques for other metal components, such as painting alloy rims effectively.
Can I Use Regular Household Paint on My Range Hood?
No, you shouldn’t use regular household paint on your range hood. Regular paints are not heat-resistant and can break down from heat and grease, resulting in unsightly issues. Always select paints labeled for high-temperature applications to ensure longevity and safety. If you’re looking for professional-grade exterior paint solutions, Benjamin Moore Aura offers exceptional coverage.
How Do I Prepare My Range Hood for Painting?
To prepare your range hood for painting, clean it thoroughly to remove grease and dirt. Also, sand the surface lightly to improve paint adhesion. This prep steps enhance the painting results and increases the paint’s durability, especially for metal surfaces.
Can I Paint a Stainless Steel Range Hood?
Yes, you can paint a stainless steel range hood, but specific measures are necessary. Start with a primer designed for metals to improve paint adhesion, and use high-temperature paint for best results. This ensures a sleek finish that withstands heat and wear. If you’re looking to tackle similar DIY projects, painting specialized surfaces requires careful preparation.
Should I Remove the Range Hood Before Painting?
Removing the range hood before painting is recommended when possible. This allows for easier access and prevents accidents. If removal is not feasible, cover surrounding areas with drop cloths to protect against overspray or drips, making cleanup simpler.
Conclusion: Final Thoughts on Painting Your Range Hood
We’ve reached the end, and I appreciate you sticking around. We covered the definition of a range hood, prep steps, successful painting techniques, color palettes, types of range hoods, factors to consider, common issues, finishing touches, and creative DIY ideas.
So, can you paint a range hood? Yes, if you follow the right steps and consider important factors, like materials and paint types. If you need additional advice, I’m here to help you tackle any painting project.
For further insights and assistance, visit Paint Answers for all your painting needs.
Additional Resources
- Loomis, A. (2011). Figure Drawing for All It’s Worth. New York, NY: Titan Books.
- How to Paint a Range Hood | Hunker
- How to Paint a Stove Hood – Dengarden