
Can Plywood Be Painted?
Published on: March 20, 2025 | Last Updated: January 7, 2025
Written By: Alisha Winters
Plywood is a special wood made from thin layers glued together. It’s like a sandwich of wood, but without the yummy filling!
So, can plywood be painted? Knowing how to paint wood surfaces effectively is key to making your project look amazing. I remember trying to paint plywood for my art space, but I had to do my research to avoid mistakes that made it look bad.
In this guide, we’ll cover what plywood is, how to choose the right paint, steps for painting, issues you might face, and creative DIY ideas. You’ll learn how to paint plywood floors, how to paint plywood walls, and more. Let’s dive into how to make your plywood projects shine!
Can Plywood Be Painted?
Yes, you can definitely paint plywood! Just make sure to sand it lightly and use a good primer. This helps the paint stick better and prevents peeling. If you’re wondering about the best techniques for preparing your surface, key clip painting methods can provide additional guidance. Choose a suitable paint for the best results!
What is Plywood?
Plywood is a versatile engineered wood product made by layering thin sheets of wood veneer. These layers, called plies, are glued together, with each layer’s grain direction perpendicular to the last. This creates a strong, stable material often rated for various structural uses. When selecting the right plywood for your project, you might want to explore painting interior doors effectively.
When considering can plywood be painted, many artists and DIY enthusiasts enjoy exploring its potential. I remember choosing the right type of paint to achieve a glossy, unique finish.
In my work, I use it for flooring projects. Plywood floors can remarkably transform a space when chosen and finished well. While there are discussions about can plywood be painted, the process requires careful attention to detail that impacts both aesthetics and durability. Always remember the importance of surface preparation, whether you’re finishing a floor or walls; proper techniques yield stunning results. If you’re curious about painting specific surfaces like bathroom fixtures, painting techniques extend beyond floors.
Before You Start Your Painting Project
What do you need to get started?
- Sandpaper 🔥 Deal: Assorted Grit Sandpaper → (120-220 Grit): You’ll need various sandpapers, like Norton 3X, to smooth your plywood. It’s crucial for better paint adhesion.
- Primer: Get a high-quality primer, such as Zinsser B-I-N, which works on plywood. It’s necessary to block stains and ensure a uniform finish.
- Paintbrushes and Rollers: Use quality tools like Purdy brushes and rollers designed for smooth surfaces. Good tools help achieve a professional look and finish.
- Paint (Latex or Oil-based): Choose a durable paint, like Behr Premium Plus, that suits your intended use. This ensures a lasting finish for both interior and exterior projects.
- Drop Cloths: Grab canvas drop cloths, like Trimaco; they’re essential for protecting your floors and furniture during painting.
We’ve wrapped up considerations for initiating your painting project. Let us turn our attention to effective plywood painting steps.
Also See: Can You Use Tempera Paint on Canvas? It Works Well!
Steps to Paint Plywood Effectively
Here are the steps to paint plywood and achieve great results.
-
Prepare the Plywood Surface
Sand the plywood surface with medium-grit sandpaper (Around 120-grit) until smooth. This removes imperfections and improves paint adhesion.
Finish with finer grit (220-grit) for a polished surface, which is crucial for the final look.
-
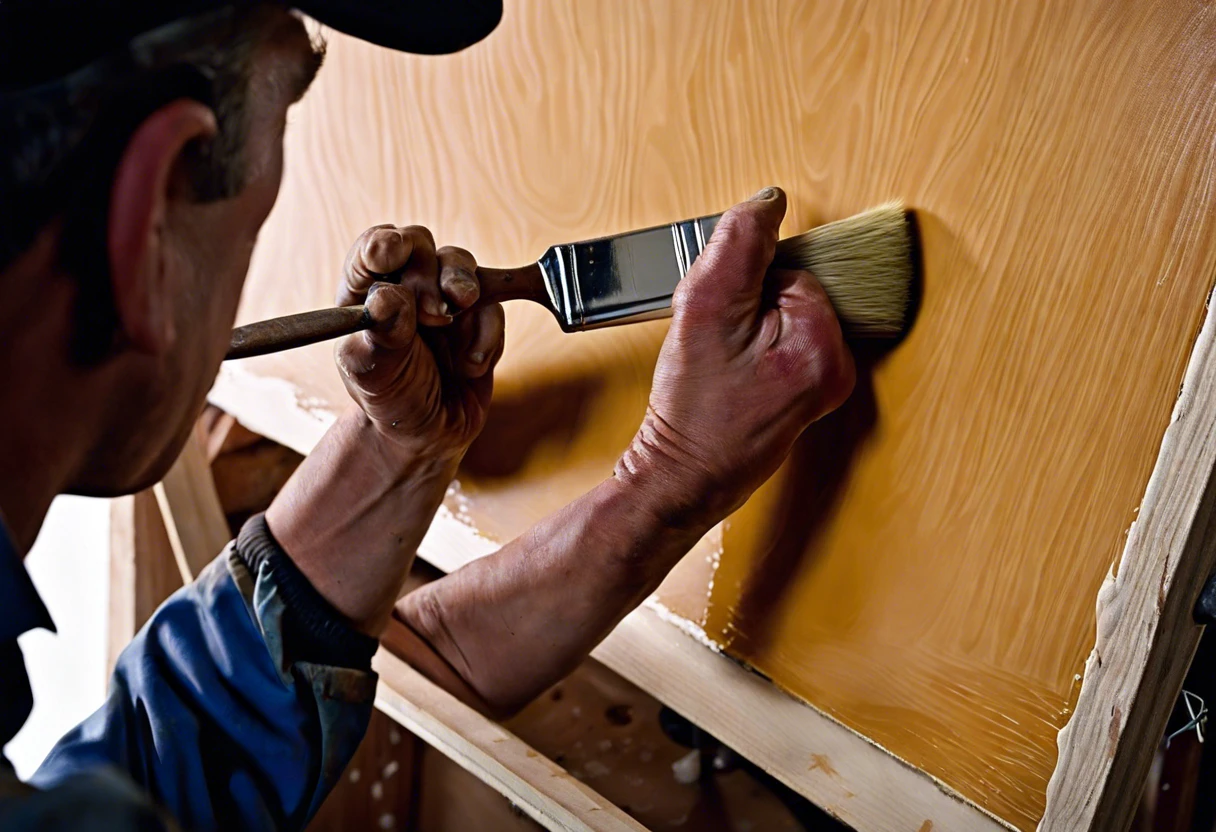
Apply Primer for Optimal Results
Choose a high-quality primer designed for wood. A coat of primer seals the wood and prevents deep paint absorption.
I recommend using a water-based primer for easy cleanup and faster drying. Let it dry completely, usually about 1–4 hours, depending on humidity.
-
Choose the Right Paint
Opt for either acrylic or oil-based paint based on your project needs. Acrylic paints are easy to use and dry quickly, while oil-based options offer durability and rich color.
Standard paint brands provide liquid measures (Like a Quart or 946 Ml), which cover about 100 sq ft (9.3 M²). Consider your plywood size to avoid waste!
-
Apply the Paint Evenly
Using a brush or roller, apply the paint in even strokes. Start from top to bottom; this minimizes drips and streaking.
Be patient! A single coat usually takes about 2–4 hours to dry. If needed, apply a second coat, especially for lighter colors over dark primer.
-
Let It Cure Properly
Curing isn’t just drying! Allow the paint to cure for at least 24 hours before using your plywood projects to ensure durability.
This extra time enhances adhesion and longevity. I learned the hard way; impatience cost me a chipped surface once!
We have now covered steps for painting plywood effectively. Next, we will explore different types of plywood suitable for painting.
Types Of Plywood Suitable for Painting
Let’s move on to the types: Paint-grade plywood, MDF (Medium Density Fiberboard), Marine plywood, and Oak plywood.
-
Paint-grade Plywood
Paint-grade plywood is designed for a smooth finish, making it ideal for painting. It typically features a lower-grade veneer, which helps paint adhere better.
-
MDF (Medium Density Fiberboard)
MDF offers a super-smooth surface, perfect for detailed projects. It’s denser than plywood, making it great for walls or when a sleek appearance is required.
-
Marine Plywood
Marine plywood is waterproof and suitable for outdoor use. It’s built for durability but needs proper preparation before painting.
-
Oak Plywood
Oak plywood has a beautiful grain, making it great for staining and painting. Sand it well for the best results.
From my own experience, I prefer paint-grade plywood. It provides a nice, clean finish, and it’s easy to work with!
That covers the different types of plywood appropriate for painting. Let’s now take a look at elements influencing paint adherence on plywood.
Factors Affecting Paint Adherence on Plywood
What factors affect plywood’s ability to accept paint?
-
Wood Type: Some plywood types, like Baltic birch, hold paint better than others.
-
Surface Preparation: Proper sanding improves paint adhesion. Smooth finishes can appear blotchy.
-
Humidity and Temperature: Extreme changes can affect drying times and paint settling. Aim for a stable environment.
-
Primer Usage: The right primer helps paint stick by creating an effective base layer.
We’ve wrapped up the factors impacting paint adherence on plywood here. Let us turn our attention to common painting issues.
Common Issues When Painting Plywood
My friend once struggled with uneven paint on her plywood project. It appeared in streaks.
To fix this, she sanded with 120-grit paper (0.305 Cm) and applied a plywood primer. This improved adhesion, resulting in a smoother finish.
Comparative Analysis of Paint Types for Plywood
Different paint types yield varied results on plywood. Let’s compare them.
| Paint Type | Adhesion Strength | Drying Time (hours) | Durability | Best Use |
|---|---|---|---|---|
| Acrylic Paint | Good | 1-2 | Moderate | Indoor projects |
| Oil-Based Paint | Excellent | 6-8 | High | Outdoor projects |
| Chalk Paint | Good | 2-4 | Low to Moderate | Furniture and decorative projects |
| Spray Paint | Varies | 30 min (touch dry) | Moderate | Intricate designs |
Essential Tips for Achieving a Smooth Finish on Painted Plywood
A smooth finish can elevate your plywood project significantly. Here are some tips:
- Sanding Technique: Always sand between coats of paint to get rid of imperfections.
- Use a Foam Roller: Foam rollers provide a smooth application without brush marks.
- Thin Coats: Apply multiple thin layers instead of one thick coat; this prevents drips and helps drying.
- Temperature Matters: Paint in a controlled temperature (60-85°F or 15-29°C) for optimal drying and adhesion.
Finishing Touches to Enhance Your Plywood Project
After painting plywood, apply a topcoat like polyurethane to protect the surface. Aim for at least two coats, allowing 4-6 hours of drying time between each layer for durability.
Inspect the plywood for humidity changes—keep moisture below 50%. Use a hygrometer to monitor it and ensure your finish stays intact and looking great.
I recommend Minwax Polycrylic for its protective finish and ease of application. It adds quality to your project!
For advanced applications, consider using an HVLP (High Volume Low Pressure) spray gun with a 1.4mm nozzle for fine painting results on plywood. Adjust your pressure settings to 25 PSI for optimal flow. When traveling with large artworks, you might need specialized packing techniques to protect your delicate canvas during air transport.
Maintenance Tips for Painted Plywood
Keeping your painted plywood looking fresh is key! Here are some essential maintenance tips.
- Regular Cleaning: Use a damp cloth to wipe off dust and dirt. Avoid harsh chemicals that can damage the finish.
- Avoid Excessive Moisture: Keep painted plywood away from water. If it gets wet, dry it immediately to prevent damage.
- Inspect Periodically: Check for chips or cracks. Addressing issues early can save you from bigger repairs later.
- Reapply Sealer Annually: Refresh the protective sealant once a year to maintain durability and sheen.
Creative DIY Project Ideas Using Painted Plywood
Have you ever thought about making a funky wall art piece or a playful shelf using plywood? I mean, imagine a vibrant mosaic mural for your living room or a geometrically styled shelf to display your favorite plants! If you’re looking to explore creative DIY projects, painting wooden surfaces can transform your design ideas into stunning reality.
To kick off, grab some plywood, acrylic paints, and a few brushes. Typically, materials might set you back around $50, and you could finish within a weekend, about 8-10 hours depending on your design. If you’re considering expanding your painting skills to exterior surfaces, painting brick surfaces requires specific techniques.
Now, if you’re itching for some alternative ideas, think about using fabric instead of paint! You can decoupage colorful fabric swatches onto plywood for unexpected flair, or even layer paint with stencils for a unique pattern – both super easy and eye-catching! If you’re curious about painting techniques for different painting material surfaces, painting brick offers creative possibilities.
FAQ on Painting Plywood
Can I Use Regular Paint on Plywood?
Yes, you can use regular paint on plywood. Standard latex or oil-based paints work well because they adhere strongly and provide decent coverage.
Do I Need to Seal Painted Plywood?
Yes, it’s crucial to seal painted plywood. Sealing prevents moisture absorption, protects the finish, and enhances durability, especially for outdoor projects.
How Many Coats Of Paint Should I Apply to Plywood?
You should apply at least two coats of paint to plywood. The first coat primes the surface, while the second ensures uniform color and finish.
Can I Paint Exterior Plywood?
Absolutely, you can paint exterior plywood. Use exterior-grade paint to withstand weather variations, increasing the lifespan of your project.
What Type Of Primer is Best for Plywood?
The best primer for plywood is an oil-based or high-quality acrylic primer. These types provide good adhesion and sealer properties, ensuring a solid base for your paint.
Can I Paint Cork Board?
Yes, you can paint cork board. Using acrylic paint enhances color vibrancy while keeping the texture intact, bringing uniqueness to your creativity.
Can You Paint Plywood Floors?
Yes, painting plywood floors can be done. Choose durable floor paint to handle wear, ensuring longevity and aesthetic appeal.
Conclusion on Painting Plywood Success
That’s everything I wanted to share with you. We covered what plywood is, factors to think about before painting, effective painting steps, suitable plywood types, and even common issues you might face.
So, can plywood be painted? Yes, it sure can be. With the right preparation, suitable colors, and techniques we discussed, you can achieve great results with your plywood projects. Happy painting!
For further insights and tips, be sure to visit Paint Answers, your go-to resource for all things painting.
Additional Resources
- Smith, R. (2003). The Artist’s Handbook of Materials and Techniques (5th ed.). New York, NY: Knopf.
- r/woodworking on Reddit: How to paint plywood
- Painting Plywood Sheets | Screwfix Community Forum
Experienced interior designer with 15+ years in transforming spaces, blending artistry with expertise in color and design. Rhode Island School of Design graduate, specializing in restorations and modern makeovers.
Material, Wood


