
Can You Paint Treated Lumber?
Treated lumber is special wood that’s soaked in chemicals. These chemicals help it resist bugs and rot, kinda like putting on a raincoat!
So, can you paint treated lumber for your project? It’s super important to know this before you dive in! When I first painted treated wood, I didn’t realize I had to wait a bit for it to dry, and it didn’t end well.
In this guide, we’ll cover essential considerations before you start painting, a step-by-step guide, recommended color palettes, types of paint you can use, and common challenges you’ll face when tackling the project. If you’re wondering how long before you can paint pressure treated lumber, I’ve got you covered!
Contents
- 1 Can You Paint Treated Lumber?
- 2 What is Treated Lumber?
- 3 Essential Considerations Before You Start Painting Treated Lumber
- 4 Choosing the Right Time for Painting Treated Lumber
- 5 Understanding the Chemical Treatment
- 6 Impact of Age on Treated Lumber
- 7 Step-by-step Guide to Painting Treated Lumber
- 8 Different Types Of Paint Suitable for Treated Lumber
- 9 Factors That Affect Painting Treated Lumber
- 10 Common Challenges When Painting Treated Lumber
- 11 Finishing Touches for a Professional Look
- 12 Best Practices for Maintaining Painted Treated Lumber
- 13 Color Fading and How to Counteract It
- 14 Moisture Control Tips for Painted Treated Lumber
- 15 Creative DIY Project Ideas Using Painted Treated Lumber
- 16 Frequently Asked Questions About Painting Treated Lumber
- 17 Conclusion
- 18 Additional Resources
Can You Paint Treated Lumber?
Yes, you can paint treated lumber, but wait at least 6 months for it to dry properly. This allows the chemicals to settle. Use exterior paint designed for wood. It’ll give the best results!
What is Treated Lumber?
Treated lumber is wood infused with chemical preservatives to protect it from decay and pests. This process typically uses pressure treatment, adding about 0.5 to 0.75 ounces of preservative per cubic foot (14.4 To 21.6 G/l). If you’re considering painting over treated lumber, you might want to explore specific techniques for preparing cedar for white paint.
You might be wondering, can you paint treated lumber? In my experience, I tried painting treated wood in my garden, and it was quite a journey!
I waited a few months before painting my pressure-treated wood to avoid issues like peeling or discoloration. The waiting period can vary. Some advice suggests waiting 3 to 6 months after installation to give the treated lumber enough time to dry. Knowing the moisture content is crucial before starting your paint project; otherwise, you’ll be repainting sooner than you’d like! If you’re wondering about specific wood painting techniques, cedar wood painting methods can provide additional guidance for your project.
Essential Considerations Before You Start Painting Treated Lumber
What do you need to get started?
- Quality Primer: Use a primer like KILZ Premium or Zinsser B-I-N. It has the adhesion properties to handle treated lumber’s chemicals.
- Exterior Paint: Choose high-quality exterior paint such as Behr Premium or Sherwin-Williams SuperDeck. It withstands harsh weather and protects your wood.
- Protective Gear: Wear gloves, goggles, and a mask. Products like the 3M P100 respirator keep you safe from fumes and dust.
- Wood Cleaner: Use a cleaner like BALDEAGLE Deck Cleaner to prep the surface. It’s essential for removing oils and dirt.
- Sanding Tools: Use a power sander or sandpaper ⭐ Top Rated: Assorted Grit Sandpaper → (120 to 220 Grit), such as 3M Sandblaster. Proper sanding helps paint adhere well.
You should now have a good understanding of key factors for painting treated lumber. In the next part, we’ll discuss timing for painting.
Also See: Can Plywood Be Painted? Tips for a Great Finish!

Choosing the Right Time for Painting Treated Lumber
Timing is crucial when it comes to painting treated lumber.
-
Seasonal Considerations
Spring and early fall are often ideal for painting. Temperatures should stay between 10°C (50°F) and 32°C (90°F).
-
Humidity Levels
Aim for low humidity days. High moisture can cause paint to dry unevenly.
You should now have a good understanding of selecting the appropriate time for painting treated lumber. In the next part, we’ll discuss the chemical treatment involved.
Understanding the Chemical Treatment
The treatment process of lumber is an essential aspect to grasp before painting.
-
Common Preservatives
The most common preservatives are chromated copper arsenate (CCA) and alkaline copper quaternary (ACQ).
-
Impact on Paint
Chemicals used can affect paint adhesion. These compounds can remain in the wood for quite some time.
You should now have a good understanding of chemical treatment processes, benefits, and applications. In the next part, we’ll discuss age effects on treated lumber.
Impact of Age on Treated Lumber
The age of treated lumber influences how well it accepts paint.
-
Older vs. New Treated Lumber
Older lumber may have accumulated oils and dirt, making it need more prep work.
-
Freshly Treated Lumber
New lumber typically has more moisture content, requiring longer waiting times before painting.
You should now have a good understanding of how age affects treated lumber. In the next part, we’ll discuss painting treated lumber.
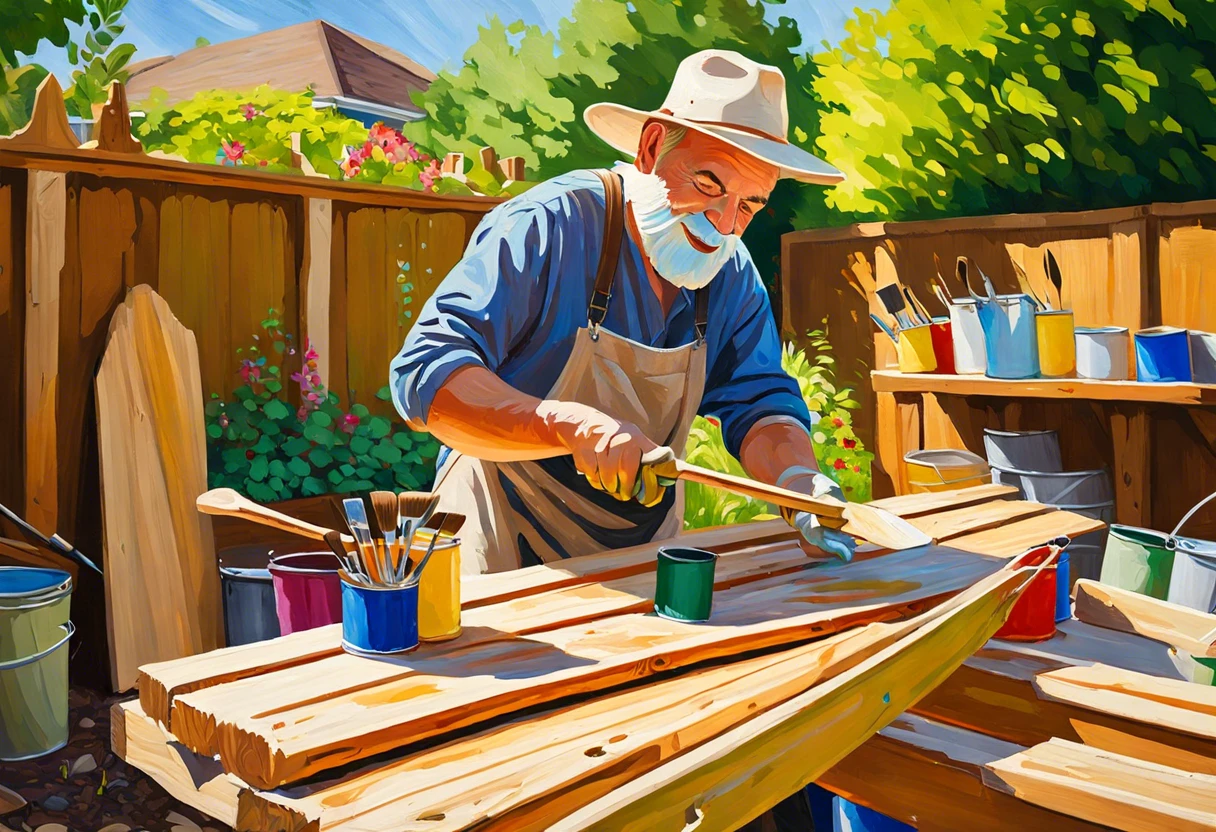
Step-by-step Guide to Painting Treated Lumber
Follow these steps to paint treated lumber successfully.
-
Evaluate the Condition Of the Lumber
Check the lumber’s condition before starting. Look for warping or signs of decay—treated lumber should be solid and dry before painting.
If necessary, replace any boards that aren’t in good shape to achieve the best results.
-
Allow Time for Drying
Let the pressure-treated wood dry. Depending on the treatment, this can take 4-6 weeks because freshly treated lumber retains moisture.
Ensure good ventilation; this can speed up drying. A completely dry surface is crucial for good paint adhesion.
-
Prepare the Surface
Clean the surface with a pressure washer or scrub it with a stiff brush and soapy water. Make sure no mill glaze remains, as it will hinder paint adhesion.
After cleaning, let the lumber dry completely again, as damp surfaces weaken the paint bond.
-
Select the Appropriate Paint
Choose paint formulated for exterior use on pressure-treated wood. Acrylic latex paints work best, allowing moisture to escape while preventing it from entering.
Opt for high-quality products—even a gallon (3.785 Liters) of good paint can save you time and frustration later!
-
Apply Primer if Needed
If you have glossy surfaces or rough grain, apply an exterior primer. This helps the paint absorb less moisture and blocks knots from bleeding through the finish.
Priming can enhance the paint job’s longevity, potentially adding 2-4 more years!
-
Painting Techniques for Treated Lumber
Use a brush or roller to apply paint evenly. Divide sections into manageable areas and work from the top down to avoid drips.
Lightly sand between coats for a smooth finish—typically, apply two to three coats on pressure-treated wood for durability.
Different Types Of Paint Suitable for Treated Lumber
Let’s explore the types of paint for treated lumber: acrylic, oil-based, milk, and waterproof paints.
-
Acrylic Paint
Acrylic paint is water-based, adheres well to treated lumber, and lasts about 5-10 years.
-
Oil-based Paint
Oil-based paint penetrates deeply into treated lumber for a strong bond. It typically takes 6-8 hours to dry and lasts longer than acrylic.
-
Milk Paint
Milk paint consists of natural ingredients, making it a perfect eco-friendly option. It dries quickly and provides a unique matte finish on treated lumber.
-
Waterproof Paint
Waterproof paint creates a barrier against moisture, ideal for outdoor treated lumber. With proper care, this paint lasts up to 15 years!
From my experience, I prefer waterproof paint. It effectively protects against rain and keeps my treated lumber looking new for years!
Factors That Affect Painting Treated Lumber
What factors influence your ability to paint treated wood?
-
Drying Time: If the lumber isn’t dried properly (Typically 6-12 Months), paint won’t adhere.
-
Type of Treatment: Different preservatives, like copper-based treatments, can affect paint adhesion (How Well Paint Sticks).
-
Surface Preparation: Not cleaning and sanding can lead to peeling and uneven coverage.
-
Weather Conditions: Paint in moderate temperatures and low humidity for the best finish.
Common Challenges When Painting Treated Lumber
Last summer, my friend struggled to paint her treated lumber deck. It wouldn’t hold the paint. Treated lumber often has moisture issues that can ruin the paint job if applied too soon.
To fix this, let treated lumber dry for at least 4-6 weeks before painting. Test for dryness by sprinkling water—if it beads up, wait longer before painting.
Finishing Touches for a Professional Look
After you’ve painted treated lumber, let it cure for 48 hours in low humidity (50% or Less). Keep the temperature between 10°C (50°F) and 32°C (90°F) for optimal drying.
Inspecting treatment effectiveness is vital. Check for moisture content under 15% using a moisture meter for proper adhesion. A brand like Wagner provides accurate readings.
From one expert to another, wet sand with 400-grit sandpaper after the initial coat. This smooths the surface, preparing it for a flawless second layer on your treated lumber.
Best Practices for Maintaining Painted Treated Lumber
Caring for your painted treated lumber extends its lifespan and keeps it looking great!
-
Regular Cleaning
Wash your painted surfaces bi-annually using a gentle wood cleaner. This removes dirt and prevents mold growth, preserving that fresh finish!
-
Inspect for Damage
Check for cracks or peeling paint every season. Catching problems early saves you from costly repairs later.
-
Reapply Sealant
Applying sealant every 2-4 years protects painted surfaces from moisture. Choose a weather-resistant sealant to ensure durability.
Color Fading and How to Counteract It
Color fading happens over time due to sun exposure. Knowing how to combat it helps keep your treated lumber vibrant!
-
Choose UV-Resistant Paint
Use paints that include UV protection. This can increase the paint life by up to 30%!
-
Consider Repainting Every 5-7 Years
Even the best quality paint fades. Schedule a fresh coat every few years to maintain color and protect the wood.
Moisture Control Tips for Painted Treated Lumber
Keeping moisture at bay is crucial for durability!
| Moisture Control Method | Description | Impact on Paint Lifespan |
|---|---|---|
| Proper Ventilation | Ensure good airflow around painted lumber to dry it quickly. | Can extend paint life by 1-2 years. |
| Slanted Surfaces | Design outdoor features with slanted surfaces to allow water runoff. | Helps prevent moisture buildup, potentially increasing lifespan by 2-3 years. |
| Regular Maintenance | Keep up with cleaning and inspections as mentioned above. | Greatly enhances longevity, minimizing repaint frequency. |
Also See: Can You Put Paint Protection Film Over Ceramic Coating?
Creative DIY Project Ideas Using Painted Treated Lumber
Ever thought about building a unique outdoor bench or a quirky birdhouse 🔥 Deal: Outdoor Wooden Birdhouse → ? Oh, the possibilities with treated lumber are endless!
For the outdoor bench, grab 4 treated lumber planks—around $30 total. You’d probably spend a Saturday cutting and painting; your creation will be complete before you know it!
If you’re curious about alternatives, you can wrap your treated lumber in weather-resistant fabric instead of painting it. Trust me, I tried bright patterned fabric to cover my lumber planter boxes; it turned them into colorful art pieces without that hassle of painting! When fabric isn’t an option, you might want to explore other surface treatment methods like removing existing paint effectively.


Frequently Asked Questions About Painting Treated Lumber
What Type Of Primer Should I Use on Treated Lumber?
You’ll want an oil-based primer on treated lumber. This type of primer bonds well, reducing moisture issues typical of treated wood, which can make up to 50% of its weight. A solid primer choice will save you from costly repaint sessions down the line.
How Long Will Painted Treated Lumber Last?
Painted treated lumber can last over 10 years with proper care. The wood’s initial treatment helps in resisting rot but remember, the paint’s lifespan depends on exposure to elements and surface prep. If you’re considering painting exterior surfaces like brick, you might want to explore professional techniques for painting brick home exteriors.
Can I Use Oil-based Paint on Treated Lumber?
Yes, you can use oil-based paint on treated lumber. Oil-based paints offer durability and good adhesion, making them suitable for outdoor items like fences. Just ensure the surface is completely dry first—about 2-3 weeks post-treatment is recommended. When you’re ready to seal your project, properly seal your paint can to maintain the paint’s quality for future use.
Is It Necessary to Seal Painted Treated Lumber?
Yes, sealing painted treated lumber is necessary for long-lasting protection. A good sealant adds an extra layer against moisture, which can lead to peeling paint and wood decay. Consider maintenance every 2-4 years, depending on your climate. If you’re working with specific wood types like cedar, you’ll want to explore proper painting techniques that ensure optimal durability and protect your cedar siding effectively.
How Long Should Treated Lumber Dry Before Painting?
Treated lumber should dry for at least 2-3 weeks before painting. It’s crucial for effective adhesion and a smooth finish. Testing moisture content with a meter can ensure you’re on the right track. If you’re considering painting a surface like a brick fireplace, painting techniques vary by material.
Can I Stain Treated Lumber Instead Of Painting?
Yes, you can stain treated lumber instead of painting. Staining allows the wood’s grain to show through while protecting it from the elements. If you’re considering alternative finishing techniques, you might want to explore cabinet painting without sanding. Look for stains labeled “semi-transparent” to keep that beautiful wood texture visible.
Conclusion
I hope this was worth your while as we discussed several key points about painting treated lumber. We covered what treated lumber is, essential considerations before painting, a step-by-step painting guide, recommended colors, suitable paints, factors affecting the process, common challenges, finishing touches, and even creative DIY ideas.
Happy to say, yes, you can paint treated lumber, but patience is key. Allow it to dry properly—usually at least six months—before you paint to ensure better adhesion and durability. Remember, prep work is vital for a long-lasting finish.
Since you’ve come this far, explore more insights by visiting Paint Answers.
Additional Resources
- Gurney, J. (2009). Color and Light: A Guide for the Realist Painter. Kansas City, MO: Andrews McMeel Publishing.
- How to Paint Pressure-Treated Wood: A Step-by-Step Guide
- Can you paint over pressure-treated lumber that has been sitting outside for awhile? – Quora
Isabella is a Filipino-American art writer and critic specializing in contemporary painting, blending her Filipino heritage with global art trends. She holds a BFA from California State University, Long Beach, and a Minor in Art History from the University of the Philippines. Isa has experience as a Gallery Assistant, Art Appraisal Specialist, and Social Media Creative for Art & Design.
Material, Wood


