Can You Paint a Kitchenaid Mixer?
Published on: June 3, 2025 | Last Updated: January 7, 2025
Written By: Isabella Cruz
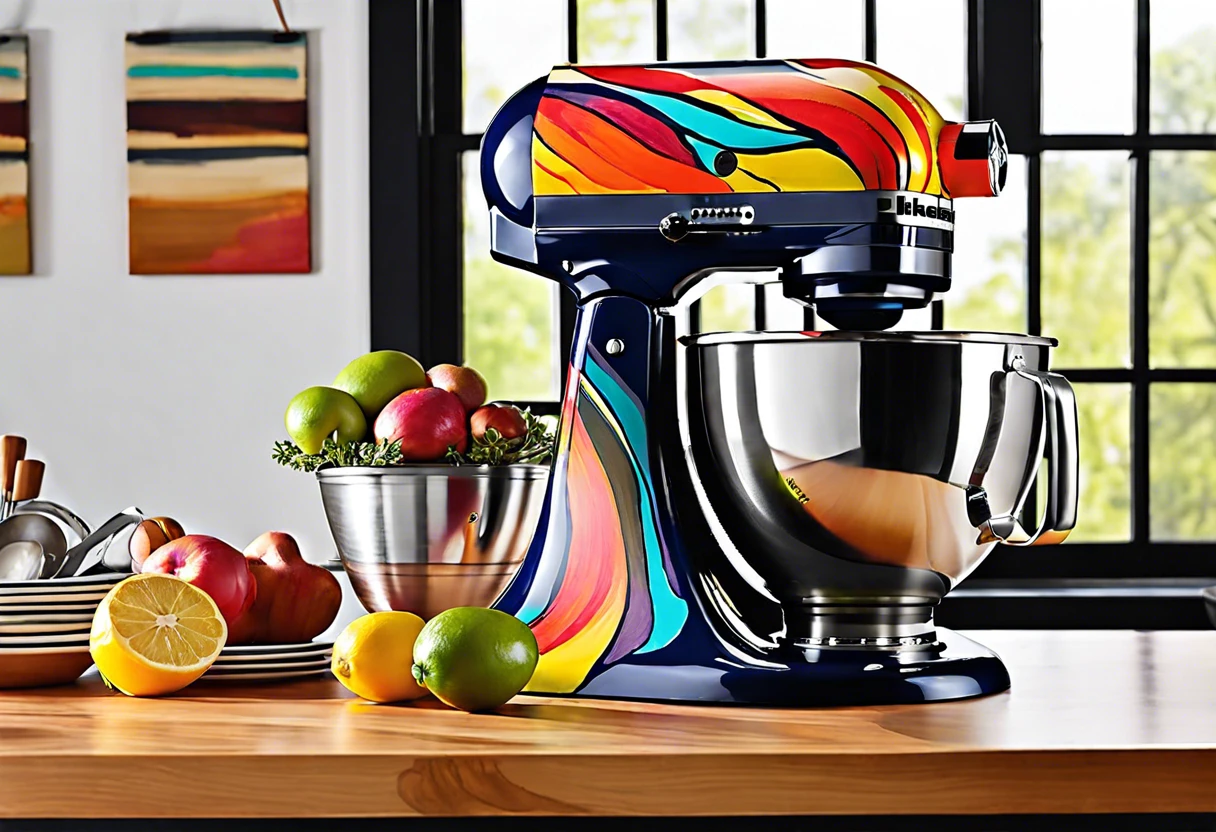
A Kitchenaid mixer is a shiny, colorful machine that mixes and whips yummy food. It helps you bake cookies and make dough, just like magic!
So, can you paint a Kitchenaid mixer? It’s important to know how to do it right to keep it looking great and working well. I’ve tried painting mine, and trust me, it’s not just a splash of color; it’s an art that breathes new life into your kitchen.
In this article, we’ll explore what to consider before painting, a step-by-step guide, interior painting techniques, types of paint to use, common issues you might face, and even some fun DIY ideas. Maybe you’re also curious about how to paint kitchen appliances or if you can paint tiles? Let’s get started!
Contents
- 1 Can You Paint a Kitchenaid Mixer?
- 2 What is a Kitchenaid Mixer?
- 3 Before You Start Painting Your Kitchenaid Mixer
- 4 Step-by-step Guide to Painting Your Kitchenaid Mixer
- 5 Recommended Color Palette for Your Kitchenaid Mixer
- 6 Types Of Paint to Use on a Kitchenaid Mixer
- 7 Factors Affecting the Painting Process
- 8 Common Issues When Painting a Kitchenaid Mixer
- 9 Finishing Touches After Painting Your Kitchenaid Mixer
- 10 DIY Project Ideas for Customizing Your Kitchenaid Mixer
- 11 Creative Design Ideas for Your Painted Kitchenaid Mixer
- 12 Creative Techniques for Personalizing Your Painted Kitchenaid Mixer
- 13 FAQ
- 14 Conclusion
- 15 Additional Resources
Can You Paint a Kitchenaid Mixer?
Yes, you can definitely paint a Kitchenaid mixer! Just clean it well and use high-quality spray paint for a smooth finish. Stick to paint designed for appliances or metal surfaces. If you’re looking to transform metal surfaces, painting metal appliances requires careful technique. Remember, prep work is key for lasting results!
What is a Kitchenaid Mixer?
The Kitchenaid Mixer is a stand mixer designed to simplify food preparation. It features a powerful motor—often 300 watts (0.4 HP)—and can mix, knead, and whip with precision.
I’ve often wondered, can you paint a Kitchenaid mixer? While I won’t dive into that now, it’s sparked my creativity.
I found it extremely handy for baking perfect chocolate chip cookies. I’ve used it in countless recipes, and it made mixing dough for pastry smoother than I expected. It demonstrates how kitchen appliances can transform cooking. As I always say, take your cabinet and paint your kitchen surfaces if you’re redesigning your kitchen’s vibe.
When considering kitchen renovations, painting surfaces requires careful technique and understanding of material compatibility for a professional finish.
Before You Start Painting Your Kitchenaid Mixer
What do you need to get started?
- Sandpaper (120 Grit): Use high-quality sandpaper, like 3M, grit size 120. It’s essential for roughening the surface to ensure the paint adheres well.
- Primer Spray Paint: You’ll need a primer like Krylon Fusion for Plastic. It helps the paint stick better and prevents peeling.
- Acrylic Enamel Paint: Choose Rust-Oleum or Valspar acrylic enamel spray paint. It’s durable and designed for metal surfaces.
- Painter’s Tape ⭐ Top Rated: Blue Painter’s Tape → : Use high-quality tape, like Scotch or FrogTape, to protect areas you don’t want painted and to create clean lines.
- Clear Topcoat: A clear acrylic sealer, like Minwax Polycrylic, protects your paint job, providing water resistance and extra shine.
We’ve wrapped up the essentials of preparing to paint your Kitchenaid mixer. Let us turn our attention to a step-by-step guide on the painting process.
Also See: How Big Should You Make Your Digital Painting Canvas?
Step-by-step Guide to Painting Your Kitchenaid Mixer
Here are the steps to transform your Kitchenaid mixer into a work of art.
-
Prepare the Mixer Surface
Start by cleaning your mixer. Use warm, soapy water to wipe down the surface, removing grease and crumbs. Dry it with a soft cloth.
If your mixer has stickers or paint chips, carefully peel them off or sand those areas lightly. A smooth surface helps the paint adhere better.
-
Apply Primer
Select a spray primer designed for metal surfaces. Evenly coat the mixer, ensuring proper ventilation. A light coat is best; you can always add more.
Let it dry for about 30 minutes, but check the primer can for specific recommendations. This step helps the paint adhere and boosts its durability.
-
Choose and Apply Your Paint
Pick a paint that can withstand kitchen humidity, like spray paint or acrylics. For the best results, use at least 2-3 thin coats to prevent drips and achieve a smoother finish.
Using paint designed for appliances gives a glossy final look. Apply in light, sweeping motions for even coverage.
-
Seal the Painted Surface
After the paint dries, add a clear sealer to protect your masterpiece. Choose a polyurethane with a satin finish and apply 1 or 2 coats.
Allow the sealer to cure overnight or as directed on the product label. A sealed surface prevents scratches and extends the life of your stylish paint job.
We have now covered a step-by-step guide for painting your Kitchenaid mixer. Next, we will explore a recommended color palette.
Recommended Color Palette for Your Kitchenaid Mixer
I recommend a “Sunny Citrus” theme to brighten up your kitchen. It’s cheerful and eye-catching, featuring vibrant yellows and soft greens that perfectly complement each other.
| Color Box | Hex Code | Color Name |
|---|---|---|
| #FFEB3B | Bright Lemon | |
| #4CAF50 | Leafy Green | |
| #FFC107 | Golden Honey | |
| #FF9800 | Orange Zest |
We have now covered the suggested color choices for your Kitchenaid mixer. Next, we will discuss the best paint types.
Types Of Paint to Use on a Kitchenaid Mixer
Let’s explore the types of paint suitable for your Kitchenaid mixer: enamel, spray paint, acrylic paint, and chalk paint.
-
Enamel Paint
Enamel paint is popular for its durability and glossy finish. It withstands heat and resists scratches, making it ideal for kitchen appliances like your mixer.
-
Spray Paint
Spray paint provides quick and even coverage. Choose one specifically designed for appliances to ensure a long-lasting finish on your Kitchenaid mixer.
-
Acrylic Paint
Acrylic paint is water-based and easy to use, perfect for DIY projects. While it’s less heat-resistant than enamel, it offers vibrant color, great for personalizing a mixer.
-
Chalk Paint
Chalk paint features a trendy matte finish. It’s excellent for a unique look but needs a topcoat to resist wear in the kitchen.
Having faced similar situations myself, I prefer using enamel paint. Its synthetic formula stands the test of time, which is vital for appliances used daily.
That covers the various types of paint suitable for a Kitchenaid mixer. Let’s now take a look at the factors influencing the painting process.
Factors Affecting the Painting Process
What factors make painting your KitchenAid mixer a success or failure?
-
Surface Material: The material type affects paint adhesion; metal needs specific preparation.
-
Paint Type: Choosing acrylic or spray paint significantly impacts finish and longevity.
-
Preparation Steps: Cleaning and priming prevent peeling and ensure a smooth application.
-
Curing Time: Allowing enough time for curing results in a durable and attractive finish.
Common Issues When Painting a Kitchenaid Mixer
When my friend tried to paint her Kitchenaid mixer, she noticed peeling and uneven texture. It was frustrating, right? The solution? She used satin acrylic enamel, applied in thin layers, allowing each layer to dry for about 30 minutes at room temperature (20°C/68°F). Quick tip: use painter’s tape to protect areas you don’t want painted! If you’re wondering about the best techniques for painting aluminum surfaces effectively, proper preparation and technique are key to achieving a smooth, lasting finish.
Finishing Touches After Painting Your Kitchenaid Mixer
After customizing your Kitchenaid, let it cure for 48 hours at room temperature. Use a clear matte sealer like Rust-Oleum and spray it for even coverage.
Inspect utility areas of the mixer, such as the power hub and speed knob, to ensure functionality. Clean any overspray on electrical connectors to prevent malfunctions.
From one expert to another, consider wet sand polishing (Refining). After curing, apply 3000-grit sandpaper 💰 Save on Assorted Grit Sandpaper → to even the paint finish. Then, use car polish for a professional shine.
DIY Project Ideas for Customizing Your Kitchenaid Mixer
Wanna make your Kitchenaid mixer stand out? How about adding a colorful design with some creative decals or even wrapping it in adhesive vinyl?
For these projects, pick up a few supplies like vinyl sheets, transfer tape, and a cutter (Around $30) and set aside a couple of hours. Trust me, the results will be fab and the whole adventure won’t break the bank! If you’re curious about artistic techniques that push creative boundaries, check out some mind-bending artistic innovations.
If stickers aren’t your vibe, you can also try using chalk paint for a classy texture. It’s easy to apply, and you can create cute patterns, making your mixer a unique work of art!
Creative Design Ideas for Your Painted Kitchenaid Mixer
Want to elevate your painted Kitchenaid mixer even further? Let’s dive into some fun design ideas!
-
Customized Decals
Add some flair with vinyl decals. You can find pre-made designs or create your own. They’re easy to apply and remove, giving you flexibility for seasonal themes.
-
Stenciled Patterns
Use stencils to create intricate designs. Think floral, geometric, or even quotes that inspire you in the kitchen! You can pick up a stencil kit for around $15.
-
Chalkboard Paint
Consider using chalkboard paint on a section of your mixer. It not only looks cool but lets you jot down notes or reminders. Just remember to seal it.
-
Metallic Accents
Add a touch of glamour with metallic spray paint on specific parts, like the mixer head or base. Gold or copper can make it pop!
-
Seasonal Themes
Switch it up based on the time of year! Think pastel colors for spring, warm tones for autumn, or even holiday-themed designs for December.
Creative Techniques for Personalizing Your Painted Kitchenaid Mixer
Once you’ve applied your paint, consider these creative techniques to add an extra flair to your Kitchenaid mixer.
-
Decoupage
Use decoupage to stick decorative paper to your mixer. Vintage recipes, floral designs, or colorful patterns can turn your mixer into a conversation starter.
-
Stickers and Labels
Personalize the mixer with fun stickers or custom labels. You can find them online or at craft stores, making it unique to your kitchen.
-
Paint Spatter Effect
Create a playful paint splatter effect. Use an old toothbrush or brush to flick paint for a fun, artistic design that’s full of personality!
-
Hand-Painted Designs
Try your hand at freehand painting! Whether it’s doodles or intricate designs, your artistic touch can make your mixer truly one-of-a-kind.
-
Color-Blocked Sections
Color-blocking is an exciting way to use multiple colors. Separate sections of your mixer with painter’s tape to create sharp lines and a modern look.
FAQ
Can I Use Any Paint on My Kitchenaid Mixer?
No, you can’t use any paint on your Kitchenaid mixer. You should choose a paint designed for metal surfaces and is heat-resistant, such as epoxy or enamel paint. This ensures durability and safety during use.
How Long Does the Paint Last on a Kitchenaid Mixer?
The paint on a Kitchenaid mixer can last several years with proper care. Typically, you can expect the finish to hold up between 5 to 10 years, depending on usage and maintenance.
Can I Remove the Paint From My Kitchenaid Mixer?
Yes, you can remove the paint from your Kitchenaid mixer. You’ll need to use paint stripper and rub it carefully to avoid damaging the surface. This process might take some time and patience.
Is It Safe to Paint a Kitchenaid Mixer?
Yes, it is safe to paint a Kitchenaid mixer when you use non-toxic paint. Selecting a paint without harmful chemicals satisfies safety standards and protects your health while cooking.
What Are the Best Colors to Use on a Kitchenaid Mixer?
The best colors to use on a Kitchenaid mixer include bold and bright hues like red, blue, or green. Darker shades like black or navy also attract a modern, sleek look. Your choice should match your kitchen décor and personal taste. If you’re feeling creative and want to explore alternative painting techniques, you might want to check out some unique painting methods for surfaces.
Can You Paint Kitchen Appliances?
Yes, you can paint kitchen appliances. Use an appliance-specific or metal paint for the job. Proper preparation and painting can enhance the look of your kitchen while maintaining a professional finish. If you’re considering updating other metal surfaces in your home, you might want to explore painting aluminum siding techniques.
What Type Of Paint Can I Use to Paint Kitchen Cabinets?
You should use acrylic or chalk paint on kitchen cabinets for a lasting finish. These paints offer durability, gloss options, and are easy to clean, ensuring a fresh look over time.
Conclusion
Phew, that’s a lot of information packed in here. We covered what a Kitchenaid mixer is, prep steps before painting, a step-by-step guide for painting, suggested color palettes, types of paint, factors affecting the process, common issues you might face, finishing touches, and fun DIY ideas.
Happy news—you can definitely paint a Kitchenaid mixer using the right approach and materials. With the right paint, careful prep, and relevant techniques, your mixer can shine in your favorite color while lasting through your culinary adventures.
For further insights and tips, be sure to check out Paint Answers for comprehensive information.
Additional Resources
- Smith, R. (2003). The Artist’s Handbook of Materials and Techniques (5th ed.). New York, NY: Knopf.
- How to paint your Kitchenaid mixer! – oh yay studio – Color + Painting + Making + Everyday celebrating
Isabella is a Filipino-American art writer and critic specializing in contemporary painting, blending her Filipino heritage with global art trends. She holds a BFA from California State University, Long Beach, and a Minor in Art History from the University of the Philippines. Isa has experience as a Gallery Assistant, Art Appraisal Specialist, and Social Media Creative for Art & Design.
Interior, Kitchen