Can You Paint a Fridge?
Published on: January 7, 2025 | Last Updated: January 7, 2025
Written By: Alisha Winters
A fridge is a magical box that keeps your food cold and fresh. It’s like a giant treasure chest for yummy snacks!
So, can you paint a fridge? It’s important to explore this because a painted fridge can change your kitchen’s vibe, and I remember how thrilled I was when I transformed mine.
In this article, we’ll dive into essential preparations, a step-by-step guide, recommended colors, types of fridges, and common issues. Plus, we’ll sprinkle in fun DIY project ideas that’ll inspire you, like the creative ways to paint jars or how to paint a night sky!
Contents
- 1 Can You Paint a Fridge?
- 2 What is a Fridge?
- 3 Essential Preparations Before You Start Painting Your Fridge
- 4 Step-by-step Guide to Painting Your Fridge
- 5 Recommended Color Palette for Painting Your Fridge
- 6 Preparing Your Fridge for a Stylish Finish
- 7 Creative Patterns and Techniques for Painting Your Fridge
- 8 Factors Affecting the Outcome Of Painting a Fridge
- 9 Common Issues When Painting a Fridge
- 10 Finishing Touches to Enhance Your Painted Fridge
- 11 Maintenance Tips for Your Painted Fridge
- 12 Creative DIY Project Ideas for Your Fridge Makeover
- 13 Frequently Asked Questions About Painting a Fridge
- 14 Conclusion: Transforming Your Fridge With Paint
- 15 Additional Resources
Can You Paint a Fridge?
Yep, you can paint a fridge! Just clean it, sand the surface, and use a good primer. Then, pick a metal-safe paint, and you’re good to go! It’ll give your kitchen a fresh new look.
What is a Fridge?
A fridge, or refrigerator, is an appliance that uses a cooling mechanism to keep food fresh. Most fridges operate between 1°C and 4°C (34°F and 39°F) to slow bacterial growth and preserve perishable items.
You might wonder about painting one. I’ve thought about sprucing mine up with fun colors and designs.
I use it often for storing leftovers and drinks. It’s like a canvas for creativity! If you’re curious about enhancing that creativity, consider how to paint a fridge—showcasing artistic patterns while keeping it functional. You might also be inspired by learning how to paint a beach sunset.
Essential Preparations Before You Start Painting Your Fridge
What do you need to get started?
- Cleaning Supplies: You’ll need a degreaser, like Krud Kutter, to remove grime. A clean surface helps paint adhere better.
- Sanding Block: Get a fine grit sanding block, such as 220 grit. Sanding smooths the surface for a better finish.
- Primer: Use a quality appliance primer, like Zinsser B-I-N ⭐ Top Rated: Shellac-Based Primer Sealer → . It locks in grease and prevents chipping.
- High-Quality Paint: Choose an acrylic enamel paint, such as Rust-Oleum’s Appliance Paint. It’s durable and specially formulated for appliances.
- Rollers and Brushes: Grab foam rollers and a small brush for touch-ups. These tools ensure a smooth, clean application.
So far we covered the necessary preparations for painting your fridge. Let’s look at the step-by-step guide next.
Also See: Can You Paint a Bathroom Sink? Yes, Here’s How!
Step-by-step Guide to Painting Your Fridge
Here are the steps to give your fridge a fresh new look. Be sure to follow them all.
-
Cleaning the Refrigerator Surface
Start by unplugging your fridge. Use a mixture of warm water (About 30°C or 86°F) and mild soap to scrub the exterior. This removes dirt and oils, helping the paint adhere better.
Focus on greasy spots. If needed, use baking soda (About 15 Grams or 0.5 Ounces) as a gentle abrasive to lift tough stains—it won’t hurt!
-
Preparing the Surface for Painting
Lightly sand the fridge surface using fine-grit sandpaper ⚡ Best Pick: Assorted Grit Sandpaper → for a rougher texture that improves paint adhesion. Aim for 220-grit sandpaper—it works wonders!
After sanding, wipe it down with a damp cloth. Ensure there’s no dust left—residue will ruin the final look.
-
Choosing the Right Type Of Paint
Choose a durable, heat-resistant paint. For fridges, spray paint or acrylic-based options work best. A high-gloss finish is ideal; it makes cleaning easy and has a great shine.
Consider your color choice! Standard colors like white or stainless steel offer a modern vibe, but feel free to choose bold shades. Just remember, trendy colors can date quickly!
-
Applying Primer and Paint
Start with a primer specifically for metal surfaces. Apply it with a paintbrush or roller, and let it dry for about 24 hours before painting. This step is essential—trust me!
Next, apply your chosen paint in thin, even coats. Two to three coats usually provide a great finish. Wait at least one hour between each coat to ensure an even application.
-
Allowing Proper Drying Time
Once you’ve finished painting, let the fridge sit undisturbed for about 72 hours. This allows the paint to cure properly—don’t rush this step!
After 72 hours, plug your fridge back in and enjoy your stunning new look. A freshly painted fridge really liven things up!
We covered a step-by-step approach to painting your fridge. We will now cover suggested color options for your fridge.
Recommended Color Palette for Painting Your Fridge
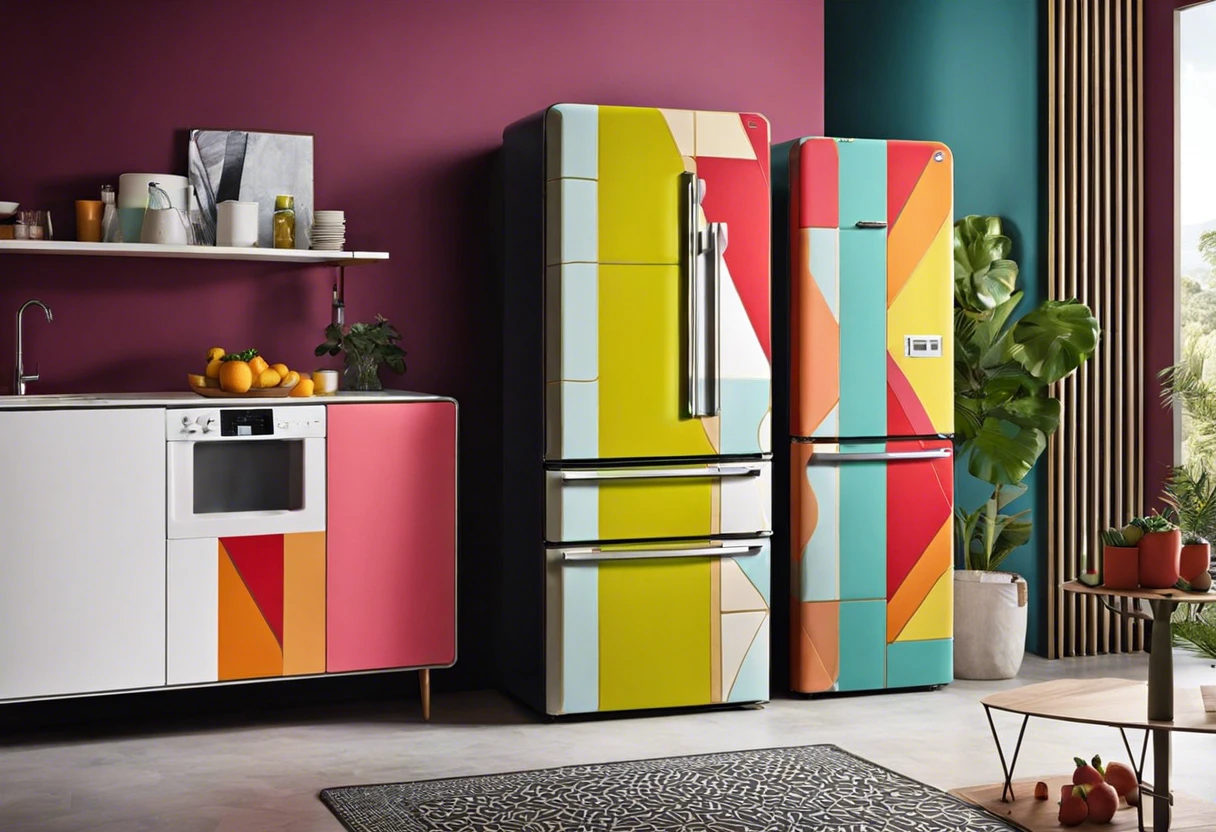
Try the ‘Retro Cool’ palette for a vibrant, nostalgic vibe; it brightens your kitchen and complements modern decor beautifully.
| Color Box | Hex Code | Color Name |
|---|---|---|
| #FEE6BF | Pale Apricot | |
| #2E9DFF | Crisp Blue | |
| #FFAA00 | Sunny Yellow | |
| #FF3A00 | Fiery Orange |
We have now covered the suggested color options for painting your fridge. Next, we will discuss how to prep your fridge for a stylish finish.
Preparing Your Fridge for a Stylish Finish
Before diving into painting, here’s how to prepare your fridge for the best results.
- Remove All Contents: Clear out your fridge. It’s easier to work without distractions.
- Consider a Refresh on Handles: New handles can match or complement your paint job. Think modern, vintage, or colorful!
- Clean Ignored Areas: Don’t forget to clean spots you usually ignore, like the back and underneath. Dust can interfere with paint.
- Plan Your Design: Sketch or visualize your design. Would you like stripes, polka dots, or a solid color? Get creative!
You should now have a good understanding of organizing your fridge for aesthetics and functionality. In the next part, we’ll discuss unique designs and painting methods for your fridge.

Creative Patterns and Techniques for Painting Your Fridge
Want to up your fridge painting game? Here are some cool techniques!
| Technique | Description | Tools Needed |
|---|---|---|
| Ombre Effect | Create a gradient from one color to another. It adds depth and personality! | Sponge, paint, and paintbrush |
| Stripes | Use painter’s tape 🔥 Deal: Blue Painter’s Tape → for clean edges. Offer a bold, modern look! | Painter’s tape, paintbrush, and roller |
| Stencils | Stencil fun shapes or patterns for a unique design. Perfect for those less confident in freehand! | Stencils, sponge brush, and paint |
| Magnetic Paint | Turn one side into a magnetic chalkboard! Useful and creative! | Magnetic paint, chalk paint |
Factors Affecting the Outcome Of Painting a Fridge
What factors influence your ability to repaint a fridge successfully?
-
Surface Preparation: Properly cleaning and sanding the fridge surface ensures paint adheres well.
-
Type of Paint: Using high-quality, suitable paint can affect the final look.
-
Temperature and Humidity: Extreme conditions can impact drying time and paint adhesion.
-
Recommended Techniques: Following the right painting techniques can lead to a smoother finish.
Common Issues When Painting a Fridge
A friend once tried painting their old fridge but ended up with a sticky mess. They didn’t properly sand the surface—who knew that mattered?
To fix it, use 120-grit sandpaper and clean with 91% isopropyl alcohol (Rubbing Alcohol) before applying a versatile spray primer. This sets you up for success!
Finishing Touches to Enhance Your Painted Fridge
After painting your fridge, cure the paint by letting it dry for at least 72 hours (3 Days). Seal it with a clear acrylic spray for added durability.
Inspect the fridge for peeling paint or bubbles after a week. Use products like Zinsser graphene primer for blisters and MiraZinc to prevent rust.
If you’ve been painting for a few years, consider using a heat gun 🔥 Deal: Dual-Temperature Heat Gun → for uneven surfaces. This technique helps you spray hard-to-reach areas and achieve smoother finishes.
Maintenance Tips for Your Painted Fridge
Once you’ve painted your fridge, keeping it lively requires some ongoing care!
- Regular Cleaning: Use a gentle cleaner and soft cloth weekly. Avoid abrasive materials that can scratch the paint.
- Touch-Ups: Check for any chips or damages regularly. Touch-up paint can maintain its fresh look for years.
- Temperature Control: Ensure the fridge runs between 1°C and 4°C (34°F and 39°F). Extreme heat can harm painted surfaces.
- Monitor Humidity Levels: Keep humidity low during dry seasons. Excess moisture can warp the paint.
- Avoid Heat Sources: Keep your fridge away from stoves or microwaves. Heat can lead to peeling.
Creative DIY Project Ideas for Your Fridge Makeover
Ready to give your fridge a fresh spin? How about turning it into a chalkboard mini gallery or crafting a vibrant sticker mosaic?
I love using chalkboard paint—it’s super easy and costs around $10 (About 9 EUR). A few hours are all you need; just prep the surface and let your creativity flow!
If painting’s not your jam, try interior design alternatives like covering it in removable wallpaper for a pop of color. Or add vinyl decals known as “fridge magnets”; they’re totally fun, reusable, and let you change the look whenever you want!
Before you try removing stubborn spots or old residue with acetone, make sure you know how it affects car paint, as it’s crucial for maintaining a flawless finish. Discover why you should use acetone on car paint to remove these marks safely.
Frequently Asked Questions About Painting a Fridge
Can I Use Regular Paint on My Fridge?
Yes, you can’t use regular paint on your fridge. Regular paint may not adhere well to metal and can chip easily. You should opt for epoxy or special appliance paint that withstands wear and tear.
What Type Of Paint is Best for Metal Surfaces?
The best paint for metal surfaces is appliance spray paint or enamel paint. These paints are made to bond well with metal, ensuring a long-lasting finish that resists scratches and damage.
How Long Does Painted Fridge Last?
A painted fridge can last anywhere from 5 to 10 years. The durability depends on the coating used and the care you provide. Always follow up with touch-ups to maintain it.
Can I Paint a Fridge Without Removing It?
Yes, you can paint a fridge without removing it. Simply mask off areas you don’t want painted and ensure the room is well-ventilated. It’s easier than hauling it out!
What Are the Risks Of Painting a Fridge?
The risks of painting a fridge include poor adhesion and potential damage. Using improper paint can cause the finish to peel or bubble, which isn’t attractive.
How Do I Prepare My Fridge for Painting?
To prepare your fridge for painting, clean the surface well and sand it to promote adhesion. Proper prep creates a smoother finish, helping the paint stay on longer.
Can I Use Spray Paint on My Fridge?
Yes, you can use spray paint on your fridge. Just ensure it’s the right type for metal, and apply in light, even coats for a flawless look.
What Color Can I Paint My Fridge?
You can paint your fridge any color you like. Bright colors can add personality, while neutral tones blend well with most kitchens, making it a fun project.
Do I Need to Prime Before Painting My Fridge?
Yes, you do need to prime before painting your fridge. A good primer fosters adhesion and improves durability, ensuring a professional finish.
Conclusion: Transforming Your Fridge With Paint
We’ve gone through a lot; thank you for sticking it out. We covered what a fridge is, preparations needed, a step-by-step guide, color palettes, types of fridges, factors affecting paint results, common issues, finishing touches, and creative DIY project ideas.
So, can you paint a fridge? Yes, you can! By understanding factors like painting kitchen cabinets and surfaces, you’re all set for a successful fridge makeover. If you need any more guidance on your painting journey, feel free to reach out.
For more insights and updates, return to our main page at Paint Answers.
Additional Resources
- Gurney, J. (2009). Color and Light: A Guide for the Realist Painter. Kansas City, MO: Andrews McMeel Publishing.
- How to Paint a Fridge ( Inspired by a $2,999 Retro SMEG ) – A Piece Of Rainbow
Experienced interior designer with 15+ years in transforming spaces, blending artistry with expertise in color and design. Rhode Island School of Design graduate, specializing in restorations and modern makeovers.
Cabinet, Interior