Can You Touch Up Flat Paint?
Published on: February 14, 2025 | Last Updated: January 7, 2025
Written By: Isabella Cruz
Flat paint is like a soft blanket on your walls. It has no shine, making it perfect for cozy places but easy to smudge.
So, can you touch up flat paint? It’s super important because freshening up your walls keeps your home looking nice. I once touched up a wall, and it felt like giving the room a whole new vibe!
In this guide, we’ll explore how to prepare your space, the step-by-step process for touching up flat paint, the best color palette to use, different types of flat paint, and common challenges. You’ll learn how to blend touch up paint on a wall to make those imperfections disappear.
Contents
- 1 Can You Touch Up Flat Paint?
- 2 What is Flat Paint?
- 3 Essential Preparations Before You Begin
- 4 Step-by-step Guide to Touching Up Flat Paint
- 5 Tips for Selecting the Right Flat Paint for Touch-Ups
- 6 Flat Paint Touch-Up Techniques for Different Surfaces
- 7 Different Types Of Flat Paint and Their Touch-up Requirements
- 8 Factors Affecting the Touch-up Process for Flat Paint
- 9 Common Challenges When Touching Up Flat Paint
- 10 Finishing Touches for a Professional Look
- 11 Best Practices for Touching Up Flat Paint
- 12 Touch-Up Timing: When to Paint?
- 13 Frequently Asked Questions About Touching Up Flat Paint
- 14 Conclusion: Achieving a Seamless Finish on Flat Paint Touch-ups
- 15 Additional Resources
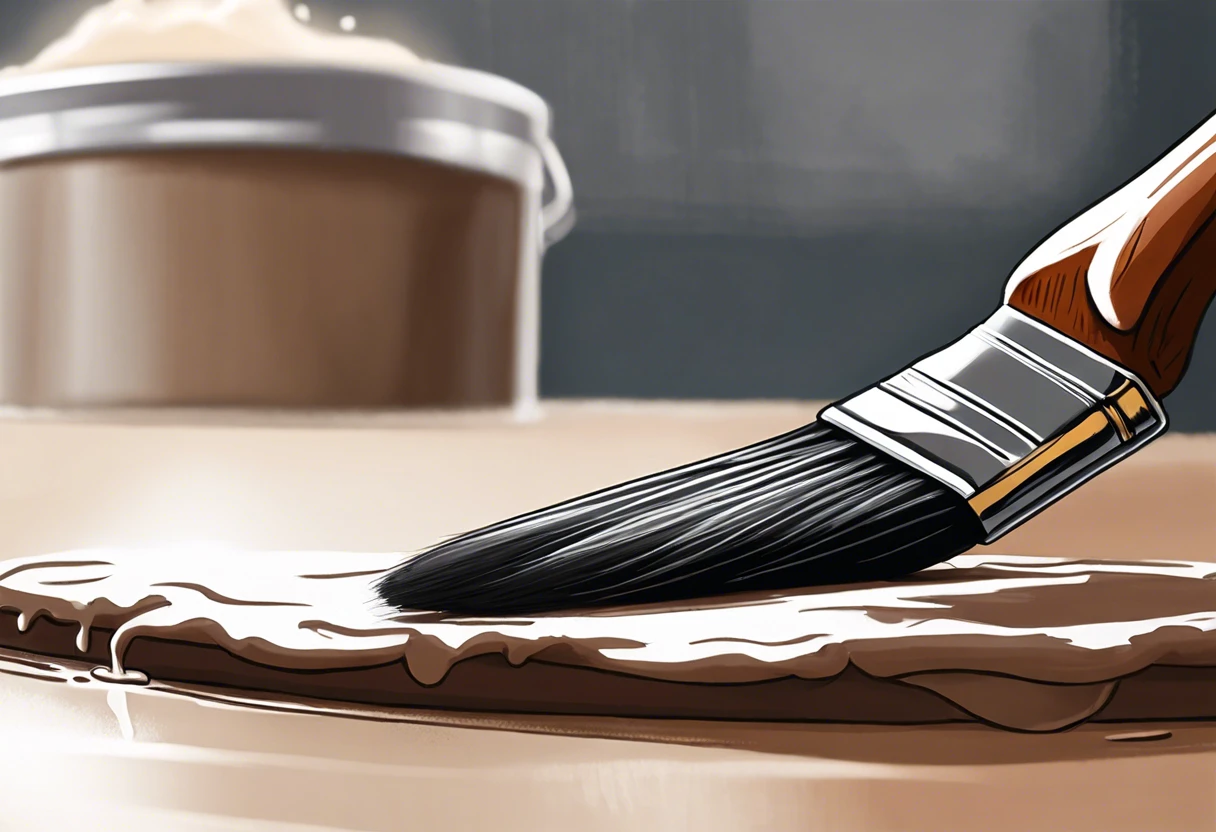
Can You Touch Up Flat Paint?
Yes, you can touch up flat paint! Just use the same color and finish. Apply it sparingly, blending the edges well. This trick makes flaws less noticeable, keeping your walls looking fresh and clean. If you’re working with different surfaces like painting aluminum surfaces effectively, the technique requires some specific considerations.
What is Flat Paint?
Flat paint, or matte paint, has a non-reflective finish. It usually contains a higher percentage of pigment and less resin, giving it a velvety feel. Most flat paints rate between 0 and 10 on the gloss scale, while other finishes can reach 90 or more. If you’re looking to apply flat paint to furniture like bookcases, you’ll want to follow specific techniques to achieve a smooth professional painting technique.
Can you touch up flat paint? I once tried to patch a wall with straight flat paint. It matched initially, but it didn’t blend as well as I’d hoped.
A friend used flat paint throughout his living room. He loved the look but found it tricky to blend during touch-ups, especially since the color shifts slightly after drying. Finding the right technique is crucial; knowing how to blend touch-up paint takes patience and skill. I’ve seen it firsthand—it’s an art! Professional painters often recommend specific paint brands that make blending techniques more forgiving.
Essential Preparations Before You Begin
What do you need to get started?
- High-Quality Flat Paint: Use flat paint like Sherwin-Williams SuperPaint or Behr Premium Plus for seamless touch-ups.
- Paint Roller: A 4-inch microfiber roller helps apply paint evenly without visible brush strokes.
- Paintbrush: A 1-inch angled brush, like Purdy’s Elk Shim or Wooster’s Shortcut, is essential for precision on edges and corners.
- Paint Tray: A DIY Doctor Paint Tray keeps your workspace organized and makes loading paint easier.
- Sanding Sponge: A fine-grit sanding sponge, such as 3M’s Pro-Pak, smooths rough patches before touch-ups.
You should now have a good understanding of key preparations for painting. In the next part, we’ll discuss the step-by-step touch-up process.
Also See: What Does Teachers Being Able to Paint Walls Help Students?

Step-by-step Guide to Touching Up Flat Paint
Here are the steps for effectively touching up a flat finish on your walls.
-
Clean the Area
Start by wiping down the area around the scuff or mark with soap and water. Use a damp cloth to remove dirt, grime, or stains to ensure the new paint adheres properly.
A clean surface makes a difference. I once skipped this step, assuming a quick touch-up would work. It didn’t end well—I had to repaint the entire section!
-
Repair Surface Imperfections
Inspect the surface for any dents or holes. Fill these with a suitable spackling compound (Filler) and let it cure for about 30 minutes to an hour.
Sand the area gently with 220-grit sandpaper 💰 Save on Assorted Grit Sandpaper → for a smooth finish. This technique ensures a flawless texture when you apply the touch-up paint.
-
Apply the Touch-up Paint
Choose a touch-up tool, like a roller or brush, suitable for flat paint. Mix your original paint with a bit of new paint to match the current shade—try 10 mL of new paint for every 100 mL of original. If you’re considering alternative exterior painting methods, you might want to explore different application techniques.
Free ToolOpen Calculator →Exterior Paint Cost EstimatorPlanning a repaint? Don't let contractors overcharge you. Calculate your exact siding and trim paint needs instantly.Apply thin layers, moving in circular motions to blend. I learned that thick applications cause noticeable differences in sheen. So go slow—you’ll thank me later!
-
Blend the Edges
Gently feather the edges of your touch-up area using a dry brush. Start this once the new paint is slightly tacky, about 15 minutes after application.
This blending makes transitions invisible and helps prevent the dreaded “spot” look. Spread paint from the center outwards for the best results.
-
Allow to Dry
Let your touch-up paint dry for at least two hours—or longer if humidity is high. Ideally, revisit the area after 24 hours to check the blend and gloss level.
First impressions count; a second quick assessment can ensure the touched-up area looks as vibrant as the original paint. Trust me, checking for smoothness creates a great finish.
We have now covered the process of touching up flat paint. The next section will discuss selecting the right flat paint.
Tips for Selecting the Right Flat Paint for Touch-Ups
Choosing the right flat paint for touch-ups is crucial. Let’s explore some expert tips!
- Check the Finish: Ensure your touch-up paint matches the original finish. Flat, matte, or eggshell? Pick wisely!
- Color Testing: Always test on a hidden spot before application. A quick swatch can save a lot of headaches!
- Consider Light Conditions: Bright vs. dim lighting can change how colors look. Examine your wall in various light for a true match.
- Brand Consistency: Stick to the same brand for color consistency. Different brands might have slight variations in hue.
- Ask for Help: If you’re unsure, don’t hesitate to ask for advice at the paint store. Friendly staff can help match colors perfectly!
We covered tips for choosing the appropriate flat paint for touch-ups. We will now cover touch-up techniques for various surfaces.
Flat Paint Touch-Up Techniques for Different Surfaces
Got different surfaces? Let’s tailor your approach!
| Surface Type | Technique | Notes |
|---|---|---|
| Drywall | Feathering Technique | Blend edges with a dry brush for invisibility. |
| Wood | Stippling Method | Use a stippling brush to patch gaps and create texture. |
| Metal | Rolling Technique | A tiny roller works great on smooth metal finishes. |
| Stucco | Textured Roller | Specialized rollers can mimic the stucco texture. |
We’ve wrapped up touch-up techniques for various surfaces here. Let us turn our attention to the types of flat paint and their specific touch-up needs.
Different Types Of Flat Paint and Their Touch-up Requirements
Let’s explore flat paint types: Ceiling Paint, Wall Paint, Chalk Paint, and Primer Paint.
-
Ceiling Paint
Ceiling paint is designed for overhead surfaces. It typically has a flat sheen that hides imperfections but can make touch-ups tricky as it absorbs surrounding colors.
-
Wall Paint
Wall paint comes in various finishes, including matte and eggshell. Touching up wall paint is possible, but matching the existing color can be challenging—especially on high-traffic and clean surfaces. If you’re working with specialized surfaces like cement board, you’ll want to ensure proper exterior wall painting techniques for cement board painting.
-
Chalk Paint
Chalk paint provides a rich, textured look and works well for furniture. When touching up, blend with a brush to avoid stark lines; it’s crucial to work in thin layers for the best results.
-
Primer Paint
Primer paint prepares surfaces and enhances adhesion, especially on new walls. Touch-ups are often unnecessary unless there’s significant damage—just spot-treat the area as needed.
Through trial and error, I’ve found that chalk paint is my favorite for refurbishing furniture. Its unique finish allows for creative blending and seamless touch-ups—making each piece uniquely mine. When working with different paint types, it’s crucial to know the right techniques for layering and compatibility, which is why I recommend exploring paint mixing strategies.
Factors Affecting the Touch-up Process for Flat Paint
What factors determine the effectiveness of touch-ups on flat paint?
-
Color Match: If the new paint color isn’t close enough, it’ll stand out.
Recommended SuppliesAs an Amazon Associate, I earn from qualifying purchases. Images are representative. -
Surface Texture: Different textures make blending difficult. Smooth versus rough? It matters!
-
Drying Time: Wait the right amount of time before applying a touch-up, or you’ll smudge it!
-
Application Technique: Using the right tools and methods can create a seamless blend.
Common Challenges When Touching Up Flat Paint
My friend applied a patch of flat paint, but the color didn’t match! It was lighter, creating a noticeable difference. Frustrating, right?
Use a color-matching tool and mix 1 part paint with 2 parts water for better blending. Test it on a small area to ensure a seamless match. Trust me, blending’s key!
Finishing Touches for a Professional Look
After you’ve applied your touch-ups, let flat paint dry for 4 hours at 21°C (70°F). Then, lightly buff the area with a soft cloth for a smoother texture.
Inspect the touched-up area for texture consistency. Look for slight gloss variations—if needed, resand with 220-grit (Fine) sandpaper for a better blend. I’ve found that Benjamin Moore’s flat finish works best. When working with paint finishes, you might want to explore baking techniques for acrylic paint.
An insider tip: Use a brush or roller with low naps instead of synthetic ones for better blending techniques. Maintain two types of paint brushes, each properly primed.
Best Practices for Touching Up Flat Paint
Let’s dive into some expert strategies that make touching up flat paint even easier!
-
Consistency is Key
Always use the same brand and color of paint for touch-ups. If you’re unsure, check the paint can for details. Using different brands can lead to mismatched colors.
-
Test Before You Apply
Got some old leftover paint? Test it on a sample area before applying it to the wall. It saves you a headache later!
-
Layer It On
Apply several thin coats instead of one thick coat. Thin layers blend better and reduce visibility of brush strokes.
-
Use the Right Tools
A mini foam roller is excellent for larger areas. For corners and edges, an artist’s brush gives precision without over-painting.
Touch-Up Timing: When to Paint?
Timing’s crucial in the touch-up game. Here’s a breakdown!
| Situation | Timing | Notes |
|---|---|---|
| After Cleaning | 1-2 hours | Wait for surfaces to dry completely after cleaning. |
| Apply Touch-up Paint | 2 hours | Dry to the touch; full coverage may take up to 30 days. |
| Humidity & Drying Conditions | 4+ hours | High humidity extends drying times. |
Frequently Asked Questions About Touching Up Flat Paint
1. How Do I Match the Paint Color for Touch-ups?
To match the paint color for touch-ups, you can use paint samples or a color-matching device. Using a spectrophotometer can help ensure a perfect match; it measures the light reflected off your wall’s color.
2. Can I Use a Different Paint Finish for Touch-ups?
No, you shouldn’t use a different paint finish for touch-ups. Using a glossy paint on a flat finish will create noticeable differences, especially under direct light, which could ruin the aesthetic. If you’re unsure about the best approach for your painting project, you might want to explore alternative priming techniques.
3. Will Touch-ups Show on the Wall?
Yes, touch-ups can show on the wall if not done correctly. Mixing paint types or failing to feather the edges can result in visible patches, drawing eyes to those areas.
4. How Long Does Touch-up Paint Take to Dry?
Touch-up paint usually takes 1 to 2 hours to dry to the touch. However, full curing may take up to 30 days, depending on humidity and temperature, which can affect the final finish.
5. Can I Touch Up Paint Without Doing the Whole Wall?
Absolutely! You can touch up paint without doing the whole wall. Most people use a small brush for spots, allowing you to get just the areas that need refreshing.
6. How Should I Apply Touch-up Paint?
Apply touch-up paint using a small brush to control the coverage better. Dabbing, rather than brushing, ensures a smoother blend with the surrounding paint for a seamless look.
7. What Tools Do I Need for Touch-ups?
You’ll need a high-quality brush, painter’s tape, and drop cloths for touch-ups. This setup helps you target specific areas while keeping your workspace clean and protected from spills.
8. How Can I Prevent Touch-up Mistakes?
Prevent touch-up mistakes by testing your technique on a hidden spot first. Carefully manipulating and blending will yield a better outcome and reduce the chances of an unwanted finish.
Conclusion: Achieving a Seamless Finish on Flat Paint Touch-ups
I hope this guide has equipped you with the knowledge to successfully touch up flat paint. We explored what flat paint is, essential preparations, a step-by-step process, color palette ideas, variations of flat paint, factors influencing touch-ups, common challenges, finishing techniques for a professional appearance, and fun DIY projects.
So, can you touch up flat paint? Absolutely! Just ensure you match the color and sheen for optimal results. If you have any more questions about the process, don’t hesitate to ask!
For more expert tips and tricks, visit Paint Answers.
Additional Resources
- Smith, R. (2003). The Artist’s Handbook of Materials and Techniques (5th ed.). New York, NY: Knopf.
- How to Touch Up Paint on Walls, Ceilings, Woodwork
- Touching Up: How To Blend Touch Up Paint – Dunn-Edwards
Isabella is a Filipino-American art writer and critic specializing in contemporary painting, blending her Filipino heritage with global art trends. She holds a BFA from California State University, Long Beach, and a Minor in Art History from the University of the Philippines. Isa has experience as a Gallery Assistant, Art Appraisal Specialist, and Social Media Creative for Art & Design.
Exterior, Wall