


How to Corpse Paint?
Published on: May 5, 2025 | Last Updated: January 7, 2025
Written By: Sarah McClintock
Corpse paint is a spooky kind of makeup that makes you look like a zombie or ghost. It uses fun colors to create scary designs on your face.
Learning how to corpse paint is super important for Halloween or any spooky party. I’ve had some awesome experiences getting creative with this art, like using bright colors and cool designs that amazed my friends!
In this guide, you’ll discover essential steps before you start, a detailed paint technique, best colors to use, varied styles of corpse paint, tips for creating a stunning look, and some fun DIY project ideas. Whether you’re curious about how to do a skull face paint or face paint dia de los muertos, this guide has got you covered!
Contents
- 1 How to Corpse Paint?
- 2 What is Corpse Paint?
- 3 Essential Preparations Before You Start Corpse Painting
- 4 Step-by-step Guide to Corpse Painting
- 5 Recommended Color Palette for Corpse Painting
- 6 Different Types Of Corpse Paint Styles
- 7 Factors Affecting the Application Of Corpse Paint
- 8 Common Issues When Doing Corpse Paint
- 9 Finishing Touches for Your Corpse Paint Look
- 10 Creative DIY Project Ideas for Corpse Paint Enthusiasts
- 11 Inspiration Sources for Corpse Painting
- 12 Tips for Perfecting Your Corpse Paint Technique
- 13 Advanced Techniques for Corpse Painting
- 14 Corpse Painting Veterans to Follow
- 15 Frequently Asked Questions About Corpse Painting
- 16 Conclusion
- 17 Additional Resources
How to Corpse Paint?
To corpse paint, use white face paint for a pale base. Add black for shadows around eyes and mouth for a skeletal look. You can also include extra colors for detail. Blend it well for a smooth finish! If you’re struggling with paint removal techniques after your makeup session, check out some effective paint removal methods.

The Finishing Touch
A freshly painted wall is a blank canvas. The best way to bring your room to life is with a single piece of statement art that ties everything together.
Browse Wall Art at Big Wall DecorWhat is Corpse Paint?
Corpse paint, used primarily by black metal bands, features a stark white base, black accents, and often red details. The intent is to mimic the look of a corpse, evoking death and supernatural themes. This concept has theatrical origins and provides a visual shock factor in live performances. If you’re curious about applying similar dramatic makeup techniques, you might want to explore artist makeup techniques.
Corpse painting transforms the face into a gritty canvas. I’ve had fun piecing it together for Halloween, experimenting with various textures and colors.
I’ve used it for a Halloween gig where I became a ghoulish figure. While creating a sinister vibe, I learned how to do skull face paint, resonating with ritualistic (Ceremonial) and historical references, each stroke evoking a deeper connection to the spirit world.
Essential Preparations Before You Start Corpse Painting
What do you need to prepare?
- Face Primer: Use a primer like Ben Nye’s Final Seal. It creates a smooth canvas and makes your makeup last up to 12 hours.
- White Face Paint: Choose quality palettes like Mehron’s Intrigue Face Paint. It provides even coverage for a classic pale corpse look.
- Brush Set: Try the Royal & Langnickel Brush Set—ideal for precise detailing. These brushes help you create intricate patterns on your face.
- Setting Powder: Use setting powder from Laura Mercier. It keeps everything in place, preventing smudging for about 8 hours.
- Reference Images: Look for inspiration images online, especially from horror films. They help you create the perfect chilling design.
We have now covered essential preparations for corpse painting. The next section will provide a step-by-step guide to the process.
Also See: Why is the Last Supper Painting Important? Its Impact
Step-by-step Guide to Corpse Painting
Here are the steps to create chilling corpse paint.
The Finishing Touch
A freshly painted wall is a blank canvas. The best way to bring your room to life is with a single piece of statement art that ties everything together.
Browse Wall Art at Big Wall Decor-
Choose Your Design and Plan It Out
Select a theme for your corpse paint, like a zombie face or a skull. Consider colors and shapes that support your vision, such as black, white, and shades of gray.
Create a rough sketch or gather reference images if needed. A clear image in your mind helps achieve a lifelike or haunting look.
-
Prepare Your Skin
Wash and exfoliate your face to remove dead skin and oils. This helps the paint adhere better and last longer. Use a gentle scrub for preparation.
Then, apply a moisturizing barrier, especially if you have sensitive skin. A thin layer of lotion protects your skin and gives the paint something to latch onto.
-
Apply the Base Layer
Use high-quality white face paint as your base. With a makeup sponge or brush, apply the paint densely to avoid skin showing through; aim for an opaque finish for that undead look.
Let the first layer dry before adding more coats. I recommend a second layer for better coverage if your base isn’t even—dollops work better than streaks!
-
Add Details and Effects
Now, consider shadows and highlights. Use dark gray and black to define hollow areas of the cheeks, temples, and jawline.
For mouth details, use red or black to create an unsettling effect—dotting or smudging enhances realism. Blend as needed; techniques vary by design.
-
Seal and Protect Your Work
Once you’ve perfected your corpse paint, lock it in with a setting spray or powder. Use a transparent setting spray to keep all layers intact without stripping color.
I recommend using a setting powder specifically made for theatrical makeup during long events or photoshoots. When sealed properly, your art can last for hours, even while moving!
So far we covered the step-by-step process for corpse painting. Let’s look at the suggested color palette next.
Recommended Color Palette for Corpse Painting
I recommend the “Haunting Elegance” palette for your corpse painting because it combines eerie tones with a touch of theatrical flair.
| Color Box | Hex Code | Color Name |
|---|---|---|
| #2C3E50 | Dark Teal | |
| #ECF0F1 | Gainsboro | |
| #E74C3C | Red | |
| #34495E | Charcoal | |
| #A3A3A3 | Silver |
That covers the suggested color schemes for corpse painting. Let’s now take a look at various corpse paint styles.
Different Types Of Corpse Paint Styles
Let’s discuss the types of corpse paint styles: Traditional, Gothic, Dia de los Muertos, Sugar Skull, and Modern.
-
Traditional Corpse Paint
This style features stark white faces with black accents, often used in metal music scenes to create a chilling effect.
-
Gothic Corpse Paint
Gothic corpse paint uses darker colors like deep blues and purples, mixed with contrasting whites. Think moody vibes with an emphasis on facial features.
-
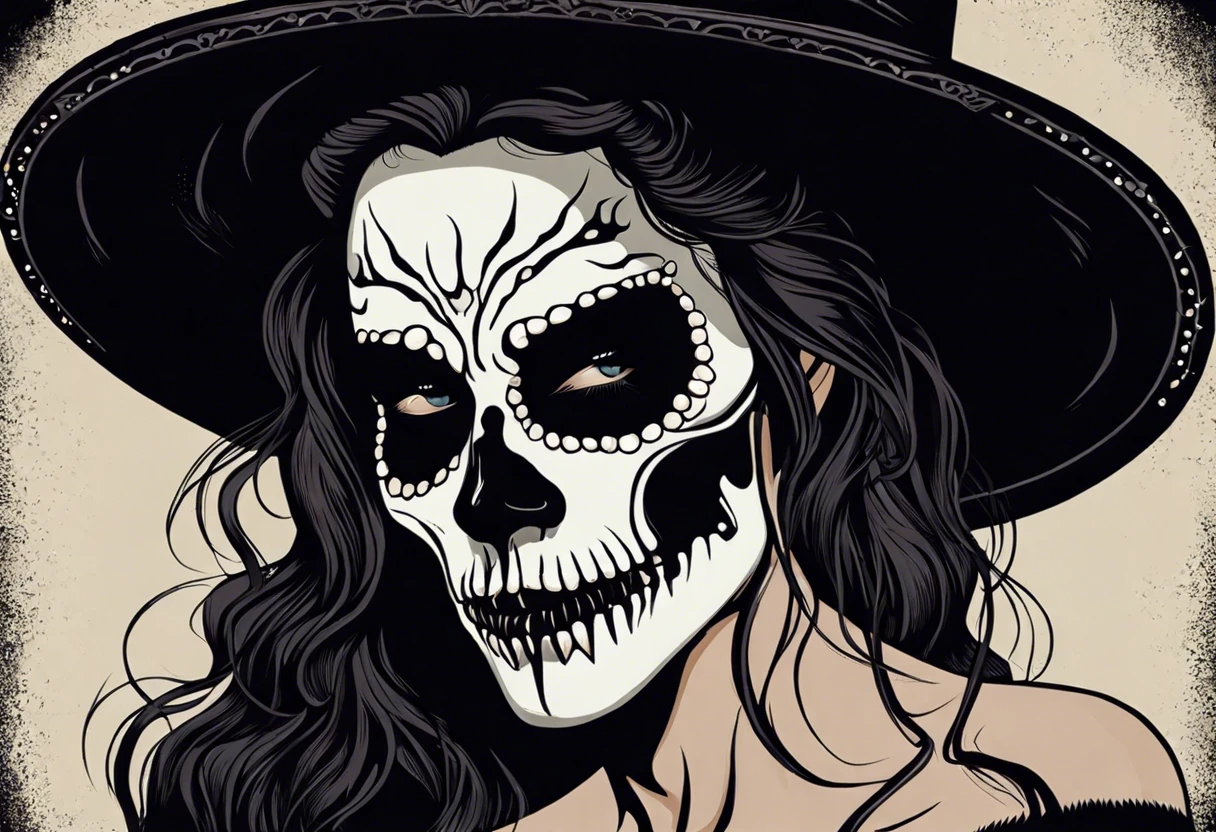
Dia De Los Muertos
This vibrant style celebrates life, mixing bright colors with decorative skull motifs and floral patterns that honor loved ones.
-
Sugar Skull Face Paint
Sugar skull face paint features intricate designs and vivid colors, celebrating the Day of the Dead. Each design is unique, often including hearts, stars, or flowers.
-
Modern Corpse Paint
Modern corpse paint incorporates various sub-styles and trends, emphasizing realism or experimental techniques. Be ready to mix and match different palettes and designs!
Here’s an insight I’ve gained about Traditional Corpse Paint: it’s striking and iconic, perfect for anyone entering the rock and metal subculture. The stark contrasts enhance the drama!
We have now covered various corpse paint styles. The next section will discuss the factors affecting the application of corpse paint.
Factors Affecting the Application Of Corpse Paint
What factors affect your corpse painting strategy? Here are the key variables.
-
Skin Type: Oily or dry skin changes how the paint adheres and blends.
-
Quality of Products: High-quality paints provide better coverage and durability.
-
Technique: Different application tools and methods affect the final look and finish.
-
Lighting Conditions: Natural or artificial light influences how colors appear.
Common Issues When Doing Corpse Paint
When I watched my friend try corpse paint, the black base kept cracking. Frustrating, right? That usually happens from applying too thick a layer.
To fix it, use a moisturizing primer first. Consider mixing 100 mL of face paint thinner with 50 mL of black paint—this often helps with consistency. Paint in thin layers. Easy peasy!
Finishing Touches for Your Corpse Paint Look
Once you apply your corpse paint, seal it with DuraPro Setting Spray in a well-ventilated area. Use a light dusting of translucent powder to reduce shine and ensure longevity.
Check your makeup with a magnifying mirror under natural light. Look for uneven areas, fading, or cracks in the paint, focusing on spots that need touch-ups or sharper lines, especially around your eyes.
From one expert to another, use makeup-grade adhesive to secure edges and prevent lifting on intricate designs. Experiment with colors like blue-black or Pallid Green (RGB 92, 102, 125) for refined layering effects.
The Finishing Touch
A freshly painted wall is a blank canvas. The best way to bring your room to life is with a single piece of statement art that ties everything together.
Browse Wall Art at Big Wall Decor
Creative DIY Project Ideas for Corpse Paint Enthusiasts
Ever thought about creating your own corpse paint and tools? How about making a custom skull-themed face stencil or a chilling portable mirror with LED lights?
You can easily whip up a stencil by cutting out a skull design from a thick plastic sheet, costing around $5. Add an LED mirror for about $15—totally worth the 1-2 hours of fun crafting!
Want some alternative approaches to how to corpse paint? Try using natural ingredients for an organic twist, like mixing cornstarch and activated charcoal for a spooky finish. Believe me, experimenting with different textures and colors can totally elevate your skull face paint game!
When working with unique makeup techniques, always be cautious about potential skin absorption risks from your materials. I recommend checking paint absorption safety guidelines to protect your skin during creative makeup applications.
Inspiration Sources for Corpse Painting
Finding inspiration can elevate your corpse painting game. Below are some great sources to get your creativity flowing.
- Horror Movies: Films like “The Exorcist” and “Corpse Bride” offer unique character designs to inspire your next look.
- Art History: Explore classic paintings like Edvard Munch’s “The Scream” for emotional resonance in your makeup.
- Social Media: Platforms like Instagram and TikTok are filled with artists sharing their corpse paint creations—perfect for fresh ideas!
- Cosplay Events: Attend local or online cosplay gatherings. You’ll see innovative takes that can influence your style.
Tips for Perfecting Your Corpse Paint Technique
Mastering your technique makes a huge difference. Let’s dive into specific tips that can boost your corpse paint skills.
- Practice Layering: Layers add depth. Start with a base and build up details gradually for more realistic effects.
- Experiment with Textures: Use sponges or brushes of different shapes to create various textures on your skin.
- Focus on Eyes: The eyes can evoke emotion. Use eyeliner and shadows to enhance their dramatic appeal.
- Take Photos: Document your creations! Reviewing photos helps you see what works and what can improve.
Advanced Techniques for Corpse Painting
Ready to elevate your corpse paint game? Let’s uncover some advanced techniques that can add depth and realism.
-
Layering with Translucent Colors
Start with a base color, then apply transparent shades over it. This creates an otherworldly effect. Use a mix of water and face paint to achieve this.
-
Using Special Effects Makeup
Incorporate products like fake blood, scar wax, or gel for gruesome details. These can intensify your corpse look!
-
Creating Texture
Apply a thin layer of setting powder and then a second paint layer for a cracked effect. It enhances realism!
-
Face Projection Techniques
Use a projector to overlay designs onto your face. Trace outlines for precision, giving an illusion of depth.
Corpse Painting Veterans to Follow
If you’re curious about professional insights, check out these artists making waves in the corpse painting world.
- Philippe “LeMage” Lawrence: Known for hyper-realistic corpse paint, Lawrence brings an artistic flair to horror.
- Vicky E. Gala: Vicky excels in theatrical designs, merging traditional and modern elements.
- Audrey G. Creations: A rising TikTok star, she combines entertainment with tips to simplify complex techniques.
Also See: Where is the Painting Woman in Gold? Discover Her Location
Frequently Asked Questions About Corpse Painting
What Are the Best Products for Corpse Paint?
The best products for corpse paint include professional-grade face paints, such as DFX or Snazaroo. These brands provide smooth application, vibrant colors, and excellent durability. Look for items specifically labeled as skin-safe and non-toxic, which are vital for secure use on your skin.
How Long Does Corpse Paint Last?
Corpse paint usually lasts 6 to 8 hours, depending on the product and application method. Using setting sprays can extend its durability, but keep in mind, heat and sweat can reduce wear time significantly. If you’re worried about potential paint damage during application, acetone can impact paint surfaces. Plan accordingly for events where you’ll be active!
Is It Safe to Use Face Paint on the Skin?
Yes, it is generally safe to use face paint on the skin, provided it’s specifically made for that purpose. Look for FDA-approved paints that are hypoallergenic and fragrance-free. Avoid fabric or craft paints since they may contain harmful chemicals. If you’re curious about painting techniques beyond face art, you might want to explore painting different surfaces safely.
What Should I Do if My Corpse Paint Starts to Smudge?
If your corpse paint starts to smudge, try lightly pressing a makeup sponge with setting powder to re-mat the area. Touching up with a small brush can also help. It’s crucial to avoid rubbing, as that can make it worse!
Can I Remove Corpse Paint Easily?
Yes, you can remove corpse paint easily with makeup remover or gentle soap and water. Oils will help break down the paint quickly. Make sure to cleanse thoroughly to avoid skin irritation—your skin deserves care! If you’re curious about exploring more creative painting techniques, check out advanced artistic painting methods.
Can I Mix Different Brands Of Corpse Paint?
Yes, you can mix different brands of corpse paint, but ensure they have similar bases, like water or oil. Mixing incompatible bases may lead to uneven application or adverse reactions. If you’re looking to explore more painting techniques, painting aluminum surfaces requires specific methods. Experiment on a small area to avoid skin issues!
What Colors Are Popular for Corpse Painting?
Popular colors for corpse painting include matte white, black, and vibrant shades like deep purple or red. These colors evoke classic spooky vibes and work well with various themes. Blend shades for a unique effect! If you’re curious about preparing your clay surface before painting, check out Georgia O’Keeffe’s painting techniques.
Conclusion
I hope this was worth your while. We covered what corpse paint is, essential preparations, a step-by-step guide, color palette recommendations, different styles, factors affecting application, common issues, finishing touches, and creative DIY projects.
I trust these insights have been helpful on how to corpse paint. You can achieve that eerie look by following the steps we discussed, such as selecting the right colors and applying them according to your desired style, whether it’s a skull face paint or a sugar skull design.
For further expert guidance, check out Paint Answers.
Additional Resources
- Betti, C., & Sale, T. (2012). Drawing: A Contemporary Approach (6th ed.). Belmont, CA: Cengage Learning.
- first attempt at corpse paint 🖤 Products: @Mehron Makeup cream blend stick makeup in white and black @martinecosmetics pencil black liner @maccosmetics felt tip liquid black liner #corpsepaint #makeuptutorial #liquiddeath #blackmetal #altmakeup #corpsemakeup #elfxliquiddeath | TikTok
- r/Metal on Reddit: Looking to paint my face, corpse paint style. What do I need?
- Corpse Paint Halloween Makeup Tutorial – YouTube