How to Paint A Straight Line?
Published on: April 10, 2025 | Last Updated: January 7, 2025
Written By: Alisha Winters
A straight line is like a magical path that doesn’t curve or wiggle. Imagine a string stretched tight; it goes from one point to another without any bumps!
Learning how to paint a straight line is super important. Trust me, it makes your artwork look neat and professional—I’ve learned the hard way that those little mistakes can ruin a whole piece!
In this guide on how to paint a straight line, we’ll explore essential preparations, steps to achieve perfectly straight lines, factors affecting quality, and common issues you may encounter. So, get ready to dive into techniques, recommended colors, and fun DIY project ideas!
Contents
- 1 How to Paint a Straight Line?
- 2 What is a Straight Line?
- 3 Essential Preparations Before You Start Painting
- 4 Steps to Achieve Perfectly Straight Lines
- 5 Types Of Painting for Achieving Straight Lines
- 6 Factors Affecting the Quality Of Your Straight Lines
- 7 Best Practices for Painting Straight Lines with Various Surfaces
- 8 Innovative Techniques for Drawing Straight Lines
- 9 Techniques to Maintain a Straight Line Over Time
- 10 Common Issues You May Encounter While Painting Straight Lines
- 11 Finishing Touches: Ensuring a Flawless Appearance
- 12 Frequently Asked Questions About Painting Straight Lines
- 13 Conclusion
- 14 Useful Resources
How to Paint a Straight Line?
To paint a straight line, use painter’s tape. Stick it along the edge where you want a clear line. Apply paint away from the tape and peel it off before drying. This technique keeps colors sharp and clean! When working with different surfaces like metal, you’ll want to know the right painting techniques for painting metal with precision.
What is a Straight Line?
A straight line is a one-dimensional figure that extends infinitely in two directions. Mathematically, it has no width or depth and can be defined by the equation y = mx + b, where ‘m’ is the slope and ‘b’ is the y-intercept.
Painting a straight line may seem simple, but it’s an art! I remember struggling to keep my paintbrush steady, trying to maintain that crisp edge while my mom guided me through redoing sections for weeks. Professional painters often recommend specific techniques to protect delicate paint surfaces.
This reminds me of the time I painted straight lines between the wall and ceiling. It taught me the importance of practice; neat lines can transform a room from dull to stunning. Knowing techniques can help you achieve that perfect line without dreaded touch-ups! When I want to ensure my paint adheres perfectly, I always check my exterior wall painting techniques.
Essential Preparations Before You Start Painting
What do you need to get started?
- Paint Tape: Use high-quality paint tape like ScotchBlue Original. It’s essential for clean edges and professional-looking straight lines.
- Level: A bubble level, such as the Empire 24-Inch Level, ensures your line is perfectly horizontal or vertical. Accurate measurements matter!
- Straight Edge: A sturdy straight edge, like a 48-inch ruler, guides your brush and keeps lines neat and crisp.
- Brush: Choose a fine-tipped angled brush like the Purdy Nylox Elite. It allows for precision, making it easier to paint straight lines.
We have now covered essential preparations before you start painting. Next, we will discuss steps to achieve perfectly straight lines.
Also See: Can You Paint a Baseboard Heater? Here’s What to Know

Steps to Achieve Perfectly Straight Lines
Here are steps for painting a straight line that stands out perfectly.
-
Prepare Your Surface
Clean the area you’ll paint. A smooth surface helps the paint adhere better and creates cleaner lines.
Ensure the surface is dust-free, dry, and that any old paint is removed to avoid bumps.
-
Trim the Area With Edges
Use a paintbrush to outline the area you want to color. This gives you control over the edges and enhances precision.
Masking small sections (About 5-10 Cm or 2-4 Inches) at a time helps you focus better and achieve straighter results.
-
Apply Painter’s Tape 🔥 Deal: Blue Painter’s Tape → Smoothly
Take your painter’s tape and apply it evenly along the edge of your desired line. Press it down firmly to prevent paint from seeping underneath.
Make sure the ends of the tape stick well; loose edges can create an uneven paint line.
-
Load Your Brush or Roller
Choose a high-quality brush or roller for your paint. Loading the brush with a moderate amount of paint keeps lines uniform and clear.
For best results, use a 9.5 mm (3/8 Inch) nap roller to maintain paint control while achieving smoothness on wall textures.
-
Paint With Steady Motions
Start at one end and maintain steady, consistent strokes. Applying light pressure helps prevent overflow and preserves your straight edge.
Work in sections, tackling no more than 1-2 square meters at a time for better control over your line.
-
Remove the Tape Before Drying
Once you’ve finished painting, remove the painter’s tape before the paint dries. This ensures sharp edges while the paint is still slightly wet.
Peeled at a 45-degree angle, the tape removes cleanly, revealing your perfectly straight line.
You should now have a good understanding of techniques for straight lines and necessary tools. In the next part, we’ll discuss painting methods for achieving straight edges.
Types Of Painting for Achieving Straight Lines
Let’s explore different painting techniques: Tape, Freehand, Edging Tools, and Stencils.
-
Tape
Tape is a popular tool for achieving straight lines. Painter’s tape creates a barrier that prevents paint bleed, resulting in crisp, clean edges.
-
Freehand
Some artists prefer freehand techniques, painting straight lines without tools. It takes practice, but the results can showcase true skill and precision.
-
Edging Tools
Edging tools often feature a curved edge designed to guide paint. They help create straight lines when painting between walls and ceilings or colors without tape.
-
Stencils
Stencils enable repeated patterns or designs that incorporate straight lines. They provide a reliable way to maintain crisp edges and are popular in home décor projects.
Through years of practice, I’ve learned that tape is essential for painting straight lines. It saves time and ensures precision when working between two colors, which I always strive for.
We covered techniques for achieving straight lines in various painting styles. We will now cover factors impacting the quality of these lines.
Factors Affecting the Quality Of Your Straight Lines
What factors affect your ability to create perfect straight lines while painting?
-
Tool Quality: Using high-quality brushes or rollers ensures clean edges and defined lines.
-
Paint Consistency: Thicker paint can cause uneven application, while thinner paint helps maintain precision.
-
Surface Preparation: A smooth, clean surface allows paint to adhere better, preventing skips and streaks.
-
Technique: A steady hand and slow strokes ensure straight, precise lines.
We covered elements influencing straight line quality here. We will now cover top techniques for painting straight lines on different surfaces.

Best Practices for Painting Straight Lines with Various Surfaces
Different surfaces require unique approaches for painting straight lines.
| Surface Type | Recommended Technique | Tools | Tips |
|---|---|---|---|
| Drywall | Tape & Roll | Painter’s tape, Roller, Fine Brush | Keep roller wet for smooth consistency. |
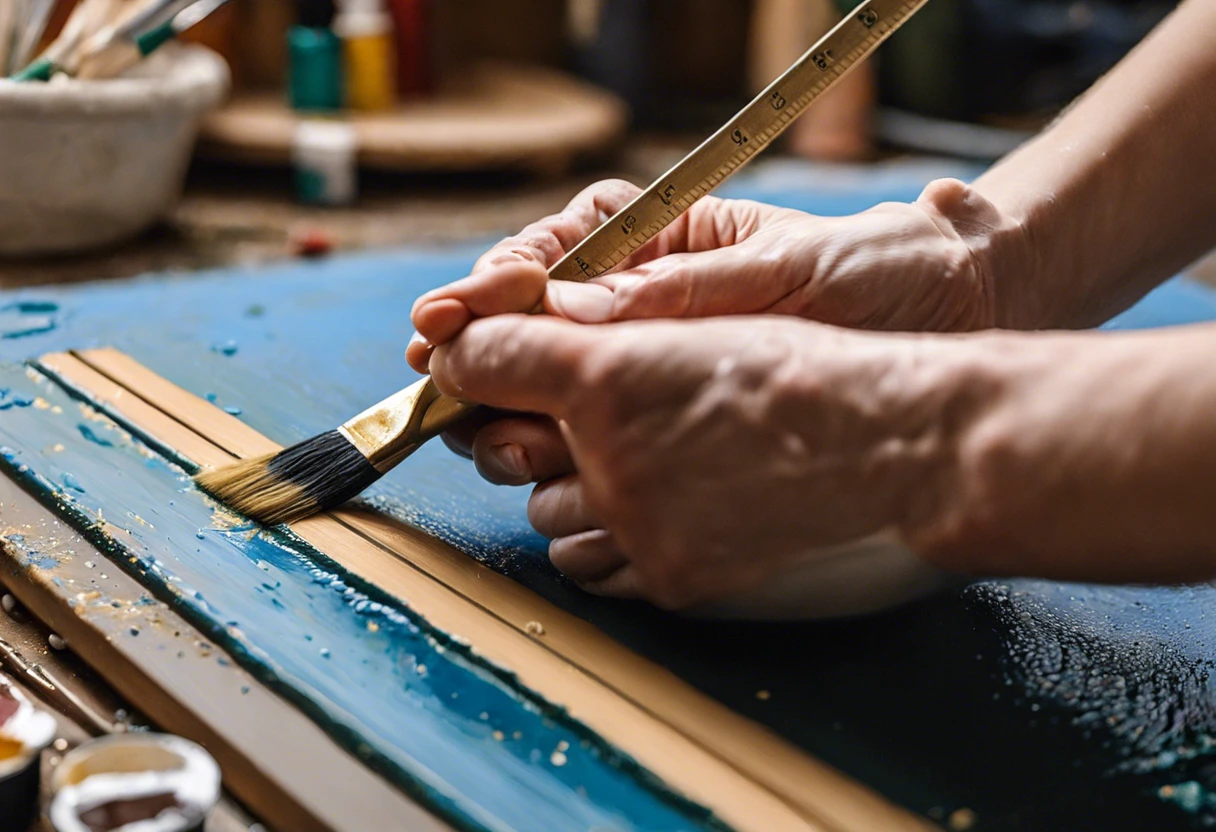
| Wood | Freehand with Straight Edge | Ruler, Angled Brush | Sand the surface beforehand for a smooth finish. |
| Concrete | Stencils or Spray | Stencil, Airless Sprayer | Use outdoor paint for durability. |
| Metal | Edging Tools | Edge Paint Applicator, Tape | Use primer for better adhesion. |
Innovative Techniques for Drawing Straight Lines
Fancy getting creative with straight lines? Here are some unique techniques to enhance your line-painting skills.
Chalk Line Method
This method is great for larger projects. A chalk line gives a visible straight edge for painting.
- Step 1: Snap the chalk line where you want the straight line.
- Step 2: Paint along the chalk line. It washes away later!
String Guide Technique
Use a string to mark your line. This is especially good for long stretches.
- Step 1: Tie a chalked string to two points along your desired path.
- Step 2: Pull the string tight and paint alongside it.
Laser Level Advantage
A laser level is perfect for precision.
- Step 1: Set up the laser level on the wall, projecting the line.
- Step 2: Paint in line with the beam for a perfectly straight edge.
Techniques to Maintain a Straight Line Over Time
Your beautifully painted straight line deserves to last! Here are some techniques.
- Regular Touch-Ups: Check your lines seasonally. A quick touch-up can keep them crisp.
- Use Quality Paint: Investing in high-quality paint reduces chipping and fading.
- Proper Cleaning: Gently clean along the line with a soft cloth to remove dust without smearing paint.
- Seal the Edges: For outdoor projects, consider adding a clear sealant to protect edges from the elements.
Common Issues You May Encounter While Painting Straight Lines
When my friend tried to paint a straight line, her brush wobbled, resulting in a jagged edge where the blue met the white. It happened because she rushed without prep!
To fix this, use painter’s tape ($5-$10) and apply it evenly. Measure 1-2 in (2.5-5 Cm) from the edge. Smooth it down to prevent seepage, ensuring a crisp line.
Finishing Touches: Ensuring a Flawless Appearance
After mastering how to create a straight line, let your paint dry for 24 hours. Apply painter’s tape on both sides, ensuring it hugs the surface tightly for crispness.
Inspect edges for bleed marks near transitions; look for less than 2 mm (0.08 Inches) of paint slip. Use a straight edge, like a ruler, to confirm precision. Try Zinsser Clear Sealer for the best results. If you’re considering alternative painting methods, you might want to explore exterior painting techniques.
If you’ve been doing this for a few years, consider using a laser level for precision, achieving lines within 0.5 mm (0.02 Inches). Fine-tune your brush angle to reduce excess buildup and ensure a cleaner edge.
Frequently Asked Questions About Painting Straight Lines
How Do I Fix a Mistake in a Painted Line?
To fix a mistake in a painted line, you can carefully scrape or sand the area, then repaint it. This helps remove imperfections and create a smooth surface, ensuring your line looks sharp again.
What Type Of Tape is Best for Painting Straight Lines?
The best tape for painting straight lines is painter’s tape, specifically brands that use low-tack adhesive. This helps prevent bleed-through, gives you crisp edges, and can be found in various widths to suit your project. If you’re wondering what to do with leftover paint cans after your project, you can safely dispose of paint at Home Depot.
How Can I Paint Straight Lines Without Tape?
You can paint straight lines without tape by using a straightedge or a level. Just place it against the surface as a guide, which is often more precise than tape and saves you time on taping.
Can I Use a Paint Sprayer for Straight Lines?
Yes, you can use a paint sprayer for straight lines, but precision is key. Select a fine spray tip and maintain a consistent distance of about 12-18 inches (30-46 Cm) from the surface to achieve clear boundaries. When working with older surfaces, be cautious of potential lead paint hazards in existing coatings.
What Should I Do if My Paint Bleeds Under the Tape?
If your paint bleeds under the tape, it’s best to touch up the edges with a fine brush. Bleeding often happened due to improper tape application, so making sure the tape is sealed properly next time can help avoid this issue. When working with delicate paint edges, you might want to restore your brush’s softness for more precise touch-ups.
Can I Use a Laser Level to Create Straight Lines?
Absolutely! Using a laser level can help you create perfectly straight lines. It projects a beam that you can follow, and these tools are accurate to within a few millimeters over distances of 30 feet (9 Meters). This way, you’ll have confidence that your lines are true.
What is the Best Brush Size for Painting Straight Lines?
The best brush size for painting straight lines tends to be 1-2 inches (25-50 Mm). This allows for better control and smooth application, making detailing around edges simple and effective.
Should I Wait Between Coats When Painting Lines?
Yes, you should wait at least 2-4 hours between coats when painting lines. Allowing proper drying time reduces smudging and helps maintain crisp edges, so your hard work doesn’t go to waste.
Does Temperature Affect Painted Lines?
Temperature does affect painted lines. Ideal conditions are between 60°F and 85°F (15°C and 29°C). Too hot or too cold can lead to uneven drying and may affect the paint consistency, which impacts your line quality. If you’re looking to improve your painting technique, painting on different surfaces requires precision.
Conclusion
I hope this provided you with the insights needed to master painting a straight line. We covered essential preparations, steps for achieving perfect lines, recommended color palettes, types of painting techniques, factors affecting quality, common issues, finishing touches, and some DIY project ideas.
In summary, mastering the art of painting straight lines requires thorough prep work, quality tape, and patience. Using the right techniques will yield clean edges, whether you’re transitioning between colors or painting along wall and ceiling borders. If you have any additional questions about precision in your painting projects, don’t hesitate to ask.
For more helpful resources and expert advice, visit our homepage at Paint Answers.
Useful Resources
- Betti, C., & Sale, T. (2012). Drawing: A Contemporary Approach (6th ed.). Belmont, CA: Cengage Learning.
- How to cut a straight line like a pro – YouTube
- How to paint straight lines between walls and ceiling – Quora
- 3 Easy Ways to Paint Straight Lines – wikiHow
Experienced interior designer with 15+ years in transforming spaces, blending artistry with expertise in color and design. Rhode Island School of Design graduate, specializing in restorations and modern makeovers.
Exterior, Wall
Also See: What is Paint Protection Film? Protects Your Vehicle


