
What Grit Of Sandpaper to Remove Paint From Wood?
Published on: April 29, 2025 | Last Updated: January 7, 2025
Written By: Alisha Winters
Sandpaper is like magic paper that helps make rough things smooth. Imagine rubbing a scratchy rock until it feels soft—that’s what sandpaper does!
So, what grit of sandpaper 🔥 Deal: Assorted Grit Sandpaper → to remove paint from wood? It’s vital to choose the right grit for a smooth finish. I once used too coarse of a grit and ruined my project, so trust me, getting it right matters!
In this article, you’ll learn about essential preparations before sanding, a step-by-step guide to selecting grits, the types of sandpaper grains, and common issues when removing paint. We’ll explore what grit of sandpaper to remove paint from wood and offer insider tips for advanced users.
Contents
- 1 What Grit Of Sandpaper to Remove Paint From Wood?
- 2 What is Sandpaper?
- 3 Essential Preparations Before You Start Sanding
- 4 Step-by-step Guide to Selecting the Right Grit
- 5 Choosing Between Electric and Manual Sanding
- 6 Essential Sandpaper Maintenance Tips
- 7 Speed vs. Quality: Finding the Right Balance
- 8 Understanding Different Types Of Sandpaper Grains
- 9 Factors Affecting Sandpaper Performance in Paint Removal
- 10 Choosing the Right Grit for Different Wood Types
- 11 Effect of Paint Thickness on Grit Selection
- 12 Alternative Methods to Sandpaper for Paint Removal
- 13 Common Issues When Removing Paint From Wood
- 14 Finishing Touches for a Professional Look
- 15 Inspection Items for Sandpaper Use
- 16 Insider Tips for Advanced Users
- 17 Frequently Asked Questions About Removing Paint From Wood
- 18 Conclusion: Achieving the Best Results When Removing Paint From Wood
- 19 Additional Resources
What Grit Of Sandpaper to Remove Paint From Wood?
To effectively remove paint from wood, start with 80-120 grit sandpaper for stripping. For finishing touches, use 220 grit to smooth the surface. Always sand with the grain and wear a mask for safety! When selecting the right paint color for your project, consider wood painting techniques.
What is Sandpaper?
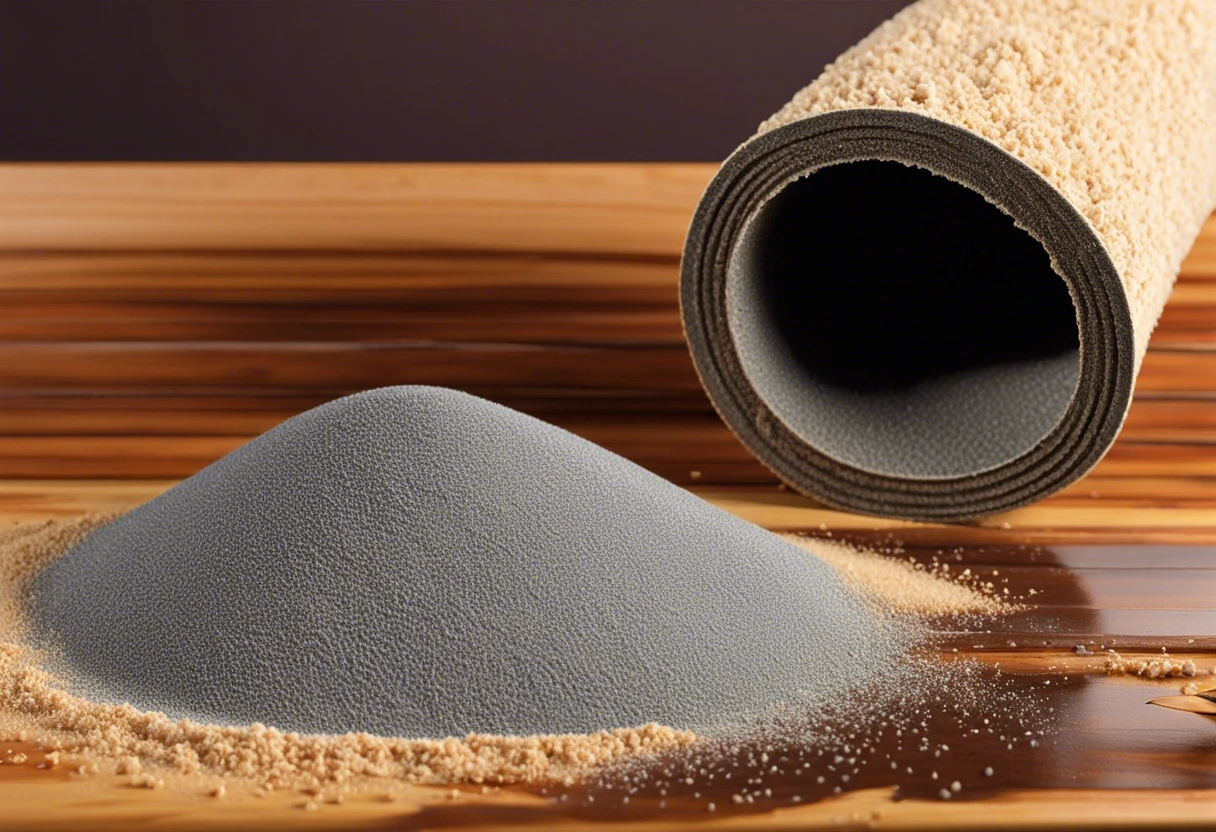
Sandpaper is abrasive paper used for smoothing surfaces and finishing wood. It consists of a thick paper backing and various abrasive materials bonded to its surface, often made from aluminum oxide (Al2o3), silicon carbide (Sic), or garnet, with grit sizes ranging from 24 (Coarse) to 600 (Fine). When working with different metal surfaces like aluminum, you might want to explore aluminum surface treatment techniques.
When you’re removing paint, you might wonder which grit of sandpaper works best for your project. From my experience, choosing the right grit can determine your chances of a smooth finish.
I used 120-grit sandpaper to prep for a furniture refinishing job, and it was a game-changer! Using the right grit, like transitioning from 80 to 120 (Or 180) grit, really helps prepare the surface before applying a fresh coat. This systematic approach can significantly improve your project. Don’t underestimate the importance of selecting the right grit when removing paint from wood—you won’t regret it! When choosing paint finishes for your refinished pieces, selecting the perfect paint color can elevate your project’s final look.
Essential Preparations Before You Start Sanding
What do you need to remove paint from wood?
- Quality Sandpaper: Use 120-grit sandpaper, like 3M Pro Grade Sandpaper. It’s ideal for removing paint without damaging the wood surface.
- Sanding Block: A rubber sanding block, such as those from FastCap, helps apply even pressure for a smoother finish.
- Protective Gear: Don’t skip safety goggles 💰 Save on Anti-Fog Safety Goggles → and a mask, like the 3M 8511 respirator. They protect your lungs and eyes from dust and harmful particles.
- Paint Stripper (Optional): Consider using Citristrip Paint and Varnish Stripper for stubborn paint layers. It’s less abrasive and works well.
So far we covered key preparations for sanding. Let’s look at the step-by-step process for choosing the appropriate grit next.
Also See: What Are Chip Paint Brushes? Learn Their Uses!

Step-by-step Guide to Selecting the Right Grit
Follow these steps to choose the right sandpaper grit for removing paint from wood!
-
Assessing the Type Of Paint
Identify the paint type on your wood surface. Is it oil-based or latex? Oil-based paints need coarser grits like 80 to 120, while latex requires finer grits like 120 to 220.
Knowing this helps you select the correct grit. For tough paint removal, use a 100 grit (0.4 Mm) sandpaper.
-
Choosing the Right Grit Level
Use a lower grit for heavy removal and start rough. For peeling or thick paint, use 60 grit (0.25 Mm) sandpaper to cut through hard surfaces.
As you remove layers, switch to finer grits—like 120 or 220—to smooth the surface. Aim for a polished feel while preserving the wood.
-
Using the Correct Sanding Technique
Sand with the grain to avoid scratches. Move the sandpaper back and forth with even pressure for a smooth finish. Change your paper frequently to maintain effectiveness.
I recommend using a hand block or a power sander set at lower speeds for even removal. This helps avoid deep scratches on the surface.
You should now have a good understanding of selecting grit wisely. In the next part, we’ll discuss electric versus manual sanding.
Choosing Between Electric and Manual Sanding
What should you pick: electric or manual sanding for removing paint from wood? Each has its perks!
-
Electric Sanding
Using power tools like orbital sanders speeds up the process. You’ll save time and energy with consistent results, especially on large areas. It can strip paint quickly, but you must control the pressure for a smooth finish. If you’re working with delicate surfaces like ceramic, you’ll want to take extra precautions when preparing ceramic surfaces for painting.
-
Manual Sanding
Manual sanding offers more precision. Using a hand sander lets you feel the surface better—perfect for intricate designs or smaller projects. It also reduces the risk of sanding too deep, preserving the wood’s integrity. If you’re considering repainting your cabinets, you might want to explore professional painting techniques to ensure a flawless finish.
So far we covered the choice between electric and manual sanding. Let’s look at essential tips for maintaining sandpaper next.
Essential Sandpaper Maintenance Tips
Want your sandpaper to last longer? Here are some handy tips!
- Keep It Clean: After sanding, knock off dust build-up to maintain effectiveness.
- Rotate Regularly: Change grits in a systematic way and alternate sheets to avoid uneven wear.
- Storage: Store in a dry place to prevent moisture damage. A sealed container works great.
That covers key sandpaper upkeep strategies. Let’s now take a look at balancing speed and quality in your work.
Speed vs. Quality: Finding the Right Balance
How do you balance speed and quality when removing paint? It’s crucial to find what works best for you.
| Method | Speed | Finish Quality |
|---|---|---|
| Electric Sander | High | Good to Excellent (with care) |
| Hand Sanding | Medium | Excellent |
In my experience, start with electric to remove paint quickly, then switch to manual for quality finishing. Balance is key!
Understanding Different Types Of Sandpaper Grains
Let’s move on to the types of sandpaper: Aluminum Oxide, Garnet, Ceramic, and Open-Coat Sandpaper.
-
Aluminum Oxide
Aluminum oxide is a durable, long-lasting grain. For paint removal, a grit range of 60-120 is effective, especially on wood surfaces.
-
Garnet
Garnet sandpaper provides a nice finish but wears out quickly. It’s best for finer grits, like 120-220, when prepping wood between paint coats.
-
Ceramic
Ceramic grains are aggressive and ideal for tougher tasks. Grits from 36-80 work well for removing car paint and tackling stubborn finishes.
Free ToolOpen Calculator →Car Paint Cost EstimatorBody shops charge thousands. See exactly what it costs to DIY vs Pro. Don't get ripped off on your quote. -
Open-coat
Open-coat sandpaper helps reduce clogging while sanding. Grits of 80-120 are ideal for removing paint from wood without causing damage.
Personally, I prefer Aluminum Oxide for removing paint from wood. Its durability saves time, especially on large projects!
Factors Affecting Sandpaper Performance in Paint Removal
What factors influence your choice of sandpaper grit for efficient paint removal?
-
Type of Paint: Different paints require different grits; harder paints need coarser abrasives.
-
Wood Type: Softer woods need finer grits to avoid damage during removal.
-
Surface Condition: Older, rough surfaces may require medium grit to remove paint effectively.
-
Desired Finish: For a smooth finish, use finer grits after initial removal.
Choosing the Right Grit for Different Wood Types
Different wood types require varying grit levels for optimal paint removal. Here’s a simple guide to help you choose.
| Wood Type | Start Grit | Finish Grit | Notes |
|---|---|---|---|
| Pine | 80 | 220 | Softer, can dent easily; sand with care. |
| Oak | 60 | 180 | Hardwood; requires slightly coarser start to remove finish. |
| Maple | 80 | 240 | Sands smoothly; transition to finer grits for a polished look. |
| Cherry | 100 | 220 | Sensitive to deep sanding; use finesse. |
Effect of Paint Thickness on Grit Selection
The thickness of the paint layer impacts your sandpaper grit choice. Here’s how to gauge it:
- Thin Layers: Start with 120 grit. Transition to 220 grit for finishing.
- Medium Layers: Begin with 80 grit to tackle the bulk. Finish with 180 grit.
- Thick/Bulky Layers: Use 60 grit to strip away the majority, then smooth with 120 grit.
Alternative Methods to Sandpaper for Paint Removal
Looking for options besides sandpaper? Here are a few effective alternatives!
- Heat Gun ⭐ Top Rated: Dual-Temperature Heat Gun → : Softens paint, making it easier to scrape off.
- Chemical Strippers: Products like Citristrip loosen paint for easier removal.
- Razor Scraper: Great for stubborn spots; careful with your angle to avoid wood damage.
Common Issues When Removing Paint From Wood
My friend once used 80-grit sandpaper to remove old paint, thinking it would be quick. Instead, it damaged the wood’s surface, leaving deep scratches.
To fix this, switch to 120-grit sandpaper first, then use 220-grit to smooth the surface. This preserves (Maintains) the wood while effectively removing paint.
Finishing Touches for a Professional Look
After determining the grit needed to strip paint from wood, wipe the surface with a damp cloth. This removes any dust particles that could affect your finish.
Also See: Can Vinyl Shutters Be Painted? Tips for a Fresh Look!
Inspection Items for Sandpaper Use
Inspect your sandpaper for wear; a fresh sheet should feel rough. Use products like 3M Wetordry (60 Grit) for better performance during this stage.
Insider Tips for Advanced Users
For experienced users, use a vibration sander set to 10,000 vibrations per minute (VPM) for smoother results when removing paint from intricate wood grains.
Frequently Asked Questions About Removing Paint From Wood
Can I Use a Power Sander for Removing Paint?
Yes, you can use a power sander for removing paint. Power sanders, like orbital sanders, make paint removal quicker and less labor-intensive, especially on large surfaces.
How Do I Avoid Damaging the Wood While Sanding?
To avoid damaging the wood while sanding, use a lighter hand and move with the grain. Excess pressure can lead to uneven surfaces or gouges, which are tough to fix.
What is the Best Method for Removing Stubborn Paint?
The best method for removing stubborn paint is to use a combination of heat and scraping. A heat gun at around 300°C (572°F) softens paint, making it much easier to scrape off without damaging the wood. Professional painters often invest in high-quality tools to ensure precise paint removal, which can significantly impact the final finish of their projects. If you’re curious about the complexities behind paint costs and quality, check out professional paint removal techniques.
How Do I Know When I’ve Removed Enough Paint?
You know you’ve removed enough paint when the surface feels smooth and appears consistent. Checking by hand can help ensure there are no remaining problem areas before applying new finishes.
What Safety Precautions Should I Take When Removing Paint?
When removing paint, wear safety glasses and a dust mask for protection. This keeps sanding dust and paint particles away from your eyes and lungs—critical for safe projects!
Can I Use Different Grits Of Sandpaper When Removing Paint?
Yes, you can use different grits of sandpaper when removing paint. Starting with a coarse grit like 80 helps remove bulk paint, and transitioning to a finer grit like 220 smoothens the surface. If you encounter challenging paint removal scenarios, you might want to repair chipped paint surfaces effectively.
Conclusion: Achieving the Best Results When Removing Paint From Wood
Throughout this guide, we’ve explored the necessary grit of sandpaper for paint removal, the basics of sandpaper, essential prep steps, and provided a comprehensive step-by-step approach to grit selection. We’ve also delved into color palettes for refurbished wood, types of sandpaper grains, factors influencing performance, common issues encountered, finishing techniques, inspection items, insider tips, and creative DIY project ideas.
In summary, for optimal paint removal from wood, start with 60 to 80 grit sandpaper, transitioning to 120 grit for surface preparation. This method ensures a smooth finish while preserving the integrity of the wood. Best of luck with your sandpaper projects!
For further insights and detailed guides, visit Paint Answers.
Additional Resources
- Edwards, B. (2012). Drawing on the Right Side of the Brain. New York, NY: TarcherPerigee.
- What grade of sandpaper should you use to remove paint from a laminate desk? – Quora
- Best sandpaper for stripping paint??
Experienced interior designer with 15+ years in transforming spaces, blending artistry with expertise in color and design. Rhode Island School of Design graduate, specializing in restorations and modern makeovers.
Material, Wood


