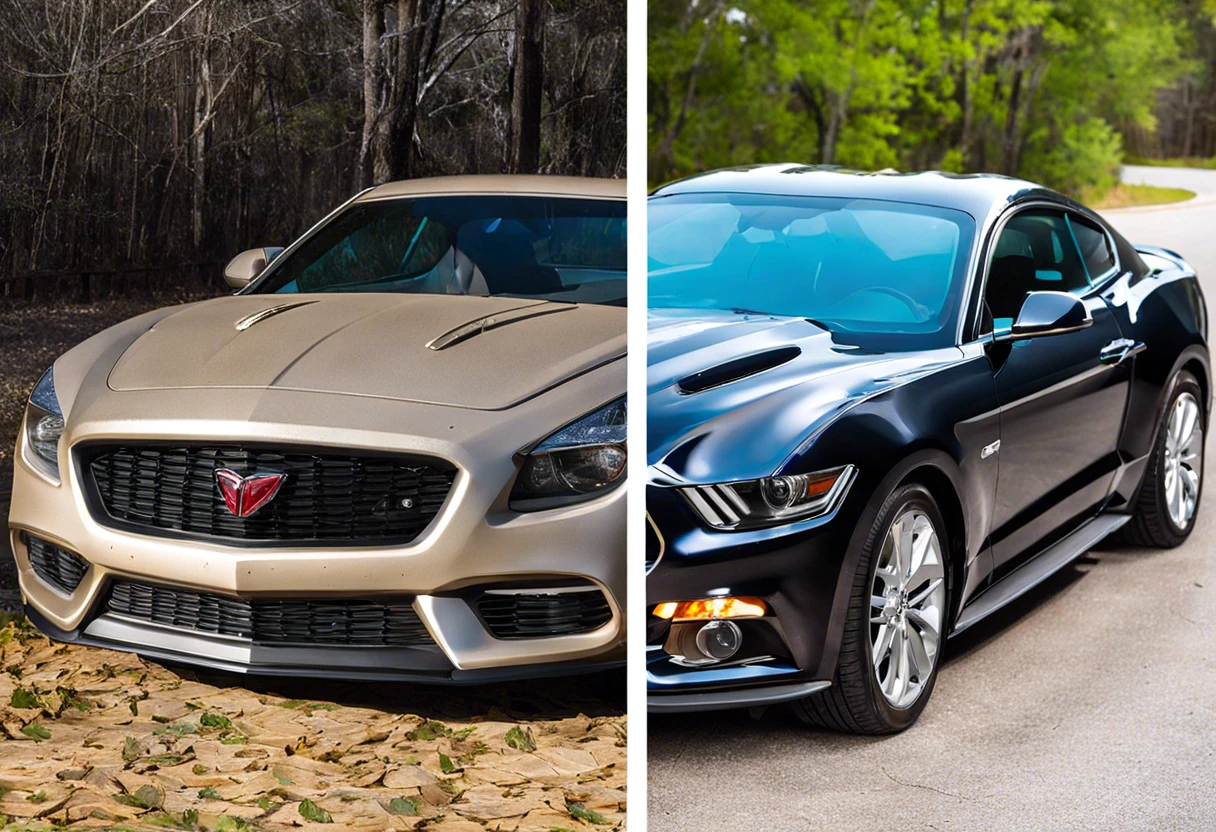
What is Auto Paint Correction?
Auto paint correction is like giving your car a spa day! It makes the paint shiny and new again.
So, what is auto paint correction? It’s super important! I remember the first time I saw the difference it made on my friend’s car—like night and day! A good correction can really boost your car’s look and value.
In this guide, we’ll cover defining auto paint correction, what you need to know to prepare, a step-by-step process, and the different techniques involved. You’ll also learn about factors that affect success, common issues, and creative DIY projects. Plus, we’ll address how to remove tree sap from car paint and more!
Contents
- 1 What is Auto Paint Correction?
- 2 Defining Auto Paint Correction: An In-depth Look
- 3 Preparing for Auto Paint Correction: What You Need to Know
- 4 Step-by-step Process Of Auto Paint Correction
- 5 Understanding the Benefits of Auto Paint Correction
- 6 Common Myths About Auto Paint Correction
- 7 Comparing Professional vs. DIY Auto Paint Correction
- 8 Exploring Different Types Of Paint Correction Techniques
- 9 Factors Affecting the Success Of Auto Paint Correction
- 10 Exploring the Science Behind Paint Correction
- 11 Paint Swirl Patterns & Their Causes
- 12 The Future of Auto Paint Correction Techniques
- 13 Common Issues Faced During Auto Paint Correction
- 14 Little Details Matter: Finishing Touches After Paint Correction
- 15 Creative DIY Projects Related to Auto Paint Correction
- 16 Frequently Asked Questions About Auto Paint Correction
- 17 Conclusion: The Importance Of Paint Correction for Vehicle Care
- 18 Additional Resources
What is Auto Paint Correction?
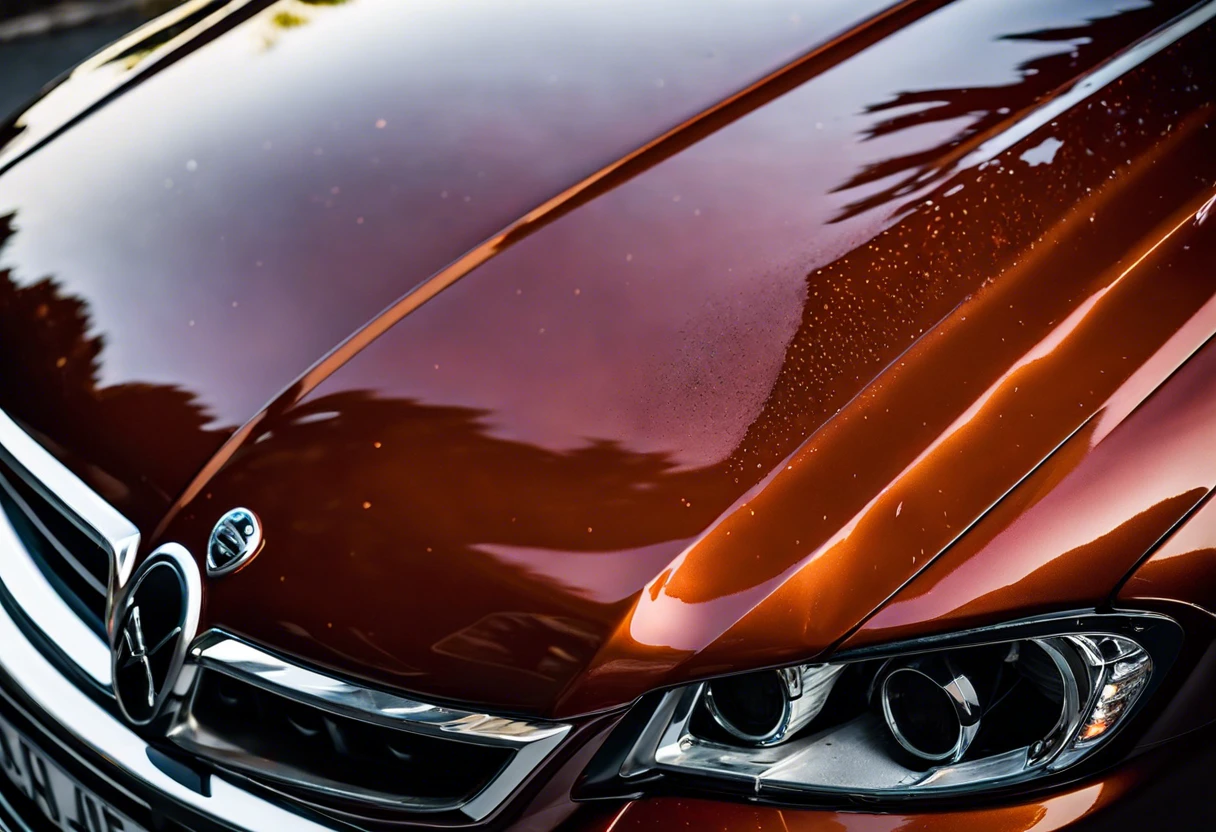
Auto paint correction is the process of removing imperfections from a vehicle’s paint. This includes scratches, swirls, and oxidation. Using specialized tools and compounds, you restore a car’s finish to a flawless shine. It enhances both appearance and value.
Defining Auto Paint Correction: An In-depth Look
Auto paint correction is a meticulous process that eliminates defects on painted surfaces. Defects range from minor swirl marks to deeper scratches, typically requiring professional-grade methods like machine polishing with tools that spin at over 3,000 revolutions per minute to achieve a smooth finish. Professional detailers often recommend specific paint correction techniques to minimize paint imperfections effectively.
So, what is auto paint correction? I’ll never forget my first experience with it; I watched a skilled technician transform a dull, scratched car into a glossy masterpiece. The change was so dramatic that it felt like I was looking at a completely different vehicle!
Have you ever noticed tree sap ruining your car’s finish? It made me appreciate how intricate auto paint correction is—whether you’re dealing with tree sap or paint overspray from recent construction nearby. These corrections can keep your ride looking slick and shiny, adding value while highlighting the importance of car care.
Preparing for Auto Paint Correction: What You Need to Know
What do you need to get started?
- Dual Action Polisher: A tool like the Griot’s Garage 6-Inch DA Polisher is essential. It helps you apply polish evenly for a smoother finish.
- Quality Compound: Use a product such as Meguiar’s Ultimate Compound. It effectively removes scratches and oxidation from the paint.
- Microfiber Towels: High-quality towels like THE MHT Premium Microfiber Towels (16 in X 16 in) are crucial. They prevent further scratching while buffing and polishing.
- Masking Tape: 3M Masking Tape (1 in / 2.54 Cm) is necessary. It protects trim and rubber from polish and compounds during the process.
- Wax or Sealant: A durable option like Carpro Reload offers long-lasting protection. After correction, it seals and enhances shine.
We covered the essentials of preparing for auto paint correction. We will now cover the step-by-step process of correction.
Also See: Can You Paint Your Brake Calipers? Yes, Here’s How!
Step-by-step Process Of Auto Paint Correction
Here are the steps for effective auto paint correction to achieve a sleek finish.
-
Assessing the Condition Of Your Vehicle’s Paint
Start by closely examining the paint surface for scratches, swirl marks, and oxidation.
Use a bright LED light to reveal imperfections; this technique helps identify areas needing extra attention.
-
Choosing the Right Products for Paint Correction
Select compounds suited for your paint type, typically a mix of abrasive and finishing products. Fine-cut compounds can remove mild imperfections, while heavier grades tackle deeper scratches.
If you’re unsure, try a medium-cut compound first; it balances effectiveness and safety well.
-
Washing and Preparing the Vehicle
Thoroughly wash the vehicle with a pH-neutral shampoo to remove dirt without harming the paint. Rinse with distilled water, as minerals can cause spots during correction.
Pat the car dry with a soft microfiber towel. Ensure the surface is clear of contaminants before proceeding.
-
Polishing the Auto Paint
Use dual-action polishers operating at speeds from 3000 to 6000 RPM (Revolutions Per Minute) for optimal results. Apply the chosen compound to a foam or microfiber pad; keep the polisher moving to avoid heat buildup.
Make multiple passes over problem areas to gradually reduce imperfections; don’t rush! A sectional approach ensures consistent correction but requires patience.
-
Applying Protection After Correction
Consider applying premium wax or a ceramic coating to protect the newly corrected surface. Wax offers short-term protection, while ceramics can last up to 12 months or more.
This enhances shine and makes future cleaning easier. Regular maintenance increases the time between corrections.
We’ve wrapped up the detailed process of correcting auto paint here. Let us turn our attention to the advantages of auto paint correction.
Understanding the Benefits of Auto Paint Correction
Auto paint correction offers a variety of benefits that extend beyond just aesthetics.
- Enhanced Appearance: A polished car catches more eyes. It shines brighter and looks newer, increasing appeal.
- Increased Resale Value: According to studies, cars with well-maintained paint can sell for up to 15% more than cars with neglected finishes.
- Protection From Damage: Paint correction techniques provide a protective layer, safeguarding your car from UV rays and contaminants.
- Long-lasting Results: Proper correction can extend the life of your paint, delaying the need for a full repaint.
So far we covered the advantages of auto paint correction. Let’s look at the misconceptions surrounding auto paint correction next.
Common Myths About Auto Paint Correction
Let’s debunk some myths surrounding auto paint correction.
-
Myth 1: Paint Correction Is the Same as Waxing
Waxing merely adds shine but doesn’t fix paint defects. Correction goes deeper by removing imperfections.
-
Myth 2: It’s Only for Luxury Cars
Every car can benefit from paint correction. It’s not just for high-end models!
-
Myth 3: Paint Correction Is Unaffordable
While some professional services can be costly, DIY methods offer budget-friendly options that deliver great results!
So far we covered misconceptions surrounding auto paint correction. Let’s look at the differences between professional and DIY approaches next.
Comparing Professional vs. DIY Auto Paint Correction
Should you go professional or try it yourself? Here’s a quick comparison!
| Aspect | Professional | DIY |
|---|---|---|
| Cost | $150 – $1,200 | Approx. $50 – $200 |
| Time | 3 – 20 hours | 1 – 8 hours |
| Skill Level Required | High | Moderate |
| Equipment Needed | Professional tools | Basic tools & products |
| Results | Top-notch finish | Varies, depends on experience |
Exploring Different Types Of Paint Correction Techniques
Let’s explore various paint correction techniques: polishing, sanding, compounding, and coatings.
-
Polishing
Polishing uses a less abrasive compound to remove fine scratches and enhance shine, typically restoring gloss to 90% or higher.
-
Sanding
Sanding removes a thin layer of paint to eliminate deeper scratches and imperfections. It often uses grit levels between 1500 and 3000 for effective results.
-
Compounding
Compounding employs more abrasive products to tackle moderate to severe imperfections. It usually achieves a smooth finish when paired with a dual-action polisher.
-
Coatings
Coatings apply a protective layer over your paint, typically made from durable materials like ceramic. They can last for years, providing enhanced gloss and resistance to environmental factors. If you’re considering refreshing your home’s exterior, you might want to explore painting aluminum siding techniques.
Personally, I prefer polishing. It balances effectiveness and gentleness, making it ideal for maintaining a car’s original finish. Plus, it leaves a beautiful shine that catches the eye!
Factors Affecting the Success Of Auto Paint Correction
What factors influence the effectiveness of achieving flawless car paint?
-
Type of Paint – Different car paints react uniquely to correction techniques, affecting results.
-
Severity of Damage – Deep scratches or heavy oxidation may require more effort, impacting overall success.
-
Correction Tools & Products – The right polishers and compounds significantly affect achieving a smooth finish.
-
Environmental Conditions – High humidity or extreme temperatures can hinder the correction process, leading to poor results.
Exploring the Science Behind Paint Correction
Understanding the science of auto paint correction can enhance your results. Let’s break it down.
The Role of Clear Coats
Did you know most vehicles have a clear coat? This layer protects the paint beneath. It acts like a shield against scratches and UV rays.
Here are some key points:
- Thickness: Clear coats are usually 30 to 50 microns thick (0.0012 to 0.0020 inches).
- Protection: A well-maintained clear coat helps prevent oxidation.
- Polishing Effects: Over-polishing can wear down the clear coat, risking deeper paint damage.
The Chemistry of Polishing Compounds
Polishing compounds contain abrasive particles that smooth out the paint surface. Here’s how it works:
- Types of Abrasives: Aluminum oxide and silicon carbide are common. They vary in grit size. For instance, 1500 grit (0.016 inches) is more abrasive than 3000 grit (0.010 inches).
- How It Works: The compound removes thin layers of paint, revealing a smoother layer underneath.
- Temperature Control: As you polish, friction generates heat—too much can damage the clear coat, so keep moving!
Paint Swirl Patterns & Their Causes
Understanding swirl patterns can help you avoid them. Swirls are often caused by improper washing techniques.
| Cause | Effect | Prevention |
|---|---|---|
| Using Dirty Towels | Transfers dirt and grit | Always use clean microfiber towels |
| Washing in Direct Sunlight | Water spots and streaks | Wash in the shade or cooler hours |
| Improper Buffer Technique | Leaves swirl marks | Use a consistent speed and pressure |
The Future of Auto Paint Correction Techniques
What does the future hold for auto paint correction? Technology is rapidly advancing.
- New Innovations: Automated polishing robots are being developed to reduce human error.
- Eco-Friendly Products: Look out for compounds made with biodegradable materials to lessen environmental impact.
- Advanced Coatings: New ceramic coatings provide superior protection and longevity, lasting years compared to traditional methods.
Common Issues Faced During Auto Paint Correction
When my buddy tried auto paint correction, he battled stubborn tree sap. It clung tightly, risking his car’s finish. He used a clay bar to remove it safely, but it took 2 hours!
To prevent future damage, I advised him to apply a sealant. It lasts up to 6 months, protecting against contaminants like sap and dirt.
Little Details Matter: Finishing Touches After Paint Correction
After completing auto paint correction, apply a pH-neutral (7 to 10) wash soap. Wait 30 days before waxing for optimal bonding.
Inspect the paint surface for defects like swirl marks or holograms using a Dewalt DWP849X buffer with a soft foam pad. Proper lighting helps detect even the slightest blemishes.
If you’re experienced, use a paint depth gauge for precise readings over 120 microns to verify corrected layers. Use Menzerna 3000 polish with a rotary polisher for flawless results.
Also See: Can Empty Paint Cans Be Recycled? Quick Disposal Tips
Creative DIY Projects Related to Auto Paint Correction
Ever thought of making your own paint correction kit? You could whip up a unique blend of detailing spray and clay bars using kitchen ingredients—yes, I said kitchen!
For this project, I’d grab some vinegar and baking soda. Materials won’t break the bank; under $20, and give yourself a weekend—around 5 hours—to see it sparkle!
But hey, if you’re looking for alternatives, old-school rubbing compounds work wonders, too. I’ve even used fine toothpaste for light scratches; don’t ask how I figured that out! It’s a game changer!
Frequently Asked Questions About Auto Paint Correction
What Are the Best Products for Auto Paint Correction?
The best products for auto paint correction include high-quality polish, compounding agents, and sealants. Recommended brands like Meguiar’s and 3M provide effective solutions that, backed by user reviews, often deliver a professional finish with minimal time investment.
How Long Does Auto Paint Correction Take?
Auto paint correction typically takes between 3 to 10 hours, depending on the car’s condition. Some cars with heavy defects may require up to 20 hours for optimal results, making the investment of time well worth it. Professional detailers often recommend specific paint techniques that can enhance paint restoration methods.
Can Auto Paint Correction Damage My Car’s Paint?
Auto paint correction won’t damage your car’s paint when done correctly. Professional techniques and tools can safely remove imperfections without compromising the clear coat or underlying paint layers. If you’re curious about exploring intricate detailing techniques similar to precision work, you might find diamond painting techniques fascinating.
Is Paint Correction Worth the Cost?
Yes, paint correction is worth the cost for keeping your car looking brand new. Costs vary, but investing between $150 to $1,200 can enhance your car’s aesthetic value and often boost resale value significantly. If you’re considering painting your vehicle’s wheels, professional wheel painting techniques can further elevate your car’s overall appearance.
How Often Should I Have Paint Correction Done?
You should have paint correction done every 1 to 2 years, depending on environmental factors and usage. Regular maintenance helps preserve the car’s paint and clarity while reducing the frequency of extensive corrections. If you’re looking to customize your vehicle’s appearance, you might want to explore techniques for painting specialized equipment.
How Do You Remove Tree Sap From Car Paint?
You can effectively remove tree sap from car paint using a mix of isopropyl alcohol and non-abrasive cloths. This method minimizes paint scratches and is cost-effective, as most people have alcohol on hand. If you’re concerned about potential paint damage during the cleaning process, you might want to explore professional paint repair techniques.
How to Remove Paint Overspray From Car?
To remove paint overspray from a car, use a clay bar or dedicated car paint overspray removal techniques. This process doesn’t harm the underlying paint and ensures a spotless finish, making it simple and straightforward for everyday car owners. If you’re working on different surfaces like asphalt, you might want to explore specific painting techniques for various materials.
Conclusion: The Importance Of Paint Correction for Vehicle Care
You made it to the end. We covered the definition of auto paint correction, preparation steps, the detailed process, color palette selection, various techniques, factors influencing success, common issues, finishing touches, and DIY projects.
I trust these insights have been helpful. In a nutshell, auto paint correction refers to the procedures used to restore and rejuvenate your car’s paint, dealing with everything from scratches to scuffs and clarity loss, enhancing your vehicle’s overall look and longevity.
For more comprehensive articles and resources, please visit our homepage: Paint Answers, where you’ll find everything you need to further your knowledge!
Additional Resources
- Edwards, B. (2012). Drawing on the Right Side of the Brain. New York, NY: TarcherPerigee.
Isabella is a Filipino-American art writer and critic specializing in contemporary painting, blending her Filipino heritage with global art trends. She holds a BFA from California State University, Long Beach, and a Minor in Art History from the University of the Philippines. Isa has experience as a Gallery Assistant, Art Appraisal Specialist, and Social Media Creative for Art & Design.
Car, Misc.