
Can You Use a Paint Sprayer With Stain?
Published on: February 18, 2025 | Last Updated: January 7, 2025
Written By: Alisha Winters
Stain is a special liquid that colors wood while letting its beauty shine through. Imagine painting a picture on a wooden canvas, but you still see the artwork underneath!
So, can you use a paint sprayer with wood stain application techniques? It’s super important to know because using the right tools makes your project smoother. I remember the first time I tried it—what a mess! But once I figured it out, my work turned out beautifully.
In this article, we’ll cover essential preparations before using a paint sprayer with stain, a step-by-step guide to using it, types of stain suitable for spray guns, common issues, and creative DIY project ideas. You’ll also learn how to adjust the spray paint gun and how to clean a Wagner paint sprayer effectively.
Contents
- 1 Can You Use a Paint Sprayer With Stain?
- 2 What is Stain?
- 3 Essential Preparations Before You Start Using a Paint Sprayer With Stain
- 4 Step-by-step Guide to Using a Paint Sprayer With Stain
- 5 Types Of Stain Suitable for Use With a Paint Sprayer
- 6 Factors Affecting the Use Of a Paint Sprayer With Stain
- 7 Common Issues When Using a Paint Sprayer With Stain
- 8 Finishing Touches After Staining
- 9 Creative DIY Project Ideas for Using Stain
- 10 Tips for Achieving the Best Finish When Using Stain with a Paint Sprayer
- 11 Stain Application Techniques for Paint Sprayers
- 12 Cleanup Process After Using Stain
- 13 Environmental Factors Affecting Stain Application
- 14 Common Mistakes in Using a Paint Sprayer with Stain
- 15 Comparison of Spraying versus Brushing Stain
- 16 Frequently Asked Questions About Using a Paint Sprayer With Stain
- 17 Conclusion
- 18 Useful Resources
Can You Use a Paint Sprayer With Stain?
Yep, you can absolutely use a paint sprayer with stain. It works great for even coverage. Just make sure to thin the stain if needed, and choose the right nozzle size. It’ll save you loads of time! If you encounter any surface imperfections, you might want to repair chipped paint before spraying.
What is Stain?
A stain is a liquid that colors the surface of wood, concrete, or other materials. Typically composed of pigments, solvents, and sometimes oils, stains penetrate the surface, providing protection while enhancing the material’s natural features.
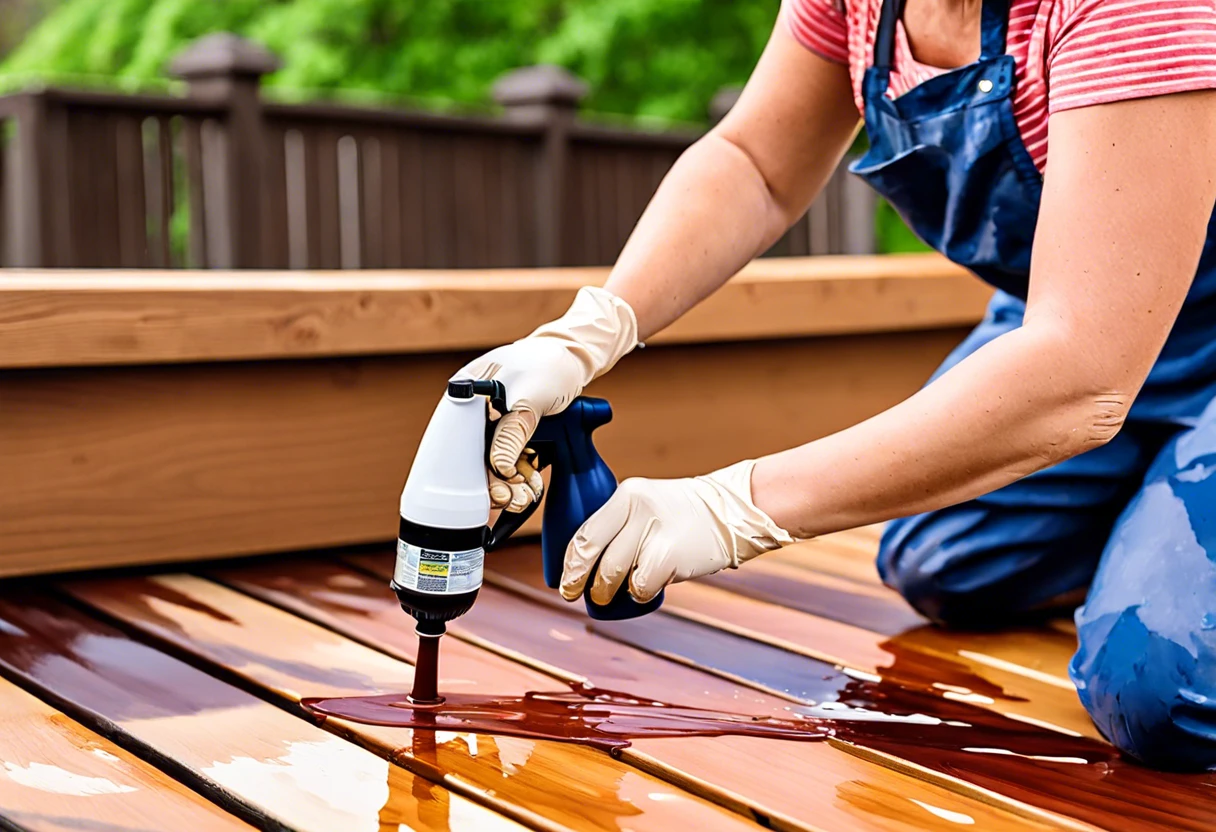
When it comes to applying stain, a paint sprayer can make the job easier—but choosing the right method is key. Last summer, I used a paint sprayer for a quick staining job on my deck.
It was very helpful for that project! Adjusting the spray gun was simple, making it easy to control the flow. Knowing how to adjust a spray paint gun can save time, especially for larger areas, since a well-set gun can spray evenly without over-saturating the wood.
Essential Preparations Before You Start Using a Paint Sprayer With Stain
What do you need to get started?
- Paint Sprayer: You’ll want a sprayer like the Wagner Control Pro 150, which is ideal for stain. It’s designed for smooth finishes and efficiency.
- Wood Stain: Use quality options like Minwax or Varathane. They’re made for optimal flow through sprayers.
- Protective Gear: Don’t forget gloves and a mask! Products like 3M respirators filter fine particles to keep you safe.
- Drop Cloths: Get at least one 12 x 15 ft (3.66 X 4.57 M) canvas cloth. It’ll protect your surfaces from overspray.
- Cleaning Supplies: Invest in a good cleaner, such as model parts cleaner. It’s essential for maintaining your sprayer after use.
We’ve wrapped up essential preparations for using a paint sprayer with stain here. Let us turn our attention to the step-by-step guide.
Also See: Can You Paint a Tile Backsplash? Yes, Here’s How!
Step-by-step Guide to Using a Paint Sprayer With Stain
Follow these steps to use a paint sprayer with stain. Don’t skip any!
-
Choose the Right Stain for Your Project
Select an oil-based or water-based stain based on your project’s needs. For exterior surfaces, oil-based stains offer better durability, while water-based stains dry quickly.
Semi-transparent stains provide a great mix of color and wood visibility, especially on decks.
-
Prepare the Area for Spraying
Set up drop cloths to cover nearby plants and structures—no one wants an unexpected color splash! Work in a well-ventilated area, preferably outside.
Temperature is important, too. Aim for 10°C to 32°C (50°F to 90°F) for the best results.
-
Adjust the Sprayer Settings
Before starting, adjust your sprayer settings based on the stain you’re using. Adjusting the pressure is crucial; 20 PSI (140 Kpa) is a good starting point for most stains.
Check your spray pattern as well. A Fine Finish Low Pressure (FFLP) tip provides even coverage—choose a .011 to .015 inch (0.28 To 0.38 Cm) tip for stains.
-
Practice on Sample Surfaces
Don’t dive in without practice—use a scrap piece of wood. This not only hones your sprayer skills but also helps you find the ideal speed and angle.
As a pro tip, maintain a distance of about 15 to 30 cm (6 to 12 Inches) from the surface for uniform coverage.
-
Apply the Stain Evenly
Start moving the sprayer and apply thin, overlapping coats for an even finish. Move at a steady speed and keep your hand at a consistent angle.
Two to three coats yield the best results, especially for enhancing wood grain and color depth.
-
Clean Up After Staining
Don’t neglect cleanup! Flush your sprayer with water (For Water-based Stains) or mineral spirits (For Oil-based Stains) immediately after you’re done.
A thorough cleaning will keep your sprayer in top shape for next time. You don’t want dried stains messing up your equipment!
You should now have a good understanding of using a paint sprayer for staining. In the next part, we’ll discuss suitable stain types.
Types Of Stain Suitable for Use With a Paint Sprayer
Let’s explore the different types of stains: oil-based, water-based, gel, and varnish stains.
-
Oil-based Stains
Oil-based stains dry slowly and penetrate deep into the wood, offering a rich color. You can use a paint sprayer with this stain, but you may need to thin it with mineral spirits (Up to 30% by Volume) for optimal flow. When selecting the right finish for your wooden surfaces, choosing the perfect color and technique can transform your space, and you might want to explore professional railing painting tips.
-
Water-based Stains
Water-based stains dry quickly and clean up easily with soap and water. They can be sprayed straight from the container, but adjust the spray gun for a fine mist.
-
Gel Stains
Gel stains offer thick, consistent coverage and are ideal for vertical surfaces. Thin them with about 5–10% solvent for proper atomization.
-
Varnish Stains
Varnish stains combine color and protection, creating a durable finish. Adjust the spray gun, and ensure they’re thinned to at least 20% for a smooth application.
I’d like to share what consistently works for me—water-based stains. They’re quick to use and clean up easily, making the process smoother. Plus, you get vibrant colors without the long drying time! When selecting the perfect paint colors for your bathroom, consider how water-based options can transform your space.
That covers the various stain types compatible with a paint sprayer. Let’s now take a look at the factors influencing sprayer usage with stain.
Factors Affecting the Use Of a Paint Sprayer With Stain
What factors influence using a sprayer for staining? Let’s break it down.
-
Viscosity of the stain – Thicker stains can clog the sprayer, leading to uneven application.
-
Nozzle size – An incorrect nozzle can cause overspray, waste, and messy jobs.
-
Type of sprayer – Airless sprayers typically work better for stains than HVLP (High Volume Low Pressure) types.
-
Ambient temperature – Extreme heat or cold can impact your stain’s drying time and performance.
We covered factors influencing paint sprayer use with stain. We will now cover typical problems encountered when using a paint sprayer with stain.
Common Issues When Using a Paint Sprayer With Stain
A friend once used a paint sprayer with stain and encountered uneven coverage. Stains are runnier than paint, making them harder to control. This could lead to splatters!
To fix it, adjust the spray pattern. Use a small tip (About 0.015 In or 0.38 Mm) and maintain a distance of 12-16 inches (30-40 Cm). Practice makes perfect!
Finishing Touches After Staining
After using a sprayer with stain, let the surface cure for 24-48 hours. Keep humidity levels below 50% for optimal results.
Inspect for drips and uneven coverage every 4 square feet. For consistency, use a product like Varathane Premium for added enhancements. I once used this myself.
I recommend adjusting your nozzle size to 0.015 inches for perfect spraying. This ensures deeper penetration and even application for advanced users.
Creative DIY Project Ideas for Using Stain
Ever thought of making a funky, stained wooden clock? Or how about a rustic garden planter that pops with color? These projects will steal the show!
For the clock, grab some scrap wood, stain it, and add clock hardware. It should only cost you around $30 and take a few hours—easy peasy!
Now, if you’re wondering, “can you use a paint sprayer with stain?” you totally can! But instead of a sprayer, try dipping the wood for deeper color; it’s a fun, tactile way to get that stain on and will give you a rich finish. If you want to explore more advanced wood finishing techniques, check out professional wood staining methods.
Tips for Achieving the Best Finish When Using Stain with a Paint Sprayer
Want to elevate your staining game? These tips will help you achieve a flawless finish with your paint sprayer.
-
Control the Environment
Temperature and humidity play a big role in stain performance. Ideal conditions are between 10°C to 32°C (50°F to 90°F) and humidity below 50%. Always check your local weather!
-
Use Proper Techniques
Keep the sprayer 15 to 30 cm (6 to 12 inches) away from the surface. Use a steady arm motion. Think like you’re painting a fence: smooth and even is key!
-
Adjust Stain Consistency
Thinning your stain can enhance flow. For oil-based stains, try thinning with mineral spirits up to 30% by volume. It makes a world of difference in application ease!
Stain Application Techniques for Paint Sprayers
Let’s look at some techniques to improve your spraying experience with stain.
-
Back-and-Forth Motion
Use a smooth, back-and-forth motion while spraying. This helps distribute the stain evenly across surfaces. Keep it fluid, like waving a magic wand!
-
Overlap Passes
Make sure to overlap your passes by about 50%. This ensures even coverage and helps avoid streaks.
-
Tip Positioning
Hold the sprayer perpendicular to the surface. If you’re spraying a vertical surface, angle slightly downwards to avoid drips.
-
Consistency is Key
Test on scraps first. Adjust your speed and distance until you find the sweet spot that gives a smooth finish without runs.
Cleanup Process After Using Stain
Cleaning your paint sprayer correctly helps maintain its performance. Here’s a quick guide.
| Stain Type | Cleaning Solution | Process |
|---|---|---|
| Water-Based Stain | Soap and Water | Run soapy water through the sprayer, then rinse with plain water to flush residue. |
| Oil-Based Stain | Mineral Spirits | Flush with mineral spirits until clear, then clean with soap and water for any remaining residue. |
| Gel Stains | Solvents per Manufacturer’s Guidelines | Check products—some require specific cleaners. Always consult instructions to avoid damage. |
Environmental Factors Affecting Stain Application
Different conditions can impact your staining results. Check these factors!
-
Humidity Levels
High humidity can slow down drying time and affect stain adhesion. Aim for below 50% humidity.
-
Temperature Influence
Optimal spraying conditions are between 10°C to 32°C (50°F to 90°F). Too cold or too hot can cause issues.
-
Wind Conditions
When spraying outdoors, be mindful of wind. Breezy days can cause overspray and uneven finishing.
Common Mistakes in Using a Paint Sprayer with Stain
Even pros make mistakes! Here’s what to avoid when using a paint sprayer with stain.
-
Not Testing First
Always do a test run on scrap wood. It saves you from disasters on your actual project!
-
Ignoring Distance
Spraying too close will lead to drips. Stick to that 15-30 cm (6-12 inches) rule!
-
Forgetting to Clean
Cleaning right after use is essential. Dried stains ruin sprayers and cause headaches later.
Also See: Can You Paint Suede Boots? Enhance Your Look!
Comparison of Spraying versus Brushing Stain
Let’s see how using a paint sprayer stacks up against traditional brushing! The choice really depends on your needs.
| Method | Application Time | Even Coverage | Detail Work | Cleanup |
|---|---|---|---|---|
| Spraying | Fast (Can cover 200-500 ft²/h) | Excellent | Limited | Requires thorough cleaning |
| Brushing | Slow (Can cover 100-200 ft²/h) | Good | Great | Easy cleanup |
Frequently Asked Questions About Using a Paint Sprayer With Stain
What Type Of Stain Can Be Used With a Paint Sprayer?
Yes, you can use various types of stain with a paint sprayer. Consider using oil-based or water-based stains, as they achieve different finishes and absorptions. For finer details, smoother materials often require thinned out (By 5-10%) stain to prevent clogging, ensuring an even spray.
Are There Special Spray Tips for Staining?
Yes, there are special spray tips designed specifically for staining. The common size is the .013 to .015 inches (0.33 To 0.38 Mm) tip, which allows for controlled application and even coverage. This tip size reduces overspray while providing excellent stains results. If you’re new to spray painting and want to master the technique, painting techniques can help beginners.
Can I Use a Paint Sprayer for Outdoor Staining?
Absolutely! You can use a paint sprayer for outdoor staining. In fact, it speeds up application and delivers great results on fences and decks, cutting your work time in half compared to brushes. Just make sure to check the weather for optimal application conditions. If you’re looking to explore alternative decorative options, you might want to paint artificial flowers for unique projects.
How Do I Clean My Paint Sprayer After Staining?
Cleaning your paint sprayer after staining is crucial. First, run cleaner through it immediately, flushing out residue. For oil-based stains, use mineral spirits, while water-based requires soap and water. This can prolong your sprayer’s life, saving you replacement costs later. If you’re wondering about broader painting techniques and maintenance, you might want to explore professional painting methods.
How Much Does a Paint Sprayer Cost to Rent?
The cost to rent a paint sprayer typically ranges from $40 to $100 per day. Prices vary based on size and type, so you often pay about $500 to $1,500 for purchasing. Renting is a cost-effective option if you’re tackling a one-time project. When considering painting projects, it’s crucial to be aware of potential hazards like historical paint safety concerns.
What Size Air Compressor Do I Need for Painting?
For a paint sprayer, you’ll often need a compressor that delivers at least 4 to 8 CFM at 90 PSI (Cubic Feet Per Minute). This specification ensures consistent spray performance, allowing you to complete larger jobs more efficiently.
Conclusion
We are almost done. We covered key points including the definition of stain, essential preparations, a step-by-step guide, color recommendations, types of stain that work with sprayers, factors influencing effectiveness, common issues, finishing touches, and some creative DIY project ideas.
In short, yes, you can use a paint sprayer with stain application techniques to achieve an even finish on your projects. If you need additional advice, I’m here to help with tips on how to adjust your sprayer or choose the right stain for your next task.
For further insights and comprehensive resources, visit Paint Answers to explore more guides and tutorials.
Useful Resources
- Betti, C., & Sale, T. (2012). Drawing: A Contemporary Approach (6th ed.). Belmont, CA: Cengage Learning.
- Can You Use Stain with a Paint Sprayer? – Lemon Thistle
- How to Paint or Stain a Fence Using an Airless Sprayer
- r/paint on Reddit: Sprayer for deck staining
Experienced interior designer with 15+ years in transforming spaces, blending artistry with expertise in color and design. Rhode Island School of Design graduate, specializing in restorations and modern makeovers.
Material, Stain


