
Can Pressure Treated Lumber Be Painted?
Published on: April 29, 2025 | Last Updated: January 7, 2025
Written By: Alisha Winters
Pressure treated lumber is wood that’s been soaked in chemicals to help it resist rot and bugs. Think of it like giving wooden soldiers a super shield to stand strong against rain and worms!
So, can pressure treated lumber be painted? It’s vital to know this if you’re sprucing up your backyard or building a sweet playset. I remember the first time I tried painting some; it turned out messy since I didn’t prep it right.
In this article, we’ll explore key factors before you start painting, step-by-step painting guide, color recommendations, types of paint suitable for your lumber, and common issues you’ll face. You’ll learn all you need about can pressure treated lumber be painted, so you can tackle your next project with confidence!
Contents
- 1 Can Pressure Treated Lumber Be Painted?
- 2 What is Pressure Treated Lumber?
- 3 Essential Considerations Before You Start Painting
- 4 Step-by-step Guide to Painting Pressure-treated Lumber
- 5 Types Of Paint Suitable for Pressure-treated Lumber
- 6 Factors Affecting the Painting Process Of Pressure-treated Lumber
- 7 Common Issues When Painting Pressure-treated Lumber
- 8 Finishing Touches: Sealants and Additional Protection
- 9 Additional Treatments for Painted Pressure Treated Lumber
- 10 DIY Project Ideas Utilizing Painted Pressure Treated Lumber
- 11 Best Practices for Maintaining Painted Pressure Treated Lumber
- 12 Comparative Longevity: Painted vs. Unpainted Pressure Treated Lumber
- 13 Frequently Asked Questions About Painting Pressure Treated Lumber
- 14 Conclusion
- 15 Additional Resources
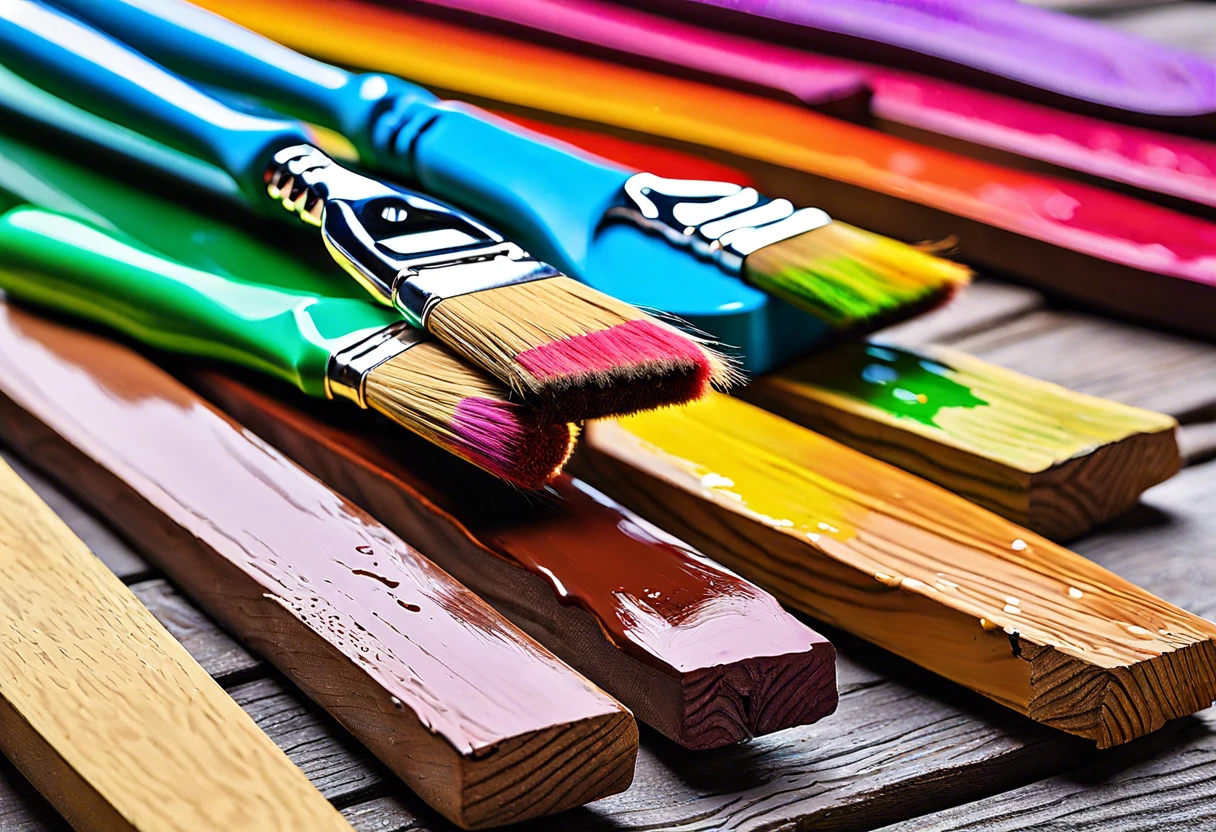
Can Pressure Treated Lumber Be Painted?
Yes, you can paint pressure treated lumber. However, wait at least 6–12 months for it to dry properly. Using a primer first helps the paint stick better. Make sure it’s clean and free of debris before you start. If you’re planning to transport a large painting after your project, you might want to check airline regulations for artwork.
What is Pressure Treated Lumber?
Pressure treated lumber is wood infused with preservatives under high pressure. This process makes the wood resistant to rot and insects, increasing its lifespan—often lasting over 20 years (More Than 10,000 Days) compared to untreated wood.
Now, let’s discuss whether you can paint it. I used pressure treated lumber for my backyard shed project and wondered the same—frustration creeps in if you’re not aware of the options!
I’ve relied on pressure treated lumber for outdoor structures due to its durability. But when considering if pressure treated lumber can be painted, be cautious; it can create problems if not done correctly. From my experience, test a small sample first to avoid costly mistakes! If you’re struggling with paint adhesion, you might want to explore effective paint removal techniques.
Essential Considerations Before You Start Painting
What do you need to prepare for?
- Exterior Primer: Use a high-quality primer like Zinsser B-I-N Shellac-Based Primer (1 Qt [0.95 L]). It seals the wood and improves paint adhesion.
- Medium-Grit Sandpaper 💰 Save on Assorted Grit Sandpaper → : Get medium-grit sandpaper, such as 3M SandBlaster (9 in X 11 in [23 Cm X 28 Cm]). It’s essential for smoothing the surface of the pressure-treated lumber before painting.
- Liquid Moisture Meter: A meter like Wagner MMC220 is crucial. It measures moisture content, as paint adheres best when wood moisture is 15% or lower.
- Quality Exterior Paint: Use paint like Behr Premium Semi-Gloss Enamel (1 Gallon [3.78 L]). This high-quality paint provides durability and weather resistance for your lumber.
So far we covered important factors to consider before beginning your painting project. Let’s look at the step-by-step painting guide next.
Also See: Can an Elephant Really Paint? Discover the Truth!
Step-by-step Guide to Painting Pressure-treated Lumber
Here’s how to decide if your treated lumber can be painted and how to do it correctly.
-
Preparation Of the Surface
Thoroughly clean the pressure-treated lumber. Use a power washer set to 3000 PSI (Pounds Per Square Inch) to remove dirt, mold, or old finish. Let it dry for at least 48 hours before proceeding.
While prepping, check for rough spots. Sand these areas with 80-grit sandpaper to achieve a smooth surface. This helps the paint adhere better and provides a polished finish.
-
Selecting the Right Paint
Choose paint designed for outdoor use and compatible with treated lumber. Look for “exterior latex” or “oil-based” paints with recommended adhesion to pressure-treated wood.
Use paint that explicitly states it works on damp surfaces. Manufactured for temperatures between 10°C and 30°C (50°F and 86°F), it ensures an optimal application environment.
-
Applying a Primer
Apply a high-quality primer for exterior wood. Use a foam roller or brush, starting at corners and edges to coat every part. Priming prepares the surface and increases the paint’s longevity.
Let the primer dry for about 24 hours before proceeding, especially in humid areas. This wait ensures proper adhesion of the topcoat, preventing future peeling or discoloration.
-
Painting the Lumber
Roll or brush on your chosen paint, applying thin, even coats. Each coat should be about 0.2 mm (0.008 Inches) thick. Allow the paint to dry fully between coats, typically around 4–6 hours, depending on humidity. Professional painters often recommend specific painting materials and techniques.
Apply at least two coats for better coverage and color retention. This enhances durability against weather damage and extends your project’s life.
That covers the step-by-step process for painting pressure-treated lumber. Let’s now take a look at paint options for it.
Types Of Paint Suitable for Pressure-treated Lumber
Let’s explore the types of paint that work well. We’ll cover Acrylic, Oil-based, Enamel, and Stain.
-
Acrylic Paint
Acrylic paint dries quickly and has excellent adhesion. It’s a top choice for pressure-treated lumber, lasting around 5-10 years if applied properly.
-
Oil-based Paint
This paint penetrates deeply and offers great moisture protection. It can last longer than acrylic, ranging from 8-12 years.
-
Enamel Paint
Enamel paint provides a glossy finish and is durable against the elements. It’s perfect for outdoor furniture made from pressure-treated wood, resisting fading and lasting up to 10 years.
-
Stain
Stain enhances the natural beauty of wood while offering weather protection. It’s recommended to reapply every 3-5 years to maintain appearance and effectiveness.
From my experience, I’m partial to Acrylic paint. It consistently delivers great results with its quick-drying feature, making my projects smoother.
That covers suitable paint types for pressure-treated lumber. Let’s now take a look at factors influencing the painting process.
Factors Affecting the Painting Process Of Pressure-treated Lumber
What factors influence the ability to paint this lumber? Here are four key ones.
-
Moisture Content – High moisture levels can hinder paint adhesion, leading to peeling.
-
Age of Lumber – Newly treated wood often needs time to dry before painting.
-
Type of Treatment – Some chemicals used in pressure treating can affect paint compatibility.
-
Surface Preparation – Proper sanding and cleaning can improve paint adherence to the surface.
So far we covered the elements influencing the painting process of pressure-treated lumber. Let’s look at the typical problems when painting it next.
Common Issues When Painting Pressure-treated Lumber
My friend once struggled to paint pressure-treated lumber. The paint peeled off because it hadn’t dried long enough—six months is ideal. Moisture levels should be below 15% for the best adhesion (Bond). If you’re considering painting exterior surfaces like brick, you might encounter similar challenges with painting brick home techniques.
To fix this, use a moisture meter. Apply a high-quality exterior primer first to ensure the paint adheres better when you finally coat it.
Finishing Touches: Sealants and Additional Protection
After exploring your options for painting pressure-treated lumber, seal it with a high-quality sealant, like Behr Premium, after 6-12 months to ensure durability.
Inspect joints and ends every 6 months for cracks. Use a moisture meter to check for moisture above 15%, which indicates that further maintenance is needed.
From one expert to another, consider power washing the surface before restaining. Use 3,000 PSI (Pounds Per Square Inch) equipment to maintain your treatment’s integrity.
Additional Treatments for Painted Pressure Treated Lumber
Let’s dive into special treatments you can apply after painting your pressure treated lumber. These can enhance appearance and longevity!
Stains vs. Paint
Consider whether you’d prefer the opaque look of paint or the natural beauty of stain. Here’s a quick comparison:
| Feature | Paint | Stain |
|---|---|---|
| Appearance | Opaque, colorful | Transparent, shows wood grain |
| Durability | 7-10 years | 3-5 years |
| Maintenance Frequency | Every 3-5 years | Every 1-3 years |
Using Sealants for Extra Protection
Sealants can add a protective layer after painting. They can guard against moisture and UV damage. Here are top sealants I recommend:
- Clear Sealant: Let’s the wood shine through while providing protection.
- Water-Repellant Sealant: Best for keeping moisture away from the wood.
- UV-Blocking Sealant: Protects against sun damage while enhancing color.
Doesn’t that sound easier than worrying about repainting all the time? With these treatments, you get peace of mind while making your projects pop!
DIY Project Ideas Utilizing Painted Pressure Treated Lumber
How about creating an eye-catching garden privacy screen or a funky outdoor bench? These projects add a splash of style to your space!
I’d gather my painter’s tape, outdoor paint, and some brushes. For $50 to $100 (About 45 to 90 USD) in materials, and a weekend afternoon, you can transform your patio or garden area!”
If you’re worried about whether can pressure treated lumber be painted, consider staining it instead. I’ve found a solid stain gives it character while keeping it protected—plus, there are tons of colors to choose from! When working with exterior wood surfaces, you might also want to explore painting cedar siding techniques for additional wood protection strategies.
Best Practices for Maintaining Painted Pressure Treated Lumber
Once you’ve painted your pressure treated lumber, keeping it in top shape is key. Here are some best practices to ensure its longevity.
-
Regular Inspections
Check your painted lumber every 6–12 months. Look for any peeling paint or cracks. Early detection helps you address issues before they worsen.
-
Cleaning Routine
Use a gentle soap and water mix to clean painted surfaces. Avoid pressure washing; it can strip the paint. A soft cloth or sponge works best!
-
Repainting Schedule
Depending on conditions, consider repainting every 3-5 years. High-humidity areas may need more frequent touch-ups, while drier climates may extend coverage.
Comparative Longevity: Painted vs. Unpainted Pressure Treated Lumber
Want to see how painting affects durability? Let’s break it down in this easy-to-read table.
| Condition | Estimated Lifespan (Years) |
|---|---|
| Painted Pressure Treated Lumber | 10-15 |
| Unpainted Pressure Treated Lumber | 5-10 |
As you can see, painting your pressure treated lumber can almost double its lifespan! That’s a win for anyone looking to maximize their outdoor projects.
Frequently Asked Questions About Painting Pressure Treated Lumber
Can You Paint Pressure Treated Wood Immediately After Installation?
No, you shouldn’t paint pressure treated wood immediately after installation. New treatments can take time to dry; you should wait at least a few months, ideally 6 months, for optimal adhesion and durability.
Is Painting Pressure Treated Lumber Necessary?
Yes, painting pressure treated lumber is necessary to protect it from the elements. Without paint, moisture can penetrate, causing warping or decay, that eventually could require costly replacements. If you’re unsure about the painting process, you might want to explore cabinet painting techniques that can help you understand surface preparation.
What Happens if You Don’t Paint Pressure Treated Lumber?
If you don’t paint pressure treated lumber, it may become susceptible to rot and insect damage. In fact, untreated wood can lose structural integrity within 5-10 years in harsh environments, drastically reducing its lifespan. When considering protective coatings, you might want to explore painting techniques for wood surfaces.
Can You Stain Rather Than Paint Pressure Treated Lumber?
Yes, you can stain rather than paint pressure treated lumber. Staining allows the wood’s grain to show while providing essential protection; just ensure it’s fully dry before applying, typically about 4-6 months after installation. If you’re considering alternative finishes, painting wood surfaces offers another versatile option for wood preservation.
How Long Should Pressure Treated Lumber Dry Before Painting?
Pressure treated lumber should dry for about 3-6 months before painting. This drying period ensures that moisture evaporates, allowing for better adhesion of paint.
Can You Use a Sealer on Pressure Treated Lumber Instead Of Paint?
Yes, you can use a sealer on pressure treated lumber instead of paint. Sealers protect against water damage and UV rays without altering the wood’s appearance, making them an excellent option.
Is There a Difference Between Cover and Transparent Stains for Pressure Treated Lumber?
Yes, there is a difference between cover and transparent stains for pressure treated lumber. Cover stains offer full-color coverage, while transparent stains allow natural wood grain to show, also providing UV protection.
Conclusion
I hope this provided you with valuable insights about pressure treated lumber. We’ve explored its definition, key considerations for painting, a comprehensive step-by-step guide, recommended color palettes, appropriate paint types, factors influencing the painting process, common challenges, finishing touches with sealants, creative DIY project ideas, and answers to frequently asked questions.
So, can pressure treated lumber be painted? Yes, but ensure you wait at least 6 months after treatment for it to dry out. By utilizing the right paint and techniques, you can achieve a stunning and durable finish for your project.
For additional information on painting techniques, check out Paint Answers.
Additional Resources
- Can You Paint Pressure Treated Wood? | CertaPro Painters®
- Can You Paint Pressure-Treated Wood? Tips and Tricks | Five Star Painting
- How to Paint Pressure-Treated Wood
Experienced interior designer with 15+ years in transforming spaces, blending artistry with expertise in color and design. Rhode Island School of Design graduate, specializing in restorations and modern makeovers.
Material, Wood


