What Grit Sandpaper Before Painting?
Published on: April 20, 2025 | Last Updated: January 7, 2025
Written By: Alisha Winters
Sandpaper’s like magic paper that helps smooth out rough surfaces before you paint. It comes in different textures, kind of like how some cookies are crunchy and others are soft!
So, what grit sandpaper 🔥 Deal: Assorted Grit Sandpaper → before painting is key to getting a smooth finish? I learned the hard way that using the right grit makes all the difference in how the paint goes on. If you don’t sand properly, the paint can peel or look bumpy.
In this article, you’ll discover how to choose the right grit, observe preparation steps, explore types of sandpaper, understand factors that impact your choice, and learn about common issues. Plus, I’ll cover creative DIY project ideas that involve painting while answering frequently asked questions about sanding. This guide on what grit sandpaper before painting will set you up for painting success!
Contents
- 1 What Grit Sandpaper Before Painting?
- 2 What is Sandpaper?
- 3 Preparation Before You Get Started
- 4 Step-by-step Guide to Choosing the Right Grit
- 5 Understanding Sandpaper Grading Systems
- 6 Sandpaper Grit Chart Overview
- 7 Types Of Sandpaper Relevant to ‘What Grit Sandpaper Before Painting’
- 8 Factors Affecting Your Sandpaper Choice
- 9 Common Issues Encountered When Selecting Grit for Painting
- 10 Recommended Grit Sandpaper for Specific Surfaces
- 11 How Grit Size Affects Paint Adhesion
- 12 Finishing Touches After Sanding
- 13 Frequently Asked Questions About Sanding Before Painting
- 14 Conclusion
- 15 Additional Resources
What Grit Sandpaper Before Painting?
Before painting, use 120 to 220 grit sandpaper. It smooths surfaces and helps paint adhere better. For walls, 180 grit is a good choice. Remember, the finer the grit, the smoother the finish!
What is Sandpaper?
Sandpaper is a handy tool for surface finishing. It consists of a paper backing and abrasive particles, such as garnet, aluminum oxide, or silicon carbide, glued to its surface. The grit size ranges from 40 (Coarse) to 600 (Fine) or higher, offering various levels of abrasion.
When working with different surfaces, you might wonder about painting techniques and surface preparation. If you’re curious about specific painting methods for various surfaces, understanding material compatibility becomes crucial.
When prepping a surface for painting, the right grit sandpaper makes a significant difference. I learned that using 120 grit before painting gives a better finish than jumping straight in with a finer grit. If you’re unsure about using chemical solvents during surface preparation, you might want to check how acetone affects paint surfaces.
I used it extensively for refinishing old furniture. My go-to choice for walls was usually 120 grit, as it effectively smooths the surface and removes imperfections, making it ideal for paint application. Knowing the right grit for sanding cabinets before painting can really enhance your DIY projects! If you’re curious about exploring digital painting techniques, you might want to check out how 3D paint enables creative animations.
Preparation Before You Get Started
What do you need to prepare for sanding before painting?
- Sandpaper (120 Grit): Use 3M Pro Grade sandpaper at 120 grit. It’s ideal for smoothing surfaces before painting.
- Sanding Block: Get a sanding block, like Hyde 09130; it helps control pressure and improves sanding efficiency.
- Dust Mask: Wear a dust mask like 3M 8247. This protects your lungs from harmful sanding dust.
- Shop Vacuum: A shop vacuum, such as Craftsman 9-17816, is necessary for quick clean-up of dust and debris to keep your workspace tidy.
We have now covered preparation essentials before starting. Next, we will explore a detailed guide on selecting the appropriate grit.
Also See: Can You Paint in Cold Weather Inside? Tips for Success

Step-by-step Guide to Choosing the Right Grit
Here are the steps for selecting the best grit sandpaper before painting.
-
Assess the Surface Condition
Examine your surface closely. A rough surface needs coarser sandpaper, around 60-80 grit (150-200 Μm), while a smooth one requires finer grit, about 120-220 (75-130 Μm).
If you’re dealing with old paint, start with 80 grit to remove imperfections effectively without damaging the surface. Trust me, I’ve made the mistake of choosing grit that’s too fine before, and it extended my sanding time significantly! When stubborn paint proves challenging, you might want to explore alternative removal techniques like chemical solutions for paint stripping.
-
Select the Appropriate Grit Sandpaper
Choose the grit based on the surface type, from rough wood to smooth drywall. Use 120 grit (100 Μm) to prepare previously painted surfaces for better adhesion.
Different scenarios may require varying grits; for cabinets, I usually start with 150 grit (100 Μm) and finish with 220 grit (75 Μm) before painting. This combination creates a smooth finish!
-
Prepare Your Workspace
Clean your space before starting. Dust and dirt can affect your paint finish, so clear everything and set up the area properly for your sanding project.
I recommend using drop cloths to catch debris and protect your floor. Preparation may seem tedious, but it’s essential for a pristine look when you’re finished.
-
Sanding Technique
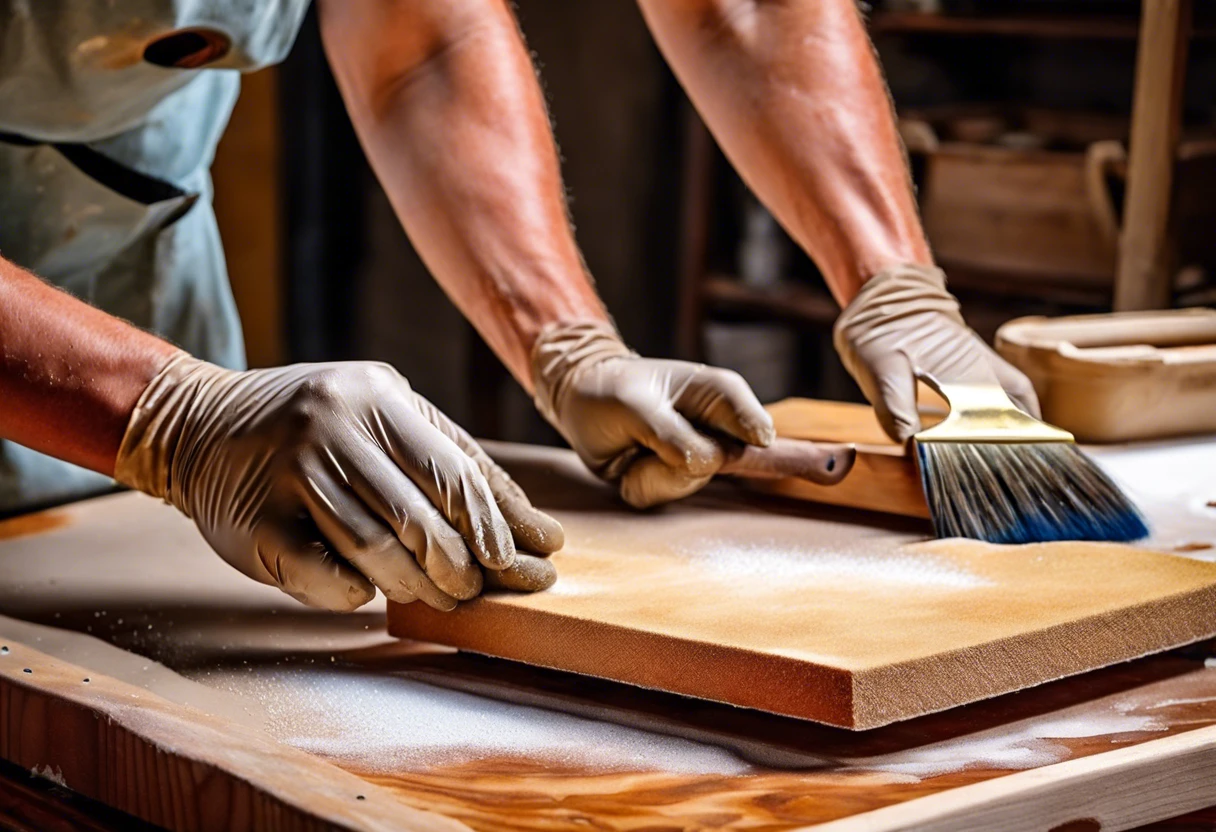
Apply even pressure while sanding; don’t rush this step. Keep your movements consistent to avoid gouges and focus on going with the grain, especially for wood surfaces.
Switch to finer grits after using rougher ones to create a smoother foundation for your paint. I typically finish sanding with 320 grit (43 Μm) for a flawless finish before applying any paint.
You should now have a good understanding of selecting appropriate grit and its importance. In the next part, we’ll discuss sandpaper grading systems.
Understanding Sandpaper Grading Systems
Let’s break down how sandpaper grit is actually graded and the significance of that grading.
- Coarse Grit: Includes 40 to 80 grit; great for heavy material removal. It sets the stage for your surface prep.
- Medium Grit: Ranging from 100 to 150 grit, it’s the go-to for knocking down rough areas and smoothing surfaces before painting.
- Fine Grit: This ranges from 180 to 240 grit; ideal for finishing touches and preparing your surfaces for paint.
- Extra Fine Grit: 300 grit and above. Use it for delicate sanding, like between paint coats.
So far we covered how sandpaper grading works. Let’s look at the grit chart overview next.
Sandpaper Grit Chart Overview
Here’s a handy chart that explains what each grit does and when to use it before painting.
| Grit Range | Use Case | Material Types |
|---|---|---|
| 40-80 | Heavy Material Removal | Rough Wood, Paint Stripping |
| 100-150 | Surface Preparation | Wood, Metal |
| 180-220 | Finalizing Surface for Painting | Wood, Drywall |
| 240+ | Finishing Touches | Delicate Surfaces, Between Coats |
We covered the sandpaper grit chart and its significance. We will now cover the various types of sandpaper.

Types Of Sandpaper Relevant to ‘What Grit Sandpaper Before Painting’
Let’s explore the types of sandpaper you can use: fine, medium, coarse, and ultra-fine grits.
-
Fine Grit
Fine grit sandpaper usually ranges from 180 to 220 grit. This type is ideal for prepping surfaces just before painting, as it smooths without scratching.
-
Medium Grit
Medium grit sandpaper falls between 100 and 150 grit. It’s effective on rough surfaces, removing old paint or blemishes before applying a new coat.
-
Coarse Grit
Coarse grit sandpaper ranges from 60 to 80 grit. This abrasive is perfect for stripping old finishes or sanding down very rough areas before painting.
-
Ultra-fine Grit
Ultra-fine grit starts at 240 grit and higher. Use it for finishing touches; it’s excellent for ensuring a perfectly smooth finish right before the final layer of paint.
Having experience in the field, I prefer fine grit sandpaper, especially at 220 grit. It strikes the best balance between smoothness and roughness, making pre-paint surface treatment easy!
Factors Affecting Your Sandpaper Choice
What factors influence your sandpaper selection before painting?
-
Surface Texture: Smooth surfaces usually need finer grits, like 220, while rough surfaces require coarser grits for better adhesion.
-
Material Type: Different materials, like wood or drywall, need specific grits. For example, 120 grit is ideal for sanding wood cabinets.
-
Existing Finish: If there’s an old paint or varnish, coarser grits, like 80, strip it effectively before painting.
-
Intended Finish: For a glossy finish, start with a finer grit (220) to achieve a smooth surface when painting.
Common Issues Encountered When Selecting Grit for Painting
My friend once chose 80-grit (P800) sandpaper for his walls. The result? Deep scratches everywhere! It’s crucial to start with 120-grit (P1200) for smooth surfaces and then work your way up. This approach allows better paint adhesion—minimizing pesky defects. If you’re looking to tackle painting projects on different surfaces like brick pavers, proper surface preparation techniques become even more critical.
Use numbers wisely. For detailed work like cabinets, try 220-grit (P2200) for surface preparation. It reduces the chance of paint chipping, giving you a flawless finish.
Recommended Grit Sandpaper for Specific Surfaces
Different surfaces require different sandpaper grits. Let’s break down what grit to use for common materials.
| Surface Type | Initial Grit | Final Grit | Purpose |
|---|---|---|---|
| Wood (Rough) | 60-80 grit | 120-220 grit | Remove rough spots and prepare for painting. |
| Wood (Smooth) | 120 grit | 220 grit | Ensure a smooth surface for even paint application. |
| Metal | 80-120 grit | 240 grit | Strip old paint and smooth surface for adhesion. |
| Drywall | 120 grit | 220 grit | Smooth out joints and imperfections before paint. |
How Grit Size Affects Paint Adhesion
Choosing the right grit size can impact how well paint sticks to a surface. Let’s explore this more.
-
Coarse Grit (40-80)
Coarse grit removes old finishes swiftly but can leave marks if overused. Perfect for heavy-duty projects.
-
Medium Grit (100-150)
Great for general sanding. It smooths surfaces without sacrificing too much material. A solid all-rounder!
-
Fine Grit (180-220)
Prepares surfaces for the final touch. It ensures paint adheres better, reducing peeling and flaking.
Finishing Touches After Sanding
After choosing the right grit sandpaper before painting, it’s crucial to clean the surface thoroughly with a tack cloth. This removes dust and ensures a smooth, clean slate for paint.
Inspect the surface closely for imperfections or raised wood fibers. Use a bright LED light to identify any missed spots and make sure they’re smooth before applying paint.
Here’s a pro tip from my past projects: Apply 320-grit sandpaper (P220) between paint coats for added smoothness. This will greatly improve the finish quality.
Frequently Asked Questions About Sanding Before Painting
How Do I Know When to Change Grit Sandpaper?
You’ll know to change grit sandpaper when it starts to feel worn or less effective. Over time, sandpaper loses its effectiveness, often after sanding 1 to 2 square meters (10 to 20 Square Feet), depending on the material.
Can I Use the Same Grit for Different Types Of Surfaces?
No, you can’t always use the same grit for different types of surfaces. Different materials, like wood or metal, require different grit levels; 80-120 grit for wood and 400 grit for metal yield better results. If you’re unsure about paint storage and its longevity, check out how paint condition affects sanding.
Is Sanding Necessary Before Painting?
Yes, sanding is necessary before painting. It creates a smoother surface that helps paint adhere better, reducing peeling and ensuring a longer-lasting finish on average 30% more than unsanded surfaces. If you’re considering alternative painting techniques like chalk paint application methods can provide additional surface preparation insights.
Should I Wet Sand Before Painting?
Yes, you should consider wet sanding before painting. Wet sanding minimizes dust and helps achieve a finer finish, especially useful for finishes on cabinets or furniture.
What Should I Do if My Sandpaper Slips?
If your sandpaper slips, ensure it’s attached correctly to the sander. If it’s worn or dirty, it’s time to replace it. Applying even pressure during sanding also helps maintain grip and control. Professional painters often invest significant time understanding material costs, which can impact overall project expenses, especially when considering automotive paint’s complex pricing.
Conclusion
You’ve reached the conclusion. Throughout this guide, we explored different sandpaper types, necessary preparation steps, a comprehensive grit selection guide, key factors influencing your choices, common issues, finishing techniques, and creative DIY ideas.
When it comes to painting, selecting the appropriate grit is crucial—120-220 grit is ideal for walls, while 180-240 grit is perfect for cabinets. Should you require further assistance, feel free to reach out for expert sandpaper selection advice.
For more detailed guides and tutorials, visit Paint Answers.
Additional Resources
Experienced interior designer with 15+ years in transforming spaces, blending artistry with expertise in color and design. Rhode Island School of Design graduate, specializing in restorations and modern makeovers.
Texuring, Topics


