


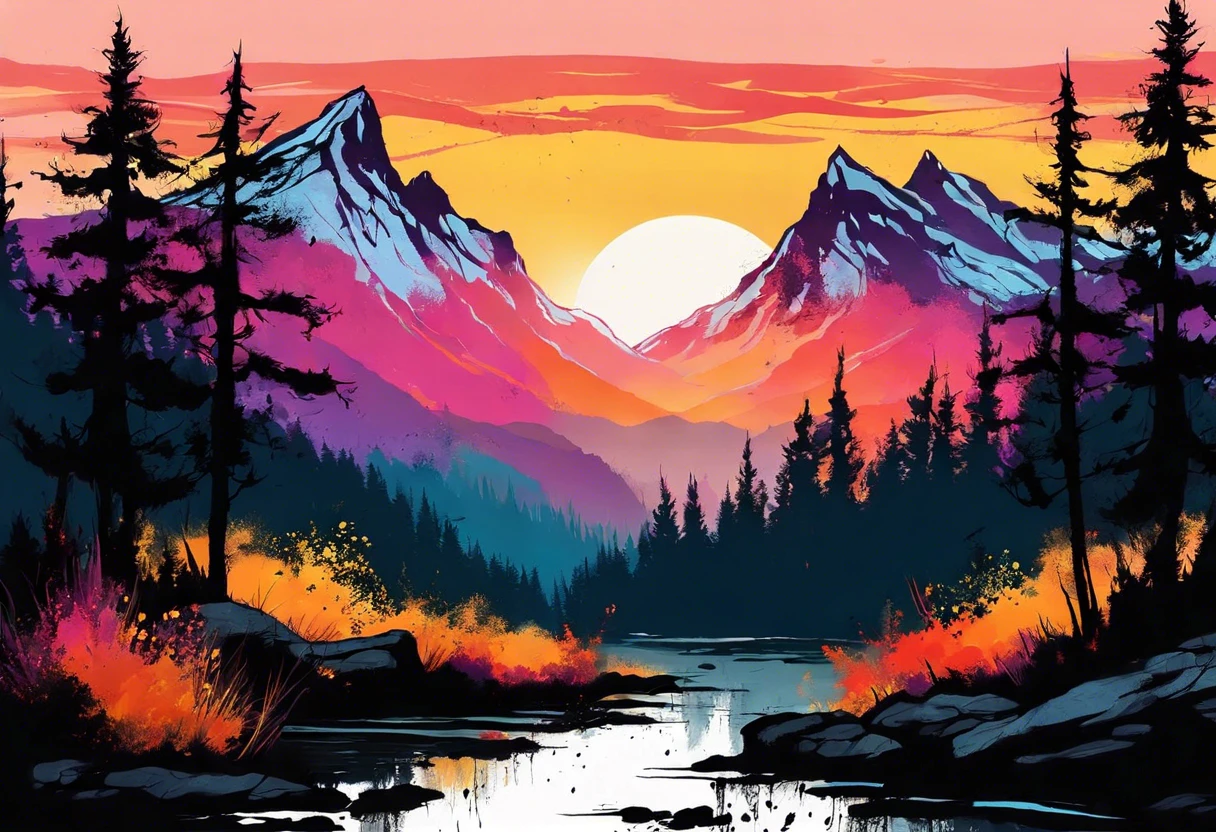
How to Paint A Mountain Landscape?
Published on: March 18, 2025 | Last Updated: January 7, 2025
Written By: Sarah McClintock
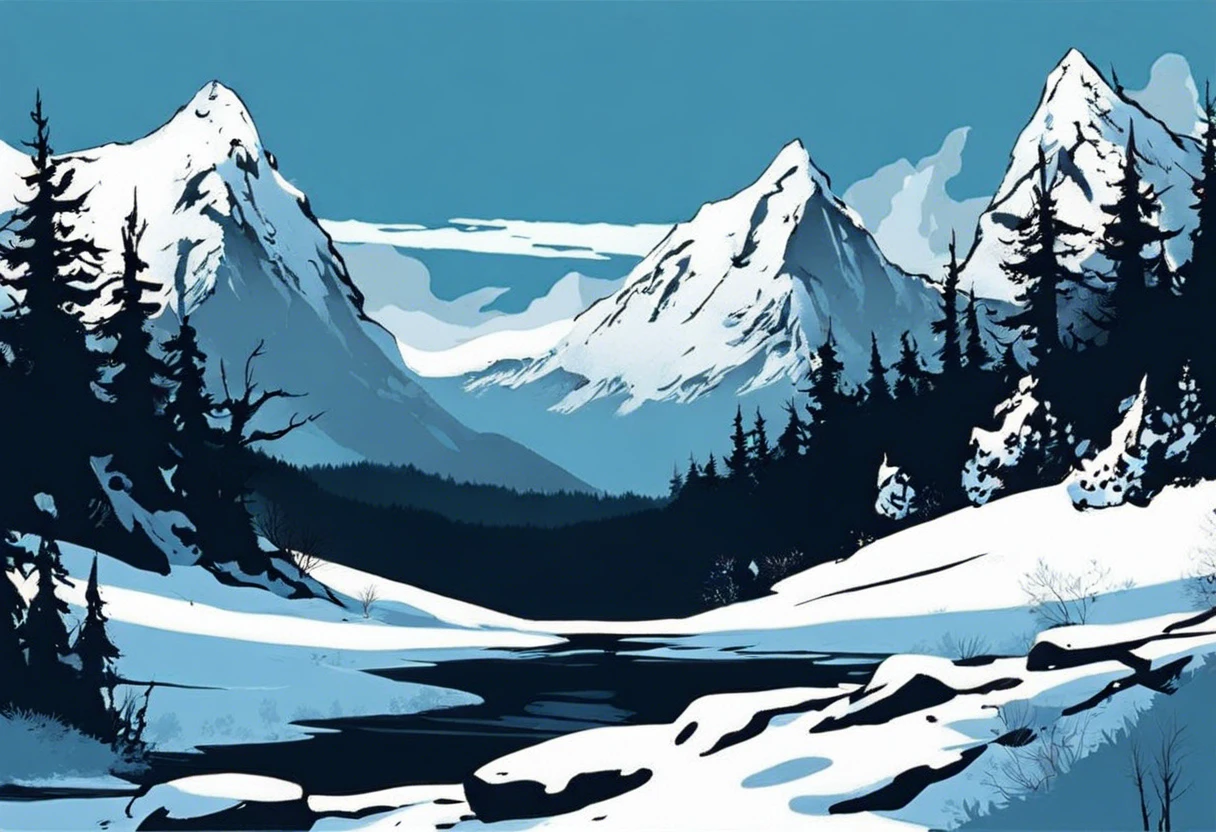
A mountain landscape is what you see when big, tall mountains meet the sky—like a giant hug of nature. It’s all about blending colors and shapes!
Learning how to paint a mountain landscape is super important. I’ve painted my share of mountains, and following steps makes sure your artwork is awesome and not a big mess.
In this guide, you’ll find essential supplies, a step-by-step painting process, recommended colors, styles, factors to consider, common painting issues, finishing touches, and DIY project ideas. You’ll discover how to paint mountains on a wall like a pro.
Contents
- 1 How to Paint A Mountain Landscape?
- 2 What is a Mountain Landscape?
- 3 Essential Supplies Before You Start Painting
- 4 Step-by-step Guide to Painting a Mountain Landscape
- 5 Recommended Color Palette for Mountain Landscapes
- 6 Different Styles Of Mountain Landscape Painting
- 7 Understanding Atmospheric Perspective in Mountain Painting
- 8 Color Temperature in Mountain Landscapes
- 9 Exploring Textures in Mountain Landscapes
- 10 Incorporating Foreground Elements in Your Landscape
- 11 Choosing the Right Composition for Mountain Landscapes
- 12 Using Light Effects to Enhance Your Mountain Painting
- 13 Common Issues When Painting Mountain Landscapes
- 14 Key Finishing Touches for Your Mountain Landscape Painting
- 15 DIY Project Ideas for Aspiring Landscape Painters
- 16 Frequently Asked Questions About How to Paint a Mountain Landscape
- 17 Conclusion: Embrace Your Creativity in Mountain Landscape Painting
- 18 Useful Resources
How to Paint A Mountain Landscape?
Start with a sketch to outline your mountain scenery. Use a wet brush to blend colors for the sky and mountains. Add details like trees and rocks with a smaller brush. Finish by adding highlights and shadows for depth. If you encounter paint challenges during your artwork, you might want to explore effective paint removal techniques.

The Finishing Touch
A freshly painted wall is a blank canvas. The best way to bring your room to life is with a single piece of statement art that ties everything together.
Browse Wall Art at Big Wall DecorWhat is a Mountain Landscape?
A mountain landscape is a striking natural scene, featuring rugged peaks often over 1,000 meters (3,280 Feet) high. This landscape typically showcases jagged cliffs, valleys, and diverse flora that thrive in alpine conditions.
To paint a mountain landscape, you need to capture the majesty and depth these features provide. I remember my first attempt; mixing cerulean blue with a touch of white brought the sky to life. If you’re looking to expand your artistic skills beyond traditional canvas, you might want to explore painting techniques for different surfaces.
A colleague found it helpful to study the play of light and shadow on mountains for his artwork. By understanding this, he learned to paint mountain landscapes more realistically, creating dramatic contrasts that draw the eye across the canvas. If you’re curious about removing paint mistakes during your artistic process, acetone can help clean painting errors.
Essential Supplies Before You Start Painting
What do you need to get started?
- Acrylic Paint Set: A set with colors like Cadmium Yellow, Ultramarine Blue, and Phthalo Green—such as Liquitex or Golden—helps blend vibrant mountain hues.
- Canvas Board: Use a primed canvas board at least 40 cm × 50 cm (16 in × 20 in), like Blick Studio. It provides a great surface for landscape details.
- Brushes: Get assorted sizes, including flats and rounds, like Winsor & Newton. They enable broad strokes and fine details.
- Palette Knives: Use flexible ones for mixing paints, such as the Martin/F. Weber Palette Knife. This ensures ergonomic mixing for texture.
- Reference Image: Have a high-resolution photo or use sites like Unsplash. A good reference guides your colors and composition.
We’ve wrapped up the necessary supplies for painting here. Let us turn our attention to the step-by-step painting process.
Also See: Why Does Jared Mccain Have Painted Nails? To Express Himself.
The Finishing Touch
A freshly painted wall is a blank canvas. The best way to bring your room to life is with a single piece of statement art that ties everything together.
Browse Wall Art at Big Wall DecorStep-by-step Guide to Painting a Mountain Landscape
Here are the steps to create your stunning mountain landscape masterpiece.
-
Choose Your Reference Image
Pick a clear, high-quality photo of a mountain scene that inspires you. Aim for a composition with hills, trees, or a river—these elements add depth.
Look for images with contrasting colors. A sunlit mountain against a bright blue sky creates vivid contrasts in your painting.
-
Prepare Your Canvas and Materials
Select your canvas size. A larger canvas—about 61 cm (24 Inches) by 46 cm (18 Inches)—gives you more space to express the landscape’s grandeur.
Ensure your materials—acrylics, watercolors, or oils—align with your vision. Each medium behaves differently; acrylics are fantastic for layering due to their quick-drying properties.
-
Sketch the Outline Of Your Landscape
Lightly sketch your composition using a pencil or pastel. Keep it light; heavy marks are hard to hide once you add paint.
Show depth by varying the mountain sizes in your sketch. Overlapping peaks enhance the three-dimensional look.
-
Apply the Sky and Background Colors
Create the sky first. Use a gradient—from light blue at the horizon to deeper blue near the top. Blend the colors smoothly for a realistic look.
A pinch of white can lighten your blues, creating a picturesque sky that draws the viewer in and sets the backdrop for your mountains.
-
Paint the Mountains With Layers
Start with the furthest mountains using gray and blue shades for a faded effect. Lighter colors suggest distance—key to effective landscape painting.
Gradually add layers of darker hues like green or brown for closer mountains. Blend between shades right on the canvas; this method creates a more natural transition.
-
Add Foreground Elements and Details
Add details like trees, rocks, or a river. These elements bring your artwork to life! Place them strategically to guide the eye through your landscape.
Use a smaller brush for precision. Finally, add highlights—don’t skip this step—these make your mountains pop with movement and shine.
-
Final Touches and Corrections
Step back and critique your piece. Look for areas needing adjustment. Sometimes, a little extra contrast in shadows can elevate your mountains.
Let your painting dry completely before any touch-ups or varnishing. This finishing touch locks in your hard work for years to come.
So far we covered a detailed guide on painting mountain landscapes. Let’s look at the suggested color palette for mountain scenes next.
Recommended Color Palette for Mountain Landscapes
I suggest using a “Nature’s Serenity” palette for painting mountain landscapes, featuring soothing and earthy tones that bring out the tranquil beauty of nature.
| Color Box | Hex Code | Color Name |
|---|---|---|
| #4A76A8 | Sky Blue | |
| #A1B354 | Fern Green | |
| #C7C2B7 | Soft Gray | |
| #AC5454 | Earthy Red | |
| #E8D2C0 | Light Sand |
We covered a suggested color palette for mountain landscapes here. We will now cover various styles of mountain landscape painting.
Different Styles Of Mountain Landscape Painting
Let’s explore various types of mountain landscape painting: Impressionism, Realism, Abstract, and Watercolor.
-
Impressionism
This style captures the fleeting effects of light and color in nature. Use quick brush strokes and bright colors to create movement in your mountain scenes.
-
Realism
In Realism, you depict landscapes as they are. Focus on details like the texture of rocks and the shade of trees to create authenticity.
-
Abstract
This style breaks down the mountain landscape into shapes and colors. It emphasizes feelings and interpretations over realistic details, allowing for sparser compositions.
-
Watercolor
Using transparent washes can evoke soft atmospheres in landscapes. Control your water mixture to achieve gradients that imitate the ethereal (Heavenly) qualities of mountains.
From both successes and failures, I’ve learned that realism resonates with me most. It makes you notice small details like shadows and colors that bring life to mountain views.
We covered various styles of mountain landscape painting. We will now explore the concept of atmospheric perspective in mountain painting.
Understanding Atmospheric Perspective in Mountain Painting
Atmospheric perspective helps you create depth in your mountain landscapes.
-
What is Atmospheric Perspective?
It’s the technique of using color and clarity to show distance. As objects get further away, they appear lighter and less defined.
-
How to Apply It?
- Use lighter, grayer colors for mountains in the background.
- Darker, more vibrant colors should dominate your foreground.
- Adjust saturation; distant mountains should lose color richness.
Color Temperature in Mountain Landscapes
Color temperature affects mood and dimension in your mountain landscapes.
-
Warm vs. Cool Colors
Warm colors (like reds and yellows) bring objects forward. Cool colors (like blues and greens) push them back.
-
Implementing Temperature
- Highlight sunny mountain areas with warm tones.
- Incorporate cool colors in shaded regions for contrast.
Exploring Textures in Mountain Landscapes
Creating realistic textures adds life to your mountains.
| Texture Type | Description | Best Techniques |
|---|---|---|
| Rocky | Rugged surfaces with uneven edges. | Use palette knives for rough edges. |
| Smooth | Flatter areas with gentle slopes. | Dry brushing to create softness. |
| Snowy | Frosted peaks capturing light. | Use white sparingly and blend. |
Incorporating Foreground Elements in Your Landscape
Foreground elements enhance depth and make your painting engaging.
The Finishing Touch
A freshly painted wall is a blank canvas. The best way to bring your room to life is with a single piece of statement art that ties everything together.
Browse Wall Art at Big Wall Decor- Consider adding a river, trees, or wildlife for detail.
- Use larger shapes in the foreground to lead the viewer’s eye.
- Different textures differentiate elements—smooth water vs. rough rocks.
Choosing the Right Composition for Mountain Landscapes
Composition is crucial for creating impactful mountain landscapes.
-
Rule of Thirds
Divide your canvas into thirds—both horizontally and vertically. Place key elements along these lines or intersections to create balance. For instance, position the horizon line along 1/3 of the canvas height to enhance depth. When you’re ready to apply your composition techniques, consider using an airless paint sprayer for precision.
-
Leading Lines
Incorporate paths, rivers, or light rays that guide the viewer’s eye toward the mountains. This technique invites engagement, making your painting more dynamic.
-
Foreground, Middleground, and Background
Ensure each layer is distinguishable. Use larger, more detailed elements in the foreground, while keeping the background softer. This method creates a sense of depth allowing viewers to move through your landscape.
Using Light Effects to Enhance Your Mountain Painting
Playing with light can transform your mountain landscape.
-
Time of Day
Consider the time of day when painting. Dawn brings soft pastels, while sunsets explode with rich colors. Adjust your palette accordingly to reflect the hour.
-
Reflections
If there’s water, incorporate reflections of the mountains. This not only enhances realism but also adds a mesmerizing quality to your painting.
-
Light Sources
Identify your light source—sunlight or moonlight. Add bright highlights where light hits and shadows where it’s absent. This technique adds dimension and drama to your mountains.
Common Issues When Painting Mountain Landscapes
One time, my friend struggled to achieve the right depth in her mountains while painting a landscape. They looked flat and uninviting.
To fix this, she blended ultramarine blue and burnt sienna for shadows, adding white for highlights. This created contrast using a value scale from 1 (Dark) to 10 (Light), bringing her mountains to life! When exploring creative techniques, artists often experiment with color mixing and painting techniques.
Key Finishing Touches for Your Mountain Landscape Painting
After completing your mountain scene, let the painting dry for at least 48 hours to ensure proper adhesion. Consider using a clear varnish, like Gamvar, for protection.
Inspect the final layer closely with bright light—check for uneven edges or color inconsistencies. Use fine-grade sandpaper (Like 320-grit) on imperfections for a smooth finish.
Here’s a pro tip based on my past projects: Experiment with color glazing (Layering Colors) using a mix of paint products, like Liquitex acrylics, for added depth.
Also See: How Much Are Paintings Worth in Cayo Perico?
DIY Project Ideas for Aspiring Landscape Painters
Ready to unleash your inner artist? Try creating a giant outdoor mural of a mountain landscape on a fence or an old wooden canvas!
First, gather materials like exterior paint, brushes, and a roll of painter’s tape—expect to spend around $50-$100. Set aside a weekend; you can knock this out in 2-3 days, depending on your fence size! If your paint seems too thick, you might want to thin out the paint properly.
If you’re looking for alternatives, how about a DIY sand and paint technique? Blend different shades of brown and white sand with acrylic to bring texture into your ‘how to paint a mountain landscape’ piece—it’s cheaper and totally unique. I often roll the paints on my wall with a sponge for soft finishes—I swear by it! When working with acrylic on various surfaces, you might want to explore painting techniques for glass.
Frequently Asked Questions About How to Paint a Mountain Landscape
What Techniques Are Best for Painting Mountains?
When painting mountains, techniques like layering, glazing, and dry brushing are best. These methods create depth and dimension while mimicking natural textures.
How Do I Choose the Right Colors for My Mountain Landscape?
You should choose the right colors for your mountain landscape by considering natural hues. Earth tones, blues, and greens are essential, as they reflect the colors found in real landscapes.
Can Beginners Successfully Paint Mountain Landscapes?
Yes, beginners can successfully paint mountain landscapes with practice and the right guidance. Many simple techniques help newcomers build confidence and skill.
What Do I Need to Start Painting Landscapes?
To start painting landscapes, gather a canvas, paints (Acrylic or Oil), brushes, and a palette. Investing around $50–$100 (USD) covers the basics you need.
How Can I Improve My Mountain Painting Skills?
You can improve your mountain painting skills through regular practice, studying various mountain styles, and seeking constructive feedback. Practicing regularly leads to noticeable improvement. If you’re looking to expand your artistic techniques, painting different surfaces like alloy rims can help diversify your skill set.
What Common Mistakes Should I Avoid When Painting Mountains?
When painting mountains, avoid using an excessive mix of colors. Stick to a color palette that reflects the mountain scene you’re capturing for harmony.
Which Brushes Are Best for Painting Mountain Textures?
The best brushes for painting mountain textures include flat and fan brushes. Flat brushes create broad strokes, while fan brushes allow for fine, detailed work that mimics natural forms.
Should I Use Reference Images When Painting Mountains?
Yes, using reference images when painting mountains is highly recommended. They provide guidance on colors, shapes, and shadows, crucial for accuracy in your artwork.
Conclusion: Embrace Your Creativity in Mountain Landscape Painting
We’ve covered a lot about how to paint a mountain landscape, including essential supplies, the techniques used by professional artists, color palettes, different painting styles, and common challenges artists face.
To paint a mountain landscape, combine your materials, follow the steps, use the right colors, and apply those finishing touches to bring your vision to life. Remember, it’s all about exploring your artistic side while enjoying the process of how to paint a mountain landscape.
If you’ve enjoyed this journey, explore further and discover more resources on Paint Answers.
Useful Resources
- Gurney, J. (2009). Color and Light: A Guide for the Realist Painter. Kansas City, MO: Andrews McMeel Publishing.
- How To Paint Easy Mountains – Step By Step Acrylic Painting Tutorial
- How to Paint Mountain Landscape / Acrylic Painting – YouTube