
Can You Thin Enamel Paint? Essential Insights, Guidelines, Tips
Published on: March 17, 2025 | Last Updated: January 7, 2025
Written By: Sarah McClintock
Enamel paint is a colorful liquid that dries hard and shiny. It’s like magic paint that makes things look beautiful and lasts a long time!
So, can you thin enamel paint properly? It’s super important to know this because thinning affects how the paint flows and sticks to surfaces. I’ve had my share of fun and messy experiences with it, and trust me, getting it just right can make your projects shine!

- ✓
- ✓
- ✓

- ✓
- ✓
- ✓

In this article, we’ll explore key topics such as what enamel paint is, essential tips before thinning, a step-by-step thinning guide, and common hiccups you might face. We’ll also suggest a color palette, discuss types of thinnable enamel paints, and share creative DIY ideas using thinned enamel paint.
Contents
- 1 Can You Thin Enamel Paint?
- 2 What is Enamel Paint?
- 3 Essential Considerations Before You Start Thinning Enamel Paint
- 4 Step-by-step Guide to Thinning Enamel Paint
- 5 Best Practices for Thinning Enamel Paint
- 6 Types Of Enamel Paints You Can Thin
- 7 Factors Affecting the Thinning Of Enamel Paint
- 8 Common Issues When Thinning Enamel Paint
- 9 Finishing Touches: Achieving the Perfect Enamel Look
- 10 Understanding the Importance of Consistency in Thinning Enamel Paint
- 11 Effects of Thinning on Drying Time
- 12 Creative DIY Project Ideas Using Thinned Enamel Paint
- 13 FAQs
- 14 Conclusion
- 15 Additional Resources
Can You Thin Enamel Paint?
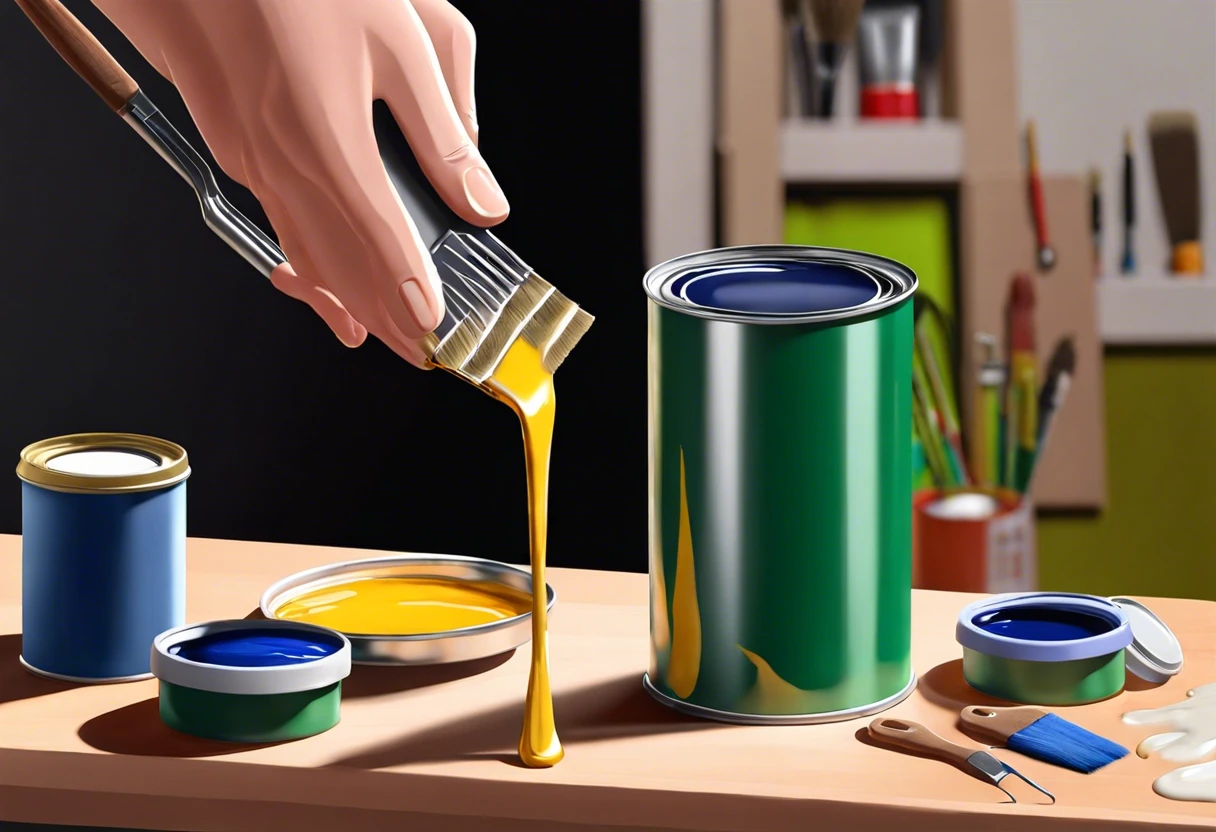
Yes, you can thin enamel paint! Use a suitable solvent, like mineral spirits or paint thinner, to achieve the desired consistency. Start with a small amount, about 10% solvent to paint, and mix well. Test it, then adjust as needed. If you’re curious about specialized painting techniques like diamond painting drill methods, exploring different artistic approaches can enhance your painting skills.

What is Enamel Paint?
Enamel paint is a glossy, durable coating used mainly for metal, wood, and plastic surfaces. It typically contains synthetic resins and pigments, offering a tough, weather-resistant finish that withstands wear and tear. If you’re considering painting delicate surfaces like baby furniture, you’ll want to ensure safe application techniques painting baby cribs safely.
You may wonder, can you thin enamel paint? I’ve experienced this myself. Once, while painting a vintage chair, I realized I needed to adjust the consistency.
During a DIY project, enamel paint helped give my metal furniture a chic look. I had to learn how to dilute (Thin) enamel paint to achieve the perfect texture for intricate designs, making the whole process smoother. When working with enamel paint in varying temperatures, I discovered some crucial techniques for maintaining optimal painting conditions.
Essential Considerations Before You Start Thinning Enamel Paint
What do you need to thin enamel paint?
- Enamel Paint Thinner: You’ll need a specific thinner like mineral spirits or paint thinner, commonly known as Gamblin Odorless or Klean-Strip. It’s vital for reducing viscosity without compromising quality.
- Measuring Cup: Get an accurate measuring cup, like a 1 oz (30 Ml) clear plastic cup. It’s crucial for precise mixing ratios, usually 1:1 for thinning.
- Stirring Stick: Use a wooden stir stick or paint mixing tool. This ensures thorough blending of paint and thinner, preventing clumps.
- Safety Gear: Wear safety goggles ⚡ Best Pick: Anti-Fog Safety Goggles → and a mask, such as the 3M P95 respirator. It’s necessary to protect against harmful fumes during the thinning process.
You should now have a good understanding of key factors for thinning enamel paint. In the next part, we’ll discuss the process of thinning.
Also See: How Can You Tell if a Painting is Real? Quick Tips

Step-by-step Guide to Thinning Enamel Paint
We’ll cover simple steps to thin enamel paint for smoother application.
-
Determine the Right Thinning Ratio
Decide how much thinner to add to your enamel paint. A common starting point is a mix of 1 part paint to 1 part thinner (1:1). For detailed jobs, adjust the ratio to 2:1 or 3:1 for a thicker consistency, depending on your project. When you’re finished painting, you’ll want to clean your brushes thoroughly to maintain their quality and preserve your painting tools effectively.
For spray applications, target a 1:1 ratio to maintain the decals and consistency needed for a smooth finish. Remember, too much thinner can cause runs, while too little may create brush marks!
-
Mixing the Enamel Paint and Thinner
Use a clean paint stirrer and scoop the paint into a separate container. Slowly add your thinner while stirring continuously for an even mix; you don’t want clumps ruining your application.
Mixing speed matters! Stir for 2-3 minutes, then let it sit for a minute to check the consistency. Stand back and watch how it flows; you want that velvety texture!
-
Testing the Consistency Of Thinned Paint
Test the thinned paint using a brush or a small section of your surface. It should glide smoothly without excessive dripping while maintaining good coverage; think of it as painting a masterpiece with a buttery feel! If you’re concerned about potential paint damage during your project, protecting your paint surface matters.
I usually perform a quick test swipe on cardboard or a scrap piece. Adjust with more thinner if needed—consistency is key. Keep it in mind when planning your approach.
That covers the method, tools, and tips for thinning enamel paint. Let’s now take a look at top practices for thinning enamel paint.
Best Practices for Thinning Enamel Paint
Let’s dive into effective techniques that ensure great results when thinning enamel paint.
Choosing the Right Thinner
Different projects call for different thinners. Here’s a quick guide:
- Mineral Spirits: Great for oil-based enamels. Mix 10-20% for best results.
- Water: Works with water-based enamel. Keep it to around 10% to maintain quality.
- Acetone: Powerful thinner for quick drying, but use sparingly—up to 5% works well.
- Enamel Reducer: Often specially formulated for thinning and maintaining paint properties. Aim for 10%.
Mini Thinning Test
Always test how your thinned paint behaves. Here’s a simple method:
- Take a small amount of your thinned paint.
- Use a brush and apply it on a scrap piece. Check coverage and texture.
- If it drips or runs, thin it less; if it’s too thick, add a little more thinner.
Adjusting for Specific Conditions
Different environments can impact how you should thin enamel paint:
| Condition | Recommendation | Ratio |
|---|---|---|
| High Humidity | Use less thinner to avoid runs. | 5-10% thinner |
| Cold Temperatures | Warm up paint slighty before thinning. | 10-15% thinner |
| Hot and Dry | Thin more to combat quicker drying. | 15-20% thinner |
Remember, adjusting your thinning ratio based on specific conditions can save you from painting headaches later on!
We’ve wrapped up best practices for thinning enamel paint here. Let us turn our attention to types of enamel paints you can thin.
Types Of Enamel Paints You Can Thin
Let’s explore the types of enamel paints you can thin: Alkyd, Acrylic, Water-Based, and Specialty Engine Enamel.
-
Alkyd Enamel
Alkyd enamel is oil-based and often requires a solvent like mineral spirits for thinning. You can typically thin it by 10-20% for smoother application.
-
Acrylic Enamel
Acrylic enamel is water-based, allowing you to thin it with water or acrylic reducers. Generally, dilute it by about 10% for optimal flow without losing color.
-
Water-based Enamel
This type mixes easily with water. You can thin it by 20-30%, which provides quick drying time and easier clean-up.
-
Specialty Engine Enamel
Designed for high temperatures, thinning specialty engine enamel requires specific thinners. Aim for a thinning of 5-10% to ensure durability.
In my experience, acrylic enamel works wonders in most situations. It balances ease of use and versatility, making it a top choice for art or DIY projects!
So far we covered different kinds of enamel paints to thin. Let’s look at the elements influencing enamel paint thinning next.
Factors Affecting the Thinning Of Enamel Paint
What factors influence your ability to thin enamel paint successfully?
-
Type of Enamel Paint: Different formulations respond uniquely; water-based thins easier than oil-based.
-
Thinning Agent: The solvent you choose—like mineral spirits or water—affects how well it mixes.
-
Temperature: Warmer conditions improve paint flow; cold can thicken it and cause issues.
-
Mixing Technique: Properly combining paints and solvents is crucial; a quick stir can ruin consistency.
Common Issues When Thinning Enamel Paint
My friend once tried to thin enamel paint for a model car. It turned clumpy instead of smooth! Frustrating, right?
To fix it, use 10% solvent (Liquid) for thinning, like mineral spirits. Mix well and test first. Always follow the manufacturer’s instructions so you get it right.
Finishing Touches: Achieving the Perfect Enamel Look
After avoiding over-thinning, let enamel paint cure for at least 24 hours at 20°C (68°F) for optimal hardness. Use a clear topcoat for extra durability against scratches.
Inspect the surface for evenness and gloss levels. For defects, use abrasive paper (800-1200 Grit) to smooth out areas, then reapply enamel paint if needed. I prefer Rust-Oleum for its consistent results. Professional painters often seek out specific high-quality paint brand recommendations.
Here’s a pro tip from my past projects: Use a moisture meter to check for humidity below 50%. Lower humidity prevents blistering in thicker applications of enamel paint.
Understanding the Importance of Consistency in Thinning Enamel Paint
Consistency in your enamel paint impacts the final outcome. Let’s break down why it matters.
The Role of Viscosity
Viscosity refers to how thick or thin a liquid is. In paint, it affects flow and adhesion. Here’s a simple guide:
- High Viscosity: This thick paint doesn’t spread well. It may leave brush marks.
- Low Viscosity: Thin paint flows nicely. It provides smooth coverage, but too thin can cause drips.
Testing Paint Consistency
Here’s a quick way to test your thinned enamel paint:
| Test Method | Description | Desired Result |
|---|---|---|
| Drip Test | Dip a brush and lift it. Count how long it takes for the paint to drip. | 3-5 seconds is ideal for smooth application. |
| Brush Stroke Test | Apply a stroke on a surface. Observe how it flows. | Smooth, even coverage without clumping. |
Effects of Thinning on Drying Time
Thinning enamel paint can speed up or slow down drying. Here’s a closer look:
Drying Time Variations
Generally, thinner paint dries faster, but watch out!
- Thinned Paint: Dries within 1-4 hours, depending on conditions.
- Unthinned Paint: May take longer, up to 8 hours or more.
Keep this in mind. If you’re in a hurry, a thinner mix might just do the trick!
Creative DIY Project Ideas Using Thinned Enamel Paint
How about jazzing up some plain wooden frames? You can paint them with thinned enamel for a dreamy, matte finish. Or try creating a unique mural on canvas using a sponge technique!
To kick off, grab some acrylic paint thinner and enamel paint. You’ll need about $15 to $20 for a small can of paint and thinner. Set aside a weekend to let your creativity flow and inspire others! If you’re looking to expand your artistic skills, painting techniques and inspiration can be a great next project.
If you’re wondering about alternatives, try mixing the enamel paint with a clear acrylic medium instead of thinner. This way, you’ll keep that beautiful depth while still achieving a softer effect and an easier application! When dried paint becomes stubborn, you might need professional cleaning techniques for restoring your paint brushes.
FAQs
Can You Use Water to Thin Enamel Paint?
Yes, you can use water to thin enamel paint, but it’s not the best practice. Water can reduce the paint’s integrity, affecting adhesion and durability.
What is the Best Thinner for Enamel Paint?
Mineral spirits or paint thinner are typically the best options to use for thinning enamel paint. They maintain the paint’s properties, enabling smooth application and drying.
Is It Necessary to Thin Enamel Paint Before Spraying?
Yes, it is often necessary to thin enamel paint before spraying. This step helps achieve a fine mist, reducing clogging in the spray nozzle and improving finish quality.
How Do You Know if You Have Thinned Paint Too Much?
You can tell if you’ve thinned enamel paint too much if it runs or drips excessively during application. The ideal consistency is smooth, pouring slowly but without being watery.
Can Thinned Enamel Paint Be Stored for Later Use?
No, thinned enamel paint should not be stored for later use. The prolonged chemical exposure can compromise its performance, leading to poor results upon reuse.
How Do You Remove Enamel Paint?
You can remove enamel paint using solvents like acetone or paint thinner. Apply the solvent with a rag or brush to break down the paint effectively, usually within 15-30 minutes.
What Happens if Enamel Paint Freezes?
If enamel paint freezes, it can spoil, ruining its application and finish. Temperatures below 0°C (32°F) can change the composition, making it difficult to use afterward.
How Long Does Enamel Paint Take to Dry?
Enamel paint typically takes 1-8 hours to dry to the touch, depending on the environmental conditions. Full drying can take up to 24 hours or longer in high humidity.
Conclusion
We covered various points including what enamel paint is, essential considerations before thinning, a step-by-step guide on how to thin enamel paint, types of enamel paints you can thin, common issues that arise, and creative DIY project ideas.
So, can you thin enamel paint? Yes, you sure can. Thinning it requires specific steps, like using the right thinner in careful amounts, usually around 10-15% of the paint volume. Wishing you success in your welding projects and happy painting!
If you want to dive deeper into this topic or find related information, check out Paint Answers.
Additional Resources
- Loomis, A. (2011). Figure Drawing for All It’s Worth. New York, NY: Titan Books.
- Forums – ARC Discussion Forums
- r/minipainting on Reddit: can anyone suggest something to thin enamel paints?
- Tamiya Paint Retarder my thoughts.


