
How to Make Paint Ornaments?
Published on: February 19, 2026 | Last Updated: October 1, 2025
Written By: paint_answered
Ornaments are pretty decorations we hang up, often for holidays or celebrations. They add sparkle and cheer, bringing joy to our surroundings.
When you learn how to make paint ornaments, you create something special with your hands. I remember my first attempt; it felt magical turning plain shapes into colorful art!
In this post, we’ll dive into essential preparations, step-by-step guides, color palettes, types of ornaments for painting, and common challenges. So, get ready to discover how to make painted ornaments and unleash your creativity!

- ✓
- ✓
- ✓

- ✓
- ✓
- ✓

Contents
- 1 How to Make Paint Ornaments?
- 2 What Are Ornaments?
- 3 Essential Preparations Before You Begin
- 4 Step-by-step Guide to Creating Stunning Paint Ornaments
- 5 Recommended Color Palette for Stunning Paint Ornaments
- 6 Different Types Of Ornaments for Painting Projects
- 7 Techniques for Painting Ornaments
- 8 Personalizing Your Paint Ornaments
- 9 Common Challenges When Making Paint Ornaments
- 10 Finishing Touches for Your Painted Ornaments
- 11 Choosing the Right Finish for Your Ornaments
- 12 Care and Maintenance of Painted Ornaments
- 13 Inspiring DIY Project Ideas for Paint Ornaments
- 14 Frequently Asked Questions About Making Paint Ornaments
- 15 Conclusion
- 16 Additional Resources
How to Make Paint Ornaments?
To make paint ornaments, simply select your materials—glass, wood, or ceramic. Use acrylic or special paint, then apply it with brushes or sponges. Dry thoroughly and add a ribbon for hanging. If you want to elevate your craft with vintage techniques, try transforming surfaces with antiquing methods. Enjoy your unique creations!
What Are Ornaments?
Ornaments are decorative items that enhance a space’s aesthetic appeal. Typically made from materials like glass, wood, or ceramic, these small treasures range from 2 cm (0.79 Inches) to over 10 cm (3.94 Inches) in size, suitable for various displays.
Making painted ornaments sparks creativity. I remember my first experience creating painted ornaments, where I explored mixing vibrant colors and applying them to different surfaces.
I’ve made custom ornaments for friends at Christmas. I experimented with painting acrylic ornaments using bright colors and personal designs, adding a unique touch to our holiday gatherings and making them memorable. If you’re looking to elevate your holiday decor, painting surfaces with creative techniques can transform ordinary objects into extraordinary keepsakes.
Essential Preparations Before You Begin
What do you need to get started?
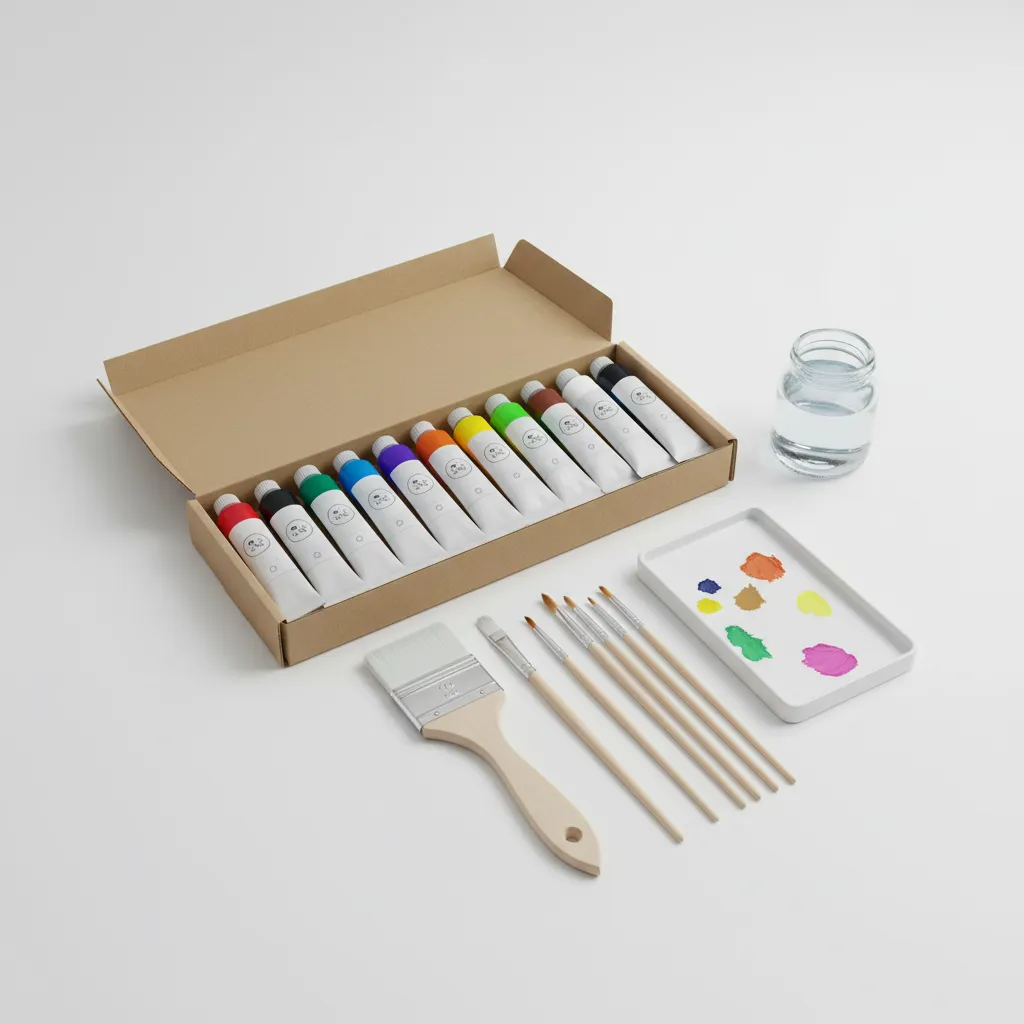
- Acrylic Paints: Get specific colors like Golden Acrylic Paint or Liquitex Basics. These vibrant paints make your ornaments stand out.
- Brushes: Use a variety of sizes, such as the Royal & Langnickel Golden Taklon Brush Set. Different sizes help create various designs and details.
- Clear Sealer: Choose a product like Mod Podge Clear Acrylic Sealer. This adds a protective finish and prolongs your artwork’s life.
- Ornament Blanks: Use plain ceramic or glass ornaments (Typically 10 Cm [4 Inches] in Diameter). They serve as the canvas for your artistic touch.
- Crafting Gloves: Wear disposable gloves, like Ecover reusable gloves. They keep your hands clean while you paint.
You should now have a good understanding of the necessary preparations before starting your project. In the next part, we’ll discuss the step-by-step process for creating beautiful paint ornaments. When working on exterior painting projects, it’s crucial to know the right temperature conditions for optimal results, so check out painting in cold weather techniques.


Also See: Where to Clean Paint Brushes? Quick Maintenance Tips
Step-by-step Guide to Creating Stunning Paint Ornaments
Let’s dive into crafting beautiful painted ornaments.
-
Prepare the Ornaments
Clean your ornaments with a damp cloth to remove dust and oils. If you’re using clear or wooden ornaments, sand them lightly for better paint adhesion.
For glass ornaments, use rubbing alcohol (70% Isopropyl) for a thorough clean, creating a smooth surface for your design.
-
Select Your Paints
Choose non-toxic acrylic paints; they’re vibrant and suitable for most surfaces. Select at least 3-5 colors for a blended look, but avoid overcrowding your palette.
For texture, use paint markers or specialty paints like metallics or glitters. They’ll make your creations pop!
-
Start Painting
Apply your first coat of paint using even strokes. Don’t rush—allow each layer to dry completely before applying the next.
Experiment with sponge or brush techniques to add depth and dimension to your art.
-
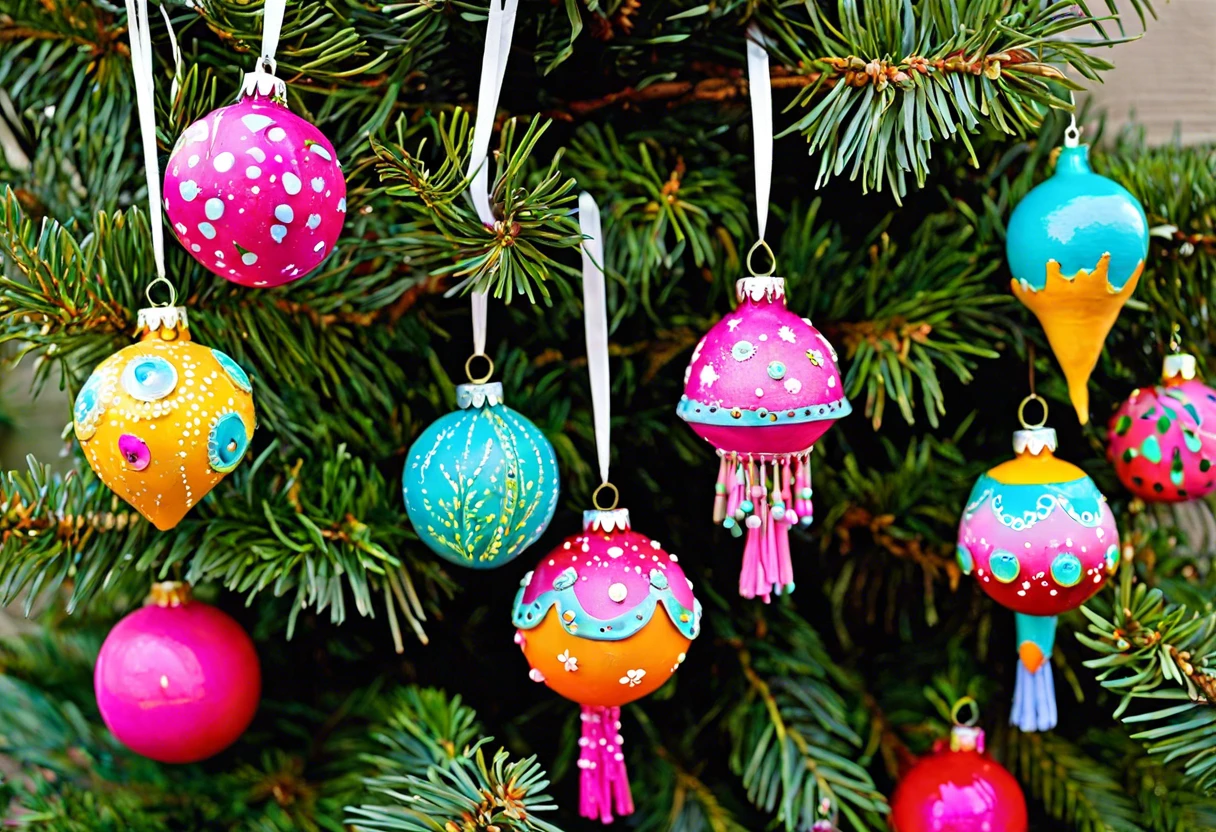
Add Decorative Elements
Once your base coat dries, get creative! Use glitter, sequins, or stickers to add detail and flair to your designs.
For a 3D effect, add glued-on embellishments like ribbons or fabric bows for extra personality.
Recommended SuppliesAs an Amazon Associate, I earn from qualifying purchases. Images are representative. -
Seal Your Ornaments
When your masterpiece is dry, seal in all your hard work. Use a clear spray sealant or Mod Podge to protect your paint.
Apply thin, even layers and let them dry for 24 hours. This keeps your ornaments looking fresh for years.


We’ve wrapped up the step-by-step process for making beautiful paint ornaments here. Let us turn our attention to the suggested color palette.
Recommended Color Palette for Stunning Paint Ornaments
I recommend a “Festive Jewel” theme for your ornaments, featuring vibrant colors that complement each other beautifully, creating a warm and inviting atmosphere.
| Color Box | Hex Code | Color Name |
|---|---|---|
| #B50F44 | Crimson Red | |
| #FBC502 | Golden Yellow | |
| #1F7A8C | Teal Blue | |
| #5D4B9A | Royal Purple | |
| #FB6D6D | Light Coral |
We have now covered a recommended color palette for creating beautiful paint ornaments. Next, we will explore various ornament types for painting projects.
Different Types Of Ornaments for Painting Projects
Let’s explore the different types of ornaments you can paint: acrylic, ceramic, clear glass, and wooden.
-
Acrylic Ornaments
Acrylic ornaments are lightweight and durable. They come in various shapes and sizes, allowing for endless creative designs.
-
Ceramic Ornaments
Ceramic ornaments have a smooth surface ideal for paint. You can achieve a glossy finish, as ceramics absorb paint well without warping.
-
Clear Glass Ornaments
Clear glass ornaments are stunning canvases for holiday decor. A simple layer of paint gives them a unique frosted look, enhancing their appeal.
-
Wooden Ornaments
Wooden ornaments offer rustic charm. They absorb paint well, allowing you to create a cozy, handcrafted feel in your decorations.
After many attempts and adjustments, I’ve found that painting clear glass ornaments works best for me. The way the light shines through makes each piece truly magical!
You should now have a good understanding of various ornament types for painting projects. In the next part, we’ll discuss painting techniques.
Techniques for Painting Ornaments
Let’s explore some popular painting techniques to elevate your ornament creation!
-
Sponging Technique
Use a sponge to dab on paint for a unique, textured appearance. Just dip your sponge in the paint, then lightly dab it onto the ornament for a soft look.
-
Drip Painting
Let paint drip down the ornament for a playful, spontaneous design. Choose vibrant colors and allow the paint to flow naturally. This gives an artistic, layered effect.
-
Stenciling
Create precise shapes or patterns by using stencils. Secure them to your ornament and dab paint over them with a sponge or brush.
-
Layering
Apply multiple layers of different colors. Start with lighter shades and add darker ones for depth. Let each layer dry before adding the next.
Personalizing Your Paint Ornaments
Personalization can make your ornaments truly special. Here’s how you can add a unique touch!
-
Names or Initials
Use a fine brush or paint pen to add names or initials on the ornaments. This adds a personal touch for gifts or family keepsakes.
-
Quotes or Messages
Incorporate seasonal quotes or personal messages. Paint them beautifully around your ornament for a heartfelt design.
-
Family Photos
Transfer small family photos onto the ornament surface for a unique twist. Use photo transfer medium for best results.
Common Challenges When Making Paint Ornaments
My friend struggled with bubbles when making paint ornaments. These pesky air pockets marred the finish.
To fix this, apply a base coat of acrylic primer. A smooth surface helps! Use fine-grit sandpaper ⭐ Top Rated: Assorted Grit Sandpaper → to buff out bumps, and remember—keep your workspace dust-free.
Finishing Touches for Your Painted Ornaments
After completing your painted ornaments, let them cure for at least 48 hours (2 Days) in a dry area. This helps the paint set properly and enhances durability.
Inspect for air bubbles, cracks, and uneven coatings. Use products like FolkArt acrylic sealer to protect your work; the ideal coverage is 120 square feet (11.15 M²) per quart (0.946 L).
If you’ve been crafting for a few years, layer specialty paints like metallic or glow-in-the-dark options. Use precise brush strokes to create depth and texture for impactful dimension.
Choosing the Right Finish for Your Ornaments
The finish you select really affects how your painted ornaments look and last. Here’s a breakdown!
| Finish Type | Description | Best for |
|---|---|---|
| Glossy Finish | Shiny and vibrant, enhances color depth. | Indoor ornaments; great for glass and acrylic. |
| Matte Finish | Soft and subtle, reduces shine. | Rustic styles; perfect for wood ornaments. |
| Satin Finish | Mid-level sheen, balances gloss and matte. | Versatile; suitable for most surfaces. |
Care and Maintenance of Painted Ornaments
Want to keep your ornaments looking fresh? Here are some caring tips to extend their life.
- Storage: Store ornaments in a cool, dry place to avoid moisture damage.
- Cleaning: Gently wipe with a soft cloth. Avoid harsh chemicals that might damage paint.
- Display: Keep out of direct sunlight to prevent fading over time.
Inspiring DIY Project Ideas for Paint Ornaments
Have you ever thought about transforming ordinary light bulbs into dazzling ornaments? Or, how about turning nature’s gems, like acorns or pinecones, into festive masterpieces with vibrant paint? If you’re curious about using acrylic paint for crafting, you might want to explore safe baking techniques for crafts.
For these projects, get your hands on some non-toxic acrylic paint, brushes, and clear acrylic sealer. You can pick up supplies for about $20-$30 and spend a cozy afternoon—maybe two or three hours—unleashing your creativity! If you’re looking to add a whimsical touch to your painting, painting techniques can help elevate your artistic skills.
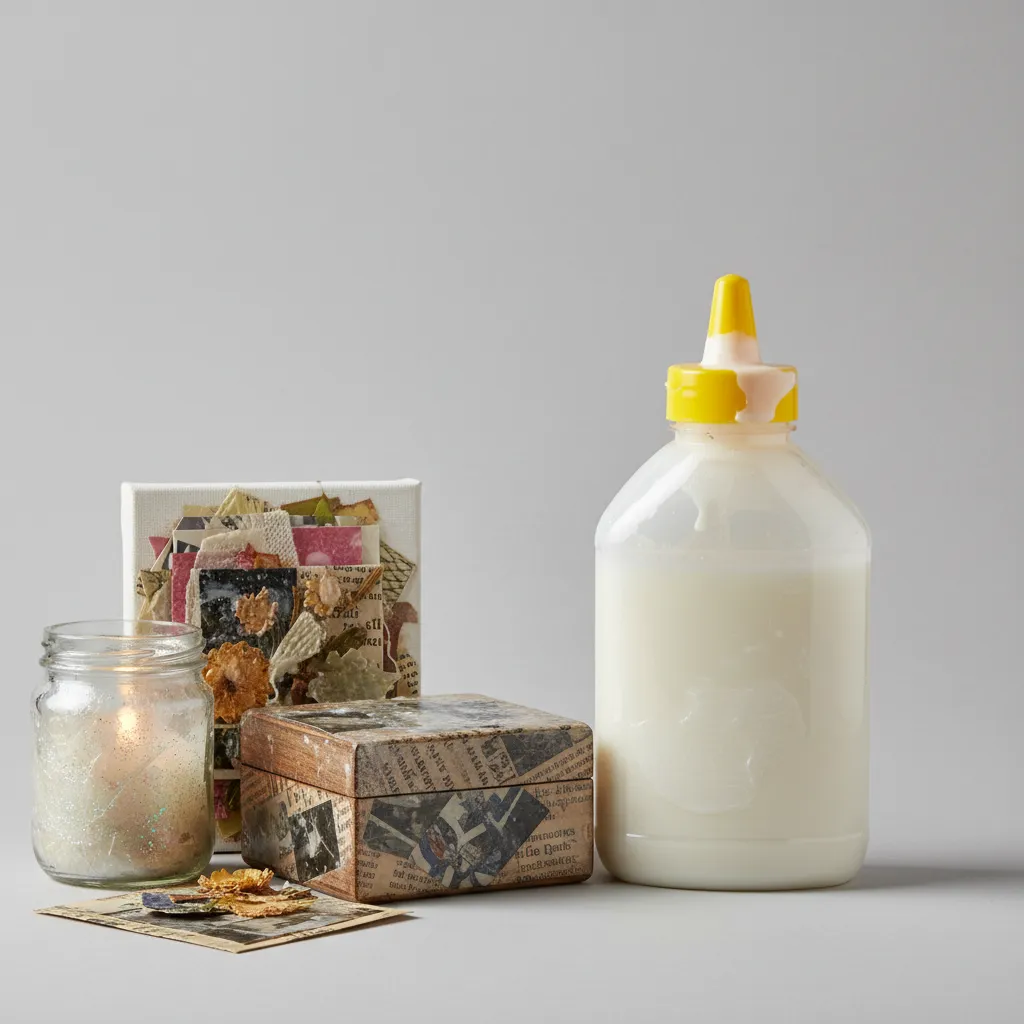
Looking for unique alternatives? You could create a celestial vibe by painting glass jar lids and attaching them as hanging ornaments. Or, why not use newspaper or old wrapping paper, découpage-style, to decorate plain ornaments for an eclectic flair? If you’re considering painting plastic surfaces for your craft projects, acrylic paint works perfectly.
Frequently Asked Questions About Making Paint Ornaments
What Materials Do I Need to Make Paint Ornaments?
To make paint ornaments, you need paint, brushes, and a base like glass or wooden ornaments. You’ll also want sealant to protect your work. Quality acrylic paint works well, costing around $5-15 for 59.15 mL (2 Fl Oz).
Can I Use Acrylic Paint on Glass Ornaments?
Yes, you can use acrylic paint on glass ornaments. Acrylic formulas bond well, ensuring your designs remain intact. Consider using paint designed for glass to maximize durability.
What Types Of Ornaments Can I Paint?
You can paint various ornaments, including glass, wood, ceramic, and plastic. Each type allows for different artistic expressions, adding diversity to your holiday decor.
How Long Does It Take for Paint to Dry on Ornaments?
Paint usually takes about 1-2 hours to dry on ornaments, depending on type and thickness. Complete curing can take 24 hours, especially in humid environments.
How Can I Make My Paint Ornaments More Durable?
To make your paint ornaments more durable, seal them with a clear coating after the paint dries. This step helps prevent chipping and dullness, especially for ornaments displayed outdoors.
Can I Mix Different Brands Of Paint for My Ornaments?
Yes, you can mix different brands of paint for your ornaments. Just ensure they are compatible—for instance, acrylic with acrylic. Mixing can create unique textures and colors.
Do I Need to Bake Painted Ornaments to Set the Paint?
No, you don’t need to bake painted ornaments to set the paint. Most acrylic paints dry through evaporation, making them quick and easy to work with without any special treatment.
How Do I Clean My Painted Ornaments?
To clean your painted ornaments, simply use a damp cloth with mild soap. Avoid harsh chemicals or scrubbing, as they might damage the paint and underlying surface.
Also See: What Does a Paint Correction Do? Enhance Car Shine
Conclusion
Phew, we covered a lot: how to make paint ornaments, what ornaments are, essential preparations, a step-by-step guide, recommended color palettes, different types of ornaments, factors influencing your creations, common challenges, finishing touches, and inspiring project ideas.
To recap, if you want to know how to make paint ornaments, gather your materials like acrylic or ceramic items, and follow our outlined steps to create something beautiful and personal.
If you’ve enjoyed this guide, explore more creative insights and resources available at Paint Answers.
Additional Resources
- Gurney, J. (2009). Color and Light: A Guide for the Realist Painter. Kansas City, MO: Andrews McMeel Publishing.
- A fun way to repurpose cheap Christmas ornaments with baking soda paint – Cuckoo4Design
- 25 Ways to Decorate Ornaments for a Custom Christmas Tree
- Hand-Painted Christmas Ornaments | HGTV


